www.eaton.com
IM02601004E
Page 147
8 Setup on the Web Server Pages
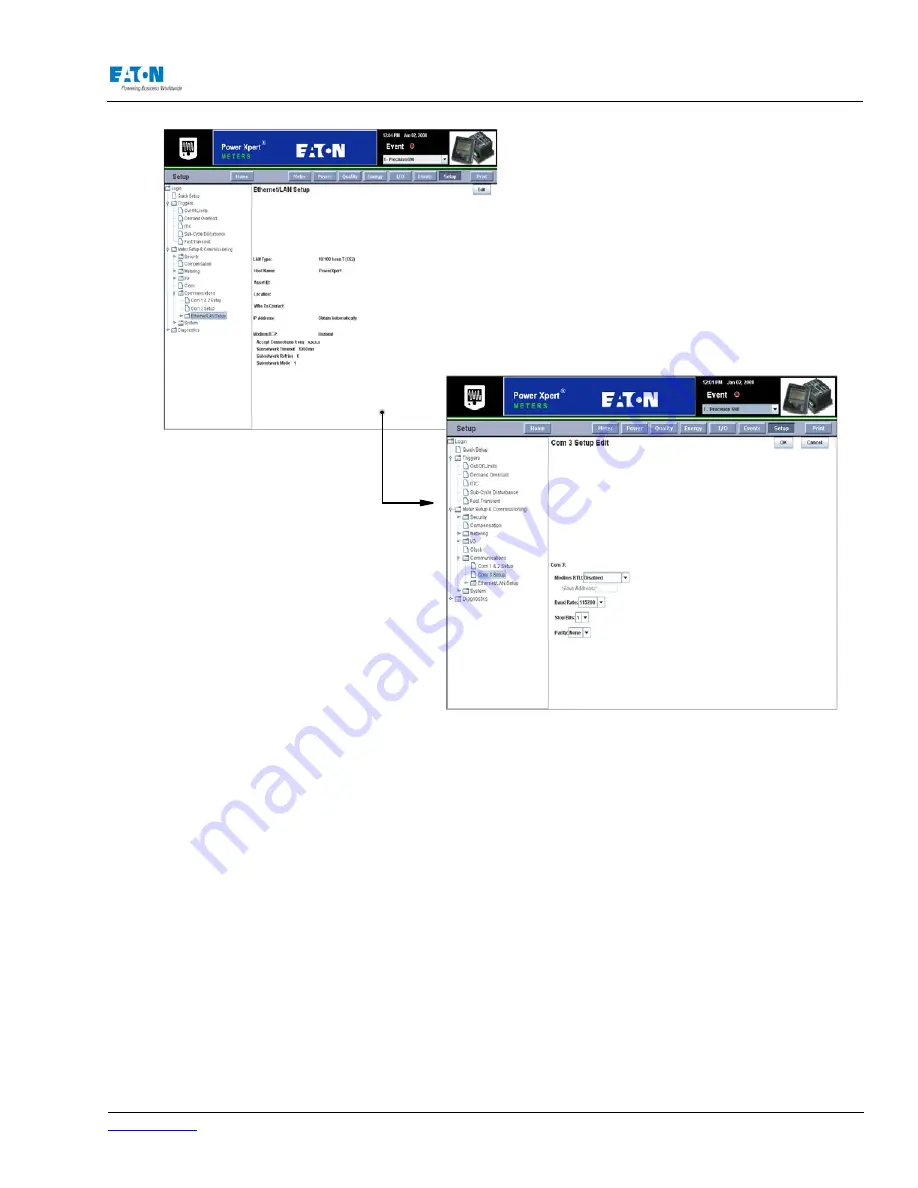
ETHERNET/LAN (CE1 & CE2) SETUP
The Ethernet/LAN Setup page allows you to select the kind of connection to be used (a fiber optic
cable on the CE1 port or a 10/100 base T on the CE2 port), address information for the IP, the DNS
Server and the Time Server (NTP), and to enable and configure the Modbus TCP.
Locating Ethernet/LAN Setup on the Web
From the Setup Main Page, select Meter Setup & Commissioning from the tree structure on the left
side of the page. The tree structure will expand to list Security, Compensation, Metering, I/O, Clock,
Communications, and System. Click Communications. The tree will expand to list COM1 & COM2
Setup, COM3 Setup and Ethernet/LAN. Click Ethernet/LAN Setup. The page will update to display
the current settings of Ethernet/LAN.
Click the Edit button at the bottom of the page to modify current Ethernet/LAN settings. Click the
appropriate radio button to select the kind of port in use (10/100 base T or 100 base F). Enter the
IP Address information or select Obtain Automatically. Enter the DNS Server Address or select
Obtain Automatically. Lastly, enable Modbus TCP, if desired.
Select Obtain Automatically if you have a DHCP server available. This allows the meter to obtain
an IP address automatically. Enter an IP address if the NTP server of the NTP Time Sync option is
selected in the Clock setup.
Click the OK button at the top of the page to save your settings.
Содержание Power Xpert PXM 4000
Страница 1: ...User and Installation Manual IM02601004E Power Xpert PXM 4000 6000 8000 ...
Страница 8: ...Page vi IM02601004E www eaton ...
Страница 19: ...www eaton com IM02601004E Page 11 1 Introduction ...
Страница 24: ...Page 16 IM02601004E www eaton ...
Страница 36: ...Page 18 IM02601004E www eaton com 2 Quick Start Guide for the Meter Module ...
Страница 45: ...www eaton com IM02601004E Page 37 3 Installation 3 8 MeterDimensions ...
Страница 46: ...Page 38 IM02601004E www eaton 3 Installation Dimension Con t ...
Страница 47: ...www eaton com IM02601004E Page 39 3 Installation Dimension Con t ...
Страница 48: ...Page 40 IM02601004E www eaton 3 Installation Dimension Con t ...
Страница 53: ...www eaton com IM02601004E Page 45 3 Installation ...
Страница 54: ...Page 46 IM02601004E www eaton 3 Installation ...
Страница 55: ...www eaton com IM02601004E Page 47 3 Installation ...
Страница 56: ...Page 48 IM02601004E www eaton 3 Installation ...
Страница 57: ...www eaton com IM02601004E Page 49 3 Installation ...
Страница 58: ...Page 50 IM02601004E www eaton 3 Installation ...
Страница 59: ...www eaton com IM02601004E Page 51 3 Installation ...
Страница 60: ...Page 52 IM02601004E www eaton 3 Installation ...
Страница 61: ...www eaton com IM02601004E Page 53 3 Installation ...
Страница 62: ...Page 54 IM02601004E www eaton 3 Installation ...
Страница 63: ...www eaton com IM02601004E Page 55 3 Installation ...
Страница 66: ...Page 58 IM02601004E www eaton 3 Installation ...
Страница 75: ...www eaton com IM02601004E Page 67 4 Introduction to Web Server Screens ...
Страница 76: ...Page 68 IM02601004E www eaton 4 Introduction to Web Server Screens ...
Страница 86: ...Page 78 IM02601004E www eaton 5 Introduction to the Local Graphical Display ...
Страница 108: ...Page 100 IM02601004E www eaton 6 Functions on the Web Server Pages ...
Страница 128: ...Page 120 IM02601004E www eaton 7 Functions on the Graphical Display ...
Страница 164: ...Page 156 IM02601004E www eaton 8 Setup on the Web Server Pages ...
Страница 198: ...Page 190 IM02601004E www eaton A MODBUS Communication ...
Страница 242: ...Page 234 IM02601004E www eaton ...
Страница 252: ...Page 244 IM02601004E www eaton D Diagnostics ...
Страница 254: ...Page 246 IM02601004E www eaton D Diagnostics ...