


Page 144
IM02601004E
www.eaton.
8 Setup on the Web Server Pages
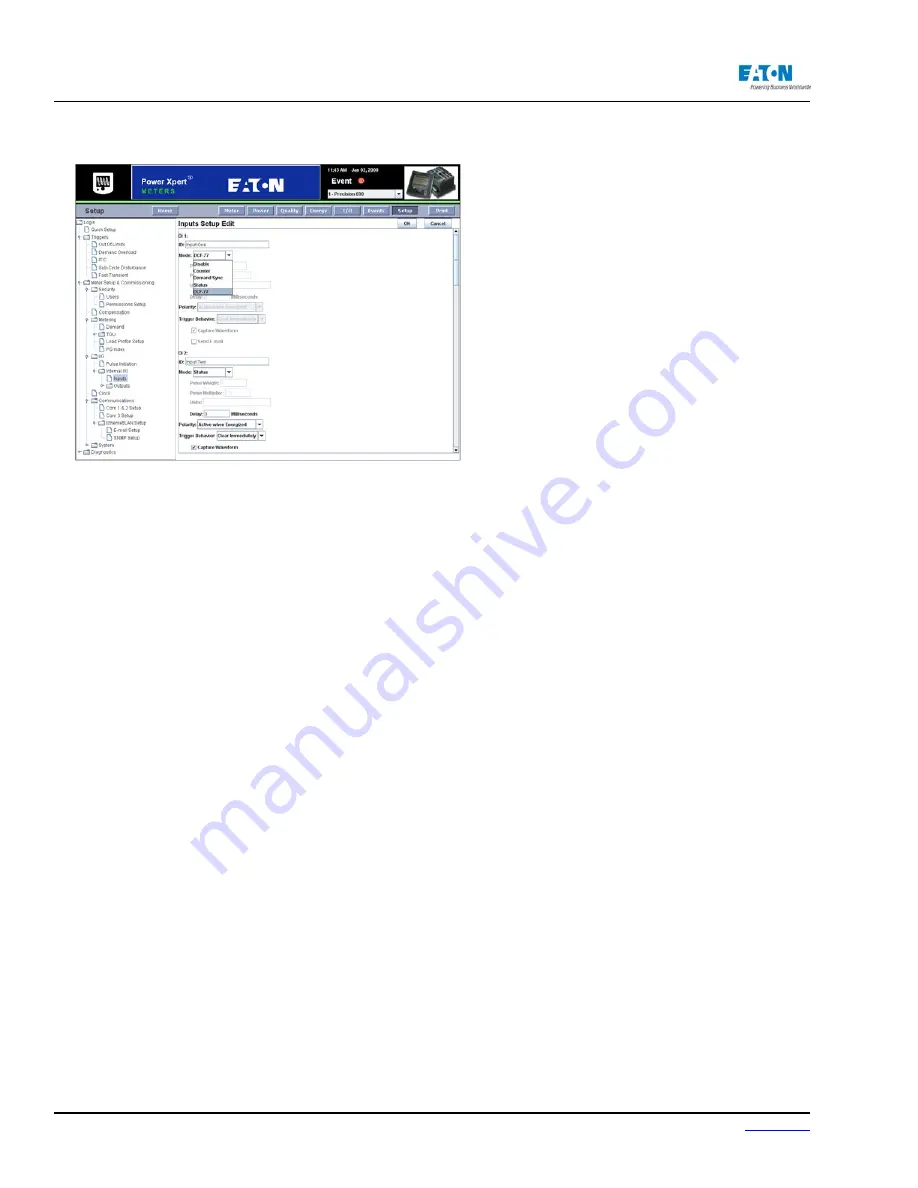
Select Input Setup to configure the appropriate
inputs for a DCF-77 source. (See diagram in Ap-
pendix G.)
COMMUNICATION SETUP
The Communication Setup section is divided into the following categories: COM1& 2, COM3,
and Ethernet/LAN. COM 1 is provided as a standard feature with all Power Xpert Meters. The
LAN/WAN COM 2 and COM 3 are included with the optional Communications Expansion card.
The page for each of these categories displays the current settings and communications ports
in use. The following sections discuss each category and their respective settings.
NOTE:
The CM Card RS 485 COM 1 is shipped from the factory as a slave port. Default
jumper settings match this slave configuration. If the port configuration is changed to a master,
refer to Appendix E for proper jumper placement instructions.
Locating Communication (COM 1, 2, 3, & Ethernet/LAN) Setup on the Web
From the Setup Main Page select Meter Setup & Commissioning from the tree structure. The
tree structure will expand to list Security, Compensation, Metering, I/O, Clock, Communica-
tions, and System. Click Communications. Then click the communication setup you wish to
view or edit: COM1 & 2, COM 3, or Ethernet/LAN. The page will update to display the current
settings for the selection.
Содержание Power Xpert PXM 4000
Страница 1: ...User and Installation Manual IM02601004E Power Xpert PXM 4000 6000 8000 ...
Страница 8: ...Page vi IM02601004E www eaton ...
Страница 19: ...www eaton com IM02601004E Page 11 1 Introduction ...
Страница 24: ...Page 16 IM02601004E www eaton ...
Страница 36: ...Page 18 IM02601004E www eaton com 2 Quick Start Guide for the Meter Module ...
Страница 45: ...www eaton com IM02601004E Page 37 3 Installation 3 8 MeterDimensions ...
Страница 46: ...Page 38 IM02601004E www eaton 3 Installation Dimension Con t ...
Страница 47: ...www eaton com IM02601004E Page 39 3 Installation Dimension Con t ...
Страница 48: ...Page 40 IM02601004E www eaton 3 Installation Dimension Con t ...
Страница 53: ...www eaton com IM02601004E Page 45 3 Installation ...
Страница 54: ...Page 46 IM02601004E www eaton 3 Installation ...
Страница 55: ...www eaton com IM02601004E Page 47 3 Installation ...
Страница 56: ...Page 48 IM02601004E www eaton 3 Installation ...
Страница 57: ...www eaton com IM02601004E Page 49 3 Installation ...
Страница 58: ...Page 50 IM02601004E www eaton 3 Installation ...
Страница 59: ...www eaton com IM02601004E Page 51 3 Installation ...
Страница 60: ...Page 52 IM02601004E www eaton 3 Installation ...
Страница 61: ...www eaton com IM02601004E Page 53 3 Installation ...
Страница 62: ...Page 54 IM02601004E www eaton 3 Installation ...
Страница 63: ...www eaton com IM02601004E Page 55 3 Installation ...
Страница 66: ...Page 58 IM02601004E www eaton 3 Installation ...
Страница 75: ...www eaton com IM02601004E Page 67 4 Introduction to Web Server Screens ...
Страница 76: ...Page 68 IM02601004E www eaton 4 Introduction to Web Server Screens ...
Страница 86: ...Page 78 IM02601004E www eaton 5 Introduction to the Local Graphical Display ...
Страница 108: ...Page 100 IM02601004E www eaton 6 Functions on the Web Server Pages ...
Страница 128: ...Page 120 IM02601004E www eaton 7 Functions on the Graphical Display ...
Страница 164: ...Page 156 IM02601004E www eaton 8 Setup on the Web Server Pages ...
Страница 198: ...Page 190 IM02601004E www eaton A MODBUS Communication ...
Страница 242: ...Page 234 IM02601004E www eaton ...
Страница 252: ...Page 244 IM02601004E www eaton D Diagnostics ...
Страница 254: ...Page 246 IM02601004E www eaton D Diagnostics ...


