25
4
M1.6 x 5
x1
Use a #0 Phillips screwdriver to thread the screw
through the mount and into the stick to secure the
mount.
Schrauben Sie mit dem #0 Phillips Schraubendreher die
Schraube in den Halter.
Utilisez un tournevis cruciforme #0 pour visser la vis au
travers du support et du longeron pour fi xer le moteur.
Usare un cacciavite con testa a croce #0 per avvitare la
vite attraverso il supporto e lo stick, per fi ssarli.
6
Plug the motor into the speed control. Attach the speed
control to the fuselage using hook and loop tape. Plug
the speed control into the throttle port of your receiver.
Secure the motor leads to prevent them from interfering
with the operation of the motor.
Verbinden Sie den Motor mit dem Regler. Montieren
Sie den Regler am Rumpf mit Klettband. Schließen
Sie den Regler am Gasanschluß des Empfängers an.
Sichern Sie die Motorkabel damit diese den Betrieb nicht
beeinfl ussen stören können.
Connectez le moteur au contrôleur. Fixez le contrôleur
au fuselage à l’aide de bande auto-agrippante. Relier
le contrôleur à la voie des gaz du récepteur. Sécurisez
les câbles pour qu’ils n’interfèrent pas avec le
fonctionnement du moteur.
Collegare il motore al regolatore di velocità. Fissare il
regolatore alla fusoliera con adesivo a strappo. Collegare
il regolatore alla porta del motore sul ricevitore. Fissare i
cavetti del motore in modo che non interferiscano con le
funzioni del motore.
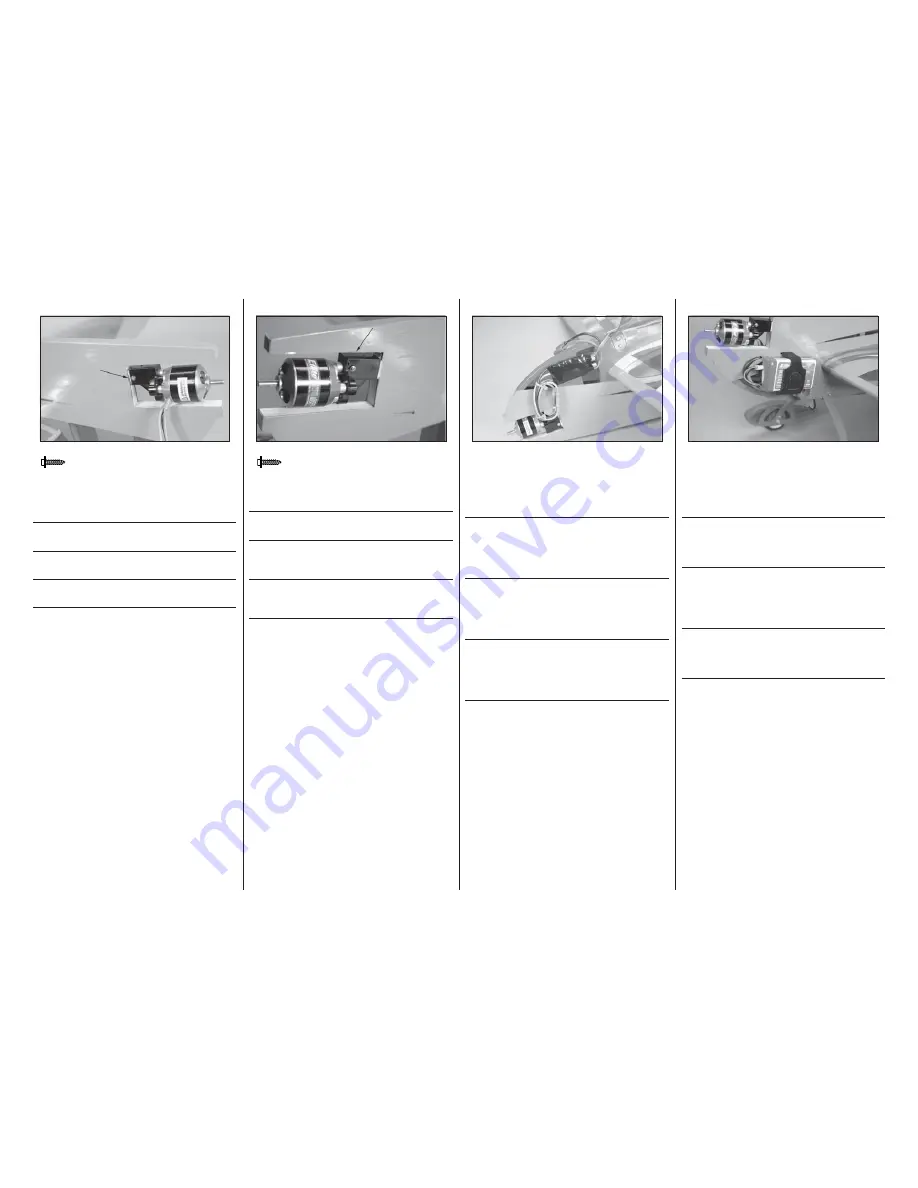
5
M1.6 x 5
x1
Repeat the previous steps to install a screw near the
front of the mount on the left side of the fuselage.
Wiederholen Sie den Schritt um die Schraube auf der
linken vorderen Seite einzudrehen.
Répétez les étapes précédentes pour installer une vis
à proximité de l’avant du support du côté gauche du
fuselage.
Ripetere i passaggi precedenti per installare una vite
vicino alla parte anteriore del supporto, sul lato sinistro
della fusoliera.
7
Secure the battery to the fuselage using the hook and
loop strap. A piece of hook and loop tape between the
battery and fuselage will keep the battery from sliding
during fl ight. The location of the battery can be changed
forward or back to achieve the correct center of gravity.
Befestigen Sie den Akku am Rumpf mit einer
Klettschlaufe. Ein Stück Klettband zwischen Akku und
Rumpf verhindert dass sich der Akku während des Fluges
bewegt.
Fixez la batterie à l’aide d’une sangle auto-agrippante.
Placez un morceau de bande auto-agrippante ente la
batterie et le fuselage afi n d’éviter le glissement de la
batterie durant le vol. La batterie peut être avancée ou
reculée afi n d’obtenir le bon centrage du CG.
Fissare la batteria alla fusoliera con adesivo a strappo
con cui si evita che la batteria possa spostarsi durante il
volo. Si può spostare in avanti o indietro la batteria per
trovare la posizione corretta del baricentro.
Содержание Extra 330SC BP
Страница 39: ...39...


