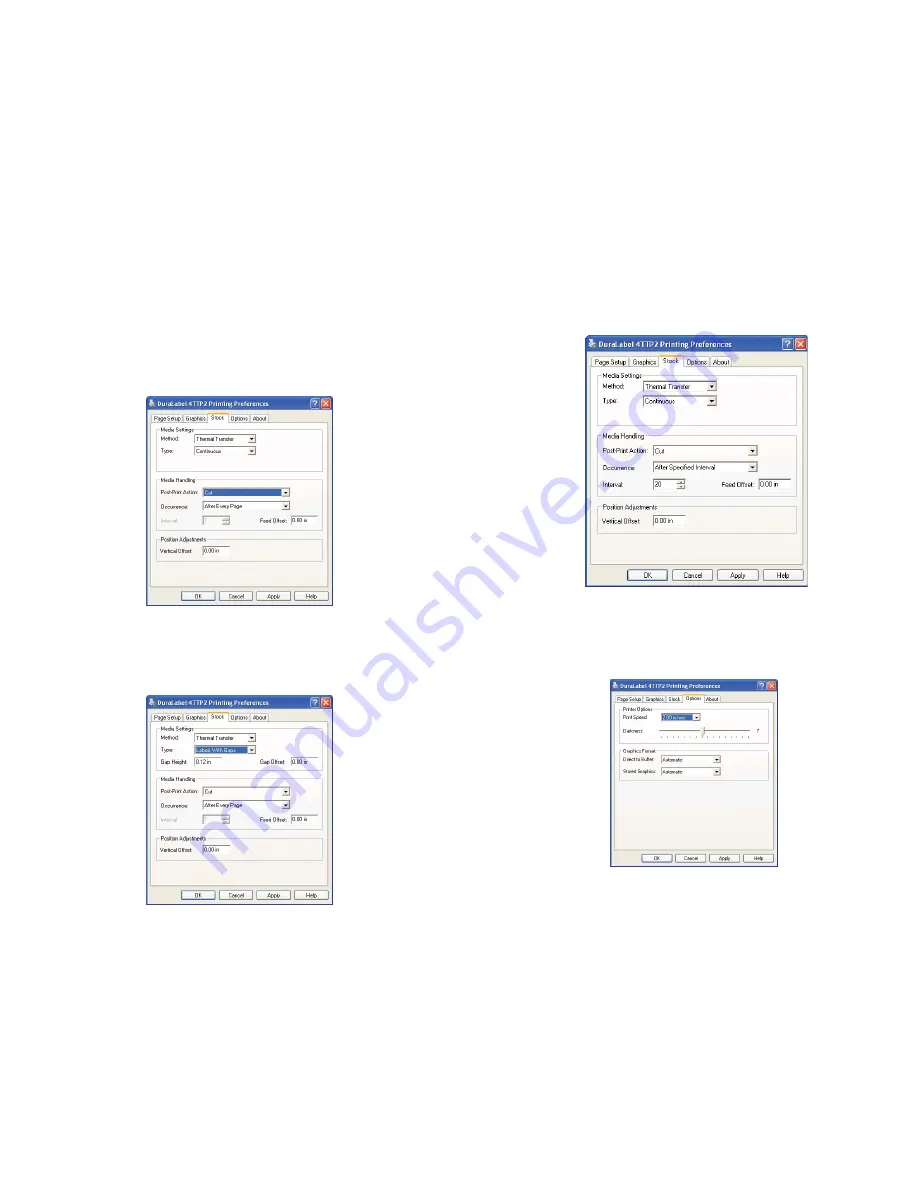
To cut labels in intervals, you may do so by setting the “Occurrence” to
After
Specified Interval
under the
Stocks
Tab. Set the Interval to the number of labels
needed. Click
Apply
to save your settings.
Adjusting the Print Speed and Darkness
Print Speed is adjusted in increments of .5”/sec. from 1.0 to 2.0”/sec. The
Darkness is adjusted from 0 to 15 in increments of 1. The
Graphics Format
settings
should not be adjusted. Leave them at
Automatic
.
When finished with your settings, click
OK
.
Your driver is now set-up and you are ready to create your labels!
13
To set the cutter, select the
Stock
Tab. Set the
Media Settings
“Type” to
Continuous
.
In order for the automatic cutter to cut after each label, under
Media Handling
next
to “Post-Print Action” select
Cut
and then next to “occurrence” select
After Every
Page
. These settings may be later adjusted to your specifications in the Printer
Properties as you are printing your labels. Select
Apply
on the bottom of the Printing
Preferences window.
To set up for printing on die-cut labels your settings will be set differently under the
Stocks
Tab. For die-cut labels with the 1/8” gap, the settings should be as
follows: “Method” should be set to
Thermal Transfer
and the “Type” should be set to
Labels With Gaps
, “Gap Height” set to
0.12
(default) and “Gap Offset” to
0
(default).
12
Содержание 4 TTP
Страница 1: ...DuraLabel 4 TTP User s Guide ...


