Removing and Replacing Field Replaceable Units
3.8 Removing an RF31T/RF35/RF36 Disk Drive
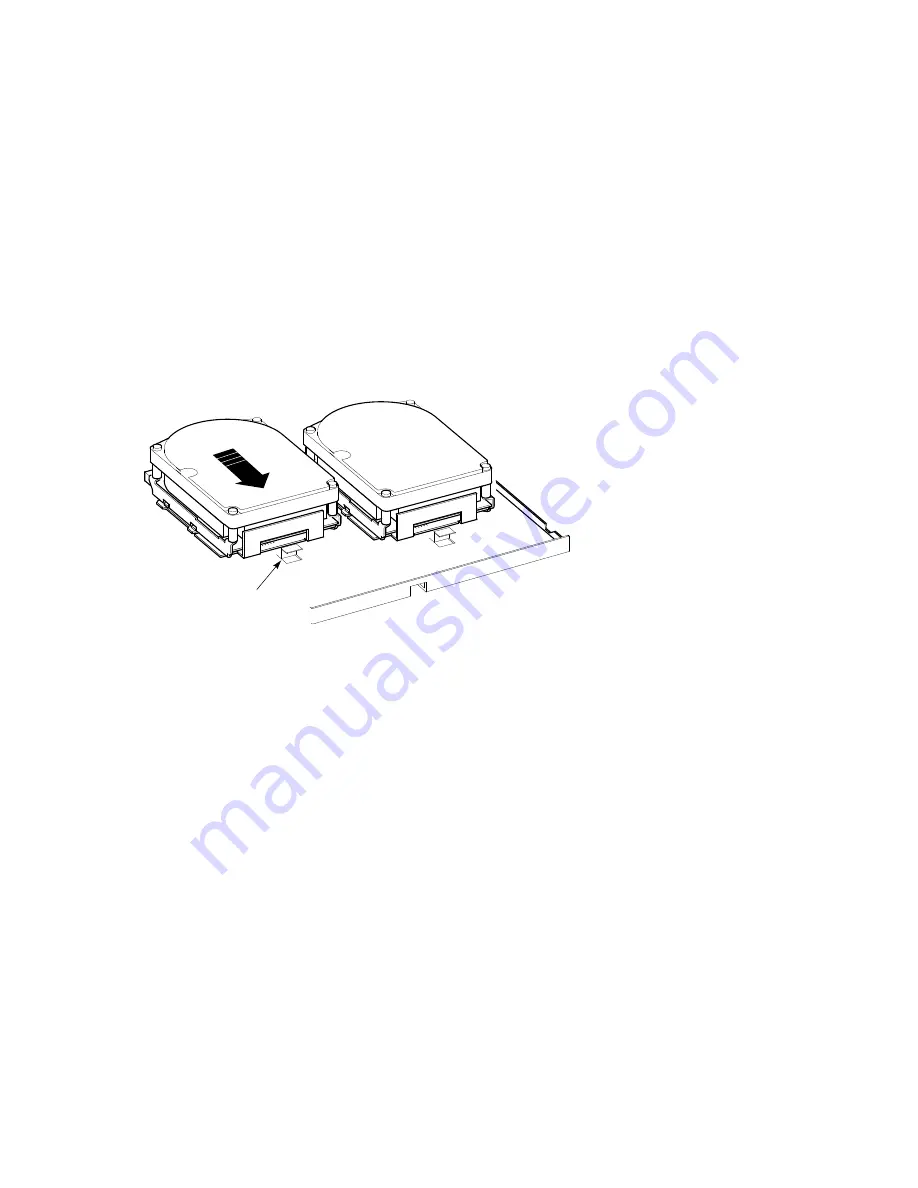
Figure 3–22 Removing a Sample RF31T/RF35/RF36 Disk Drive Option
Spring Clip
RF-Series Disk Drive
RF-Series Disk Drive
MLO-012389
3. Slide the drive forward until the rubber grommets attached to the
mounting bracket are clear of the cutouts in the lower drive-mounting
shelf.
4. Disconnect the power cable from the back of the RF-series drive.
Figure 1–5 shows the power cables in the BA42B Enclosure.
5. Disconnect the DSSI cable from the back of the RF-series drive by pulling
the pull-tab. Figure 1–6 shows the signal cables in the BA42B Enclosure.
6. Lift the RF-series drive, which has its bracket attached, out of the system
unit.
3.8.1 Separating the RF-series Drive from the Mounting Bracket
When you install a replacement RF-series drive, you must use the mounting
bracket (74-744226-01) that is attached to the faulty RF-series drive. To
separate the mounting bracket from the faulty drive, follow these steps:
1. Note how the bracket is attached in relationship to the RF-series drive.
2. Remove the four screws (12-31734-01) that secure the grommets and the
mounting bracket to the RF-series drive.
3. Separate the mounting bracket from the RF-series drive (refer to
Figure 3–23).
Removing and Replacing Field Replaceable Units 3–33


