130
Removing and Installing Parts
4
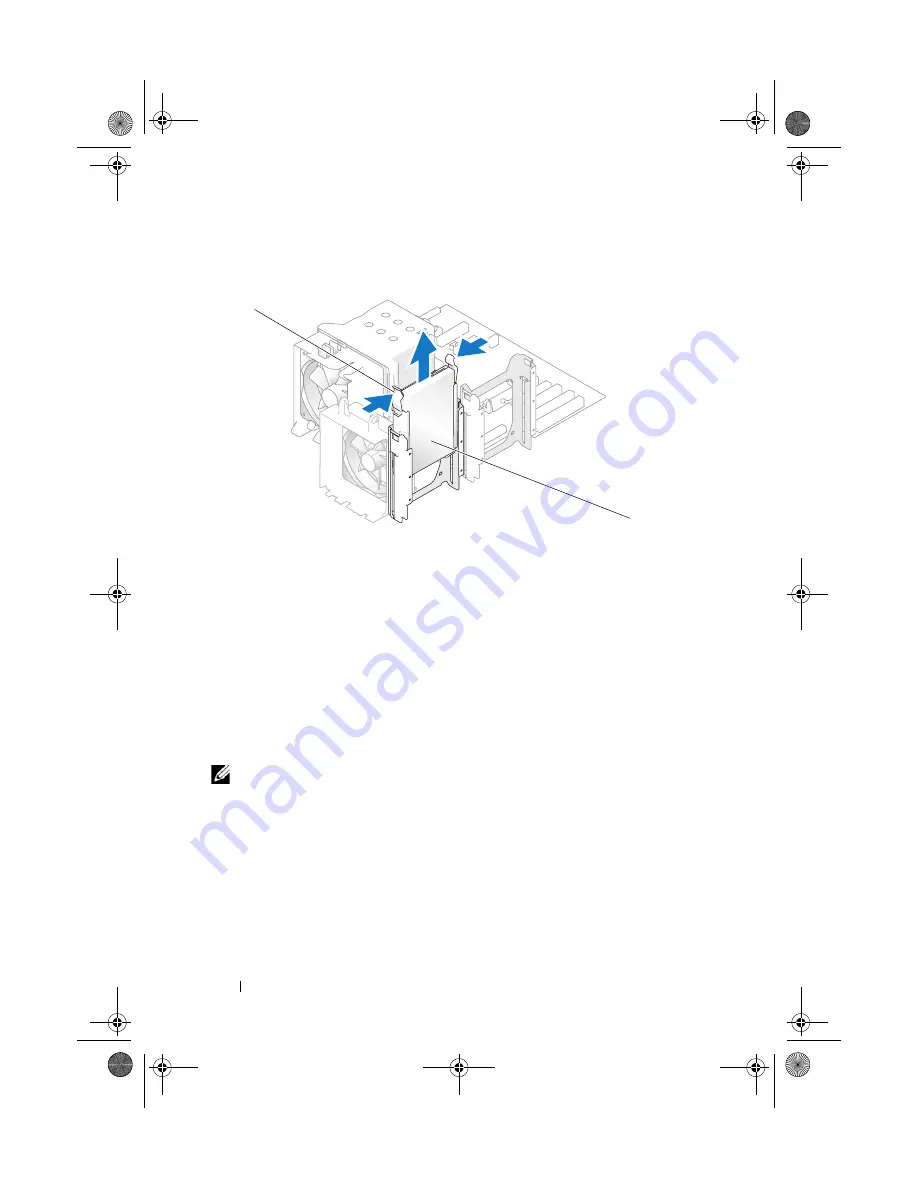
Press in on the tabs on each side of the drive and slide the drive up and out.
5
Replace the computer cover (see "Replacing the Computer Cover" on
page 172).
6
If removing this drive changes the drive configuration, then be sure to
reflect these changes in the BIOS. When you restart your computer, enter
system setup (see "System Setup" on page 178). On the setup screen go to
the "Drives" section and set the SATA ports (
SATA 0 through 4
)to the
correct configuration.
Installing a Hard Drive
NOTE:
It is recommended that you connect the hard drive to the connector labeled
SATA0 on the system board. Connect additional hard drives to connectors labeled
SATA1 and SATA2.
1
Follow the procedures in "Before You Begin" on page 99.
2
Remove the computer cover (see "Removing the Computer Cover" on
page 101).
3
Unpack the replacement hard drive, and prepare it for installation.
4
Check the documentation for the drive to verify that the drive is
configured for your computer.
1
tabs (2)
2
hard drive
1
2
book.book Page 130 Tuesday, November 27, 2007 10:29 AM
Содержание XPS 420
Страница 58: ...58 Setting Up and Using Your Computer book book Page 58 Tuesday November 27 2007 10 29 AM ...
Страница 60: ...60 Optimizing for Greater Performance book book Page 60 Tuesday November 27 2007 10 29 AM ...
Страница 218: ...218 Glossary book book Page 218 Tuesday November 27 2007 10 29 AM ...
Страница 226: ...226 Index book book Page 226 Tuesday November 27 2007 10 29 AM ...


