Back to Contents Page
Coin-Cell Battery
Dell™ Inspiron™ 410 Service Manual
Removing the Coin-Cell Battery
Replacing the Coin-Cell Battery
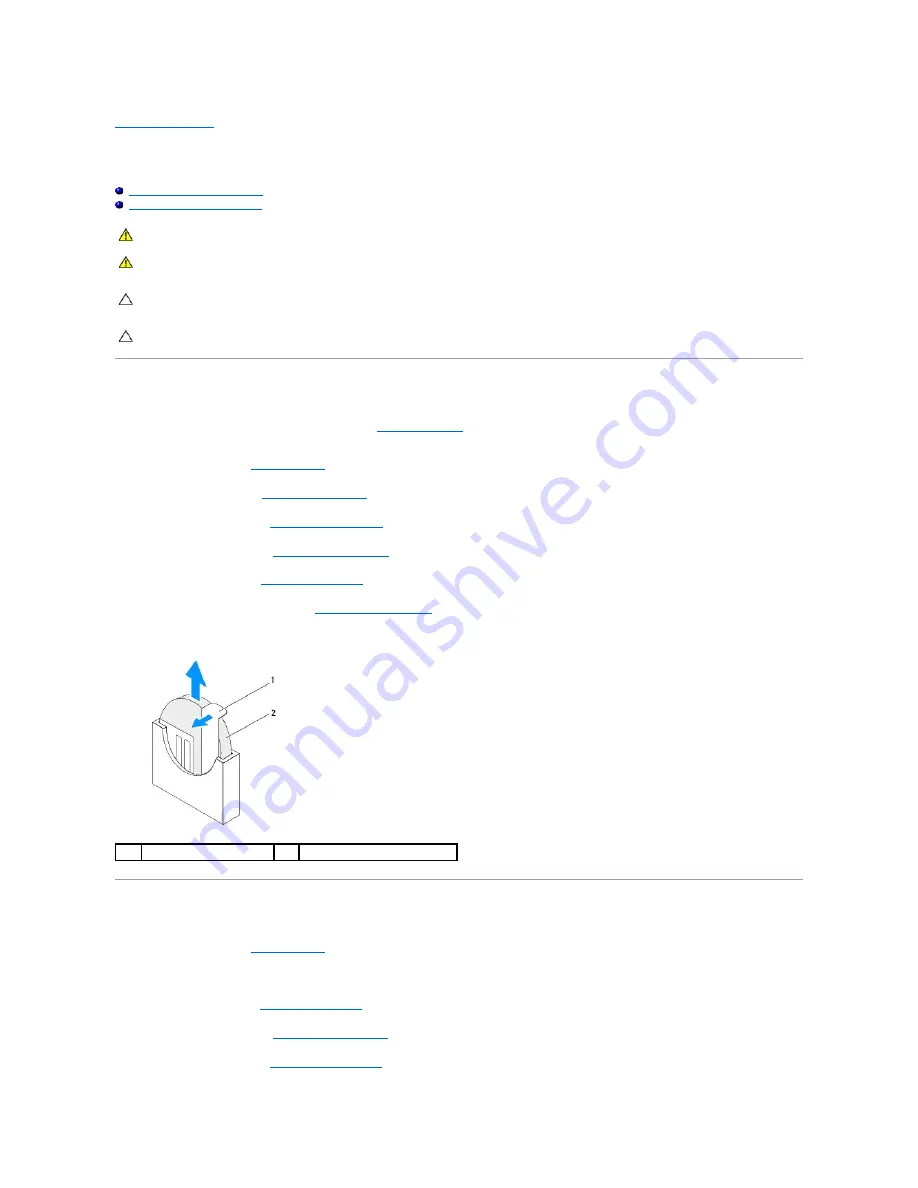
Removing the Coin-Cell Battery
1.
Record all the screens in the system setup utility (see
System Setup Utility
) so that you can restore the correct settings after the new coin-cell battery
has been installed.
2.
Follow the procedures in
Before You Begin
.
3.
Remove the top cover (see
Removing the Top Cover
).
4.
Remove the top bracket (see
Removing the Top Bracket
).
5.
Remove the optical drive (see
Removing the Optical Drive
).
6.
Remove the drive bay (see
Removing the Drive Bay
).
7.
Locate the coin-cell battery socket (see
System Board Components
).
8.
Carefully pull the release lever away from the coin-cell battery and lift the coin-cell battery out of the socket.
Replacing the Coin-Cell Battery
1.
Follow the procedures in
Before You Begin
.
2.
Insert the new coin-cell battery into the socket with the side labeled "+" facing left.
3.
Replace the drive bay (see
Replacing the Drive Bay
).
4.
Replace the optical drive (see
Replacing the Optical Drive
).
5.
Replace the top bracket (see
Replacing the Top Bracket
).
WARNING:
Before working inside your computer, read the safety information that shipped with your computer. For additional safety best
practices information, see the Regulatory Compliance Homepage at www.dell.com/regulatory_compliance.
WARNING:
A new battery can explode if it is incorrectly installed. Replace the battery only with the same or equivalent type recommended by the
manufacturer. Discard used batteries according to the manufacturer's instructions.
CAUTION:
Only a certified service technician should perform repairs on your computer. Damage due to servicing that is not authorized by Dell™
is not covered by your warranty.
CAUTION:
To avoid electrostatic discharge, ground yourself by using a wrist grounding strap or by periodically touching an unpainted metal
surface (such as a connector on your computer).
1
release lever
2
coin-cell battery
Содержание Inspiron 410
Страница 11: ...6 Connect your computer and all attached devices to electrical outlets and turn them on Back to Contents Page ...
Страница 26: ...6 Connect your computer and all attached devices to electrical outlets and turn them on Back to Contents Page ...
Страница 45: ...Back to Contents Page ...


