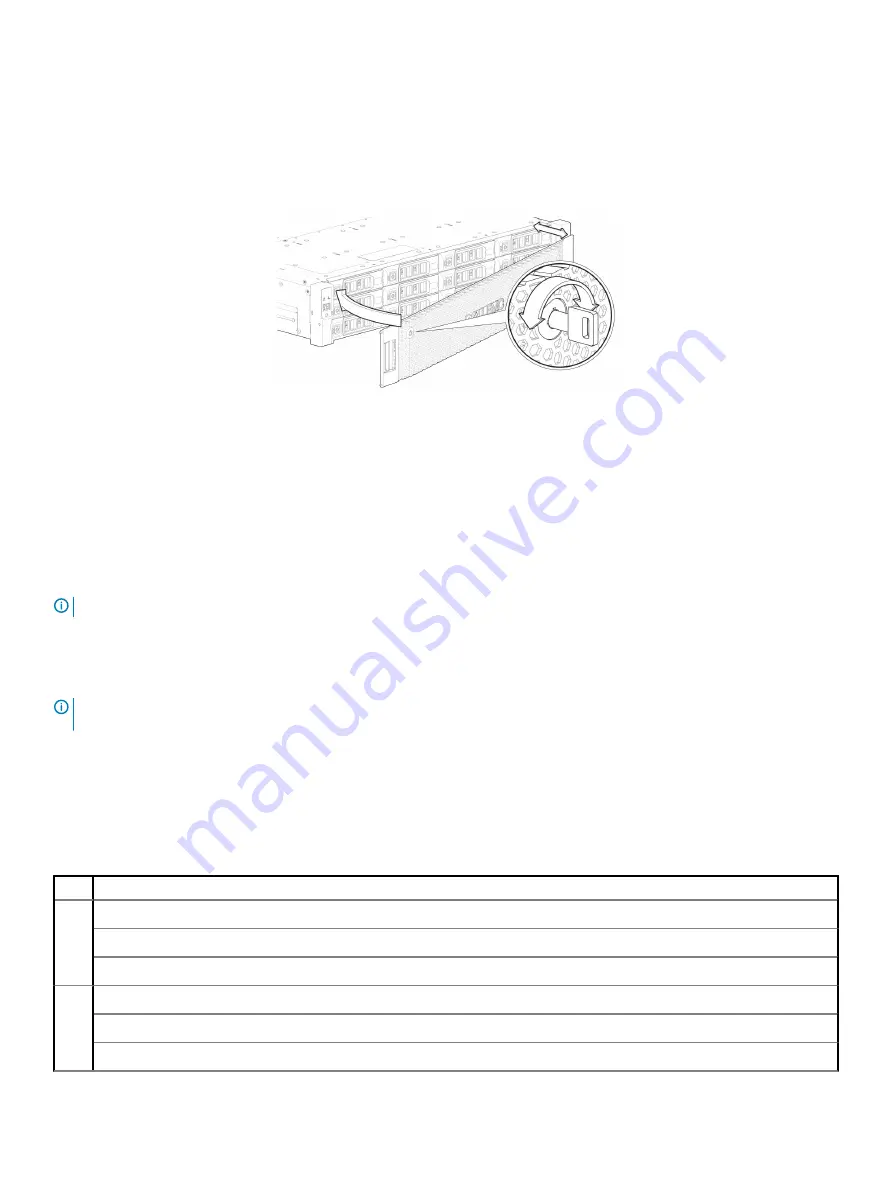
Attach or remove the 2U enclosure front bezel
The 2U12 controller enclosure in
Figure 7. Attaching or removing the 2U enclosure front bezel
is equipped with 2 controllers (4–port FC/
ISCSI model shown).
Figure 37. Attaching or removing the 2U enclosure front bezel
You can attach or remove the optional 2U enclosure bezel. Locate the bezel, and while grasping it with your hands, face the front panel of
the 2U12 or 2U24 enclosure. A partial view of a 2U12 enclosure is shown in
Figure 7. Attaching or removing the 2U enclosure front bezel
1
Hook the right end of the bezel onto the right ear cover of the storage system.
2
Insert the left end of the bezel into the securing slot until the release latch snaps in place.
3
Secure the bezel with the keylock as shown in
Figure 7. Attaching or removing the 2U enclosure front bezel
.
To remove the bezel from the 2U enclosure, reverse the order of the preceding steps.
NOTE:
for details about various enclosure options.
CRU replacement for 2U chassis
NOTE:
Unless noted otherwise within a passage pertaining to a particular CRU, the replacement procedure should be completed
within two minutes of the removal of a defective module.
Replacing a 2U12–drive chassis
This section describes 2U12–drive chassis product components.
Table 27. ME4 Series Storage System product components for 2U 12-drive chassis
Item Enclosure component description
1
Disk drive (LFF)
a) 3.5" disk drive module (disks of differing type/speed and storage capacity: SAS, SSD)
b) Blank drive carrier module (blank to maintain optimum air flow within enclosure)
2
Ear components (not customer replaceable)
a) Left ear assembly
b) Right ear assembly
50
Module removal and replacement
Содержание PowerVault ME484
Страница 1: ...Dell EMC ME4 Series Owner s Manual ...
Страница 64: ...3 4 5 64 Module removal and replacement ...


