CAUTION:
To avoid damage to the battery connector, you must firmly support the connector while installing or removing a
battery.
2
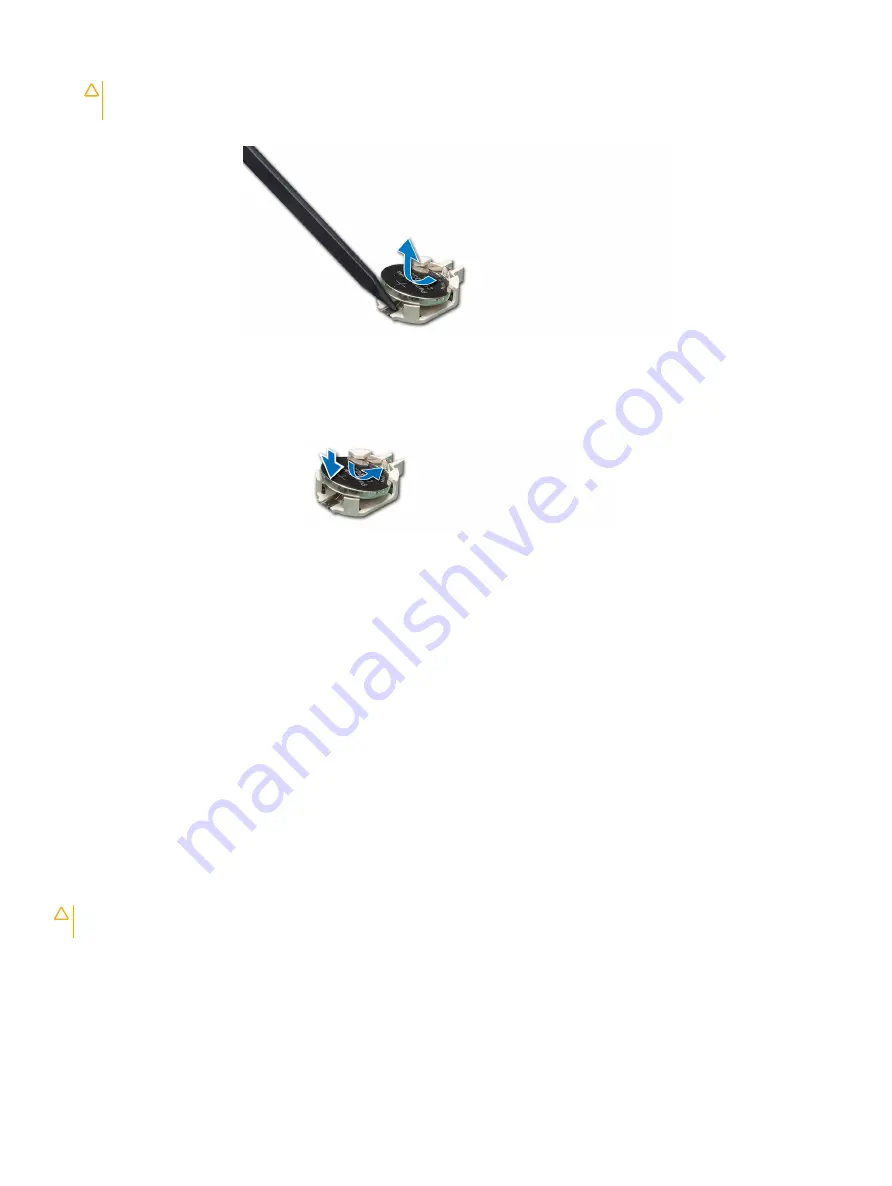
Use a plastic scribe to pry out the system battery.
Figure 109. Removing the system battery
3
To install a new system battery, hold the battery with the positive side facing up and slide it under the securing tabs.
4
Press the battery into the connector until it snaps into place.
Figure 110. Installing the system battery
Next steps
1
If removed,
Install the low profile or full height X1 expansion card risers
2
If applicable, connect the cables to the expansion card(s).
3
Follow the procedure listed in
After working inside your system
.
4
While booting, press F2 to enter the System Setup and ensure that the battery is operating properly.
5
Enter the correct time and date in the System Setup
Time
and
Date
fields.
6
Exit the System Setup.
Optional internal USB memory key
Replacing the optional internal USB memory key
Prerequisites
CAUTION:
To avoid interference with other components in the server, the maximum permissible dimensions of the USB memory
key are 15.9 mm wide x 57.15 mm long x 7.9 mm high.
1
Follow the safety guidelines listed in
2
Follow the procedure listed in
Before working inside your system
.
3
If installed,
remove the low profile expansion card riser
Steps
1
Locate the USB port or USB memory key on the system board.
152
Installing and removing system components
Содержание E46S001
Страница 28: ...System information label Figure 17 PowerEdge R540 Service information 28 Dell EMC PowerEdge R540 overview ...
Страница 30: ...Figure 21 Rear drive installation 30 Dell EMC PowerEdge R540 overview ...
Страница 75: ...Figure 29 Inside the system without rear drive cage Installing and removing system components 75 ...


