


E-GENIUS
164
AV500 2D CAMERA
Image Destination List
Select the check box(es) corresponding to the numbered image destination to enable setup.
Image Index n Destination Settings inputs will appear for the image destinations selected.
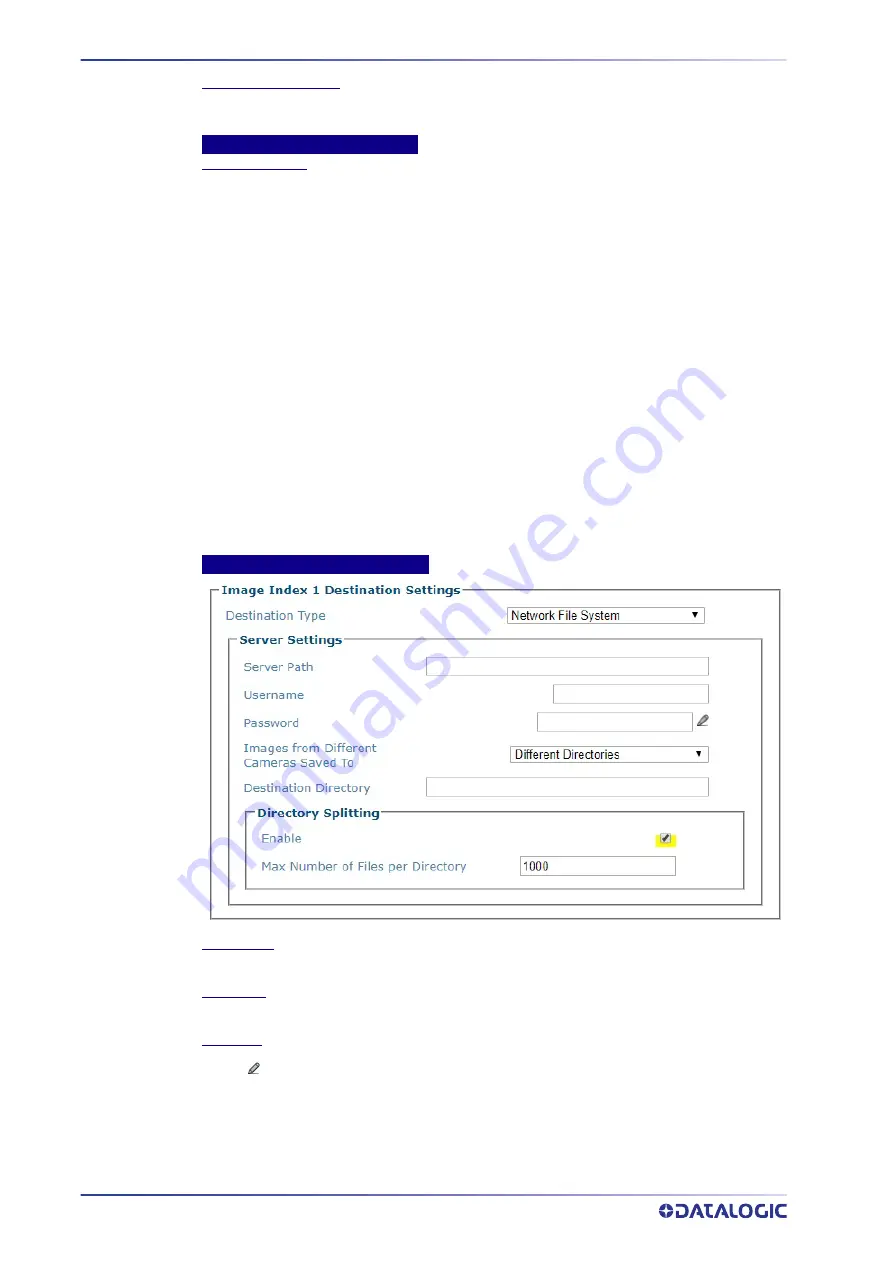
Image Index n Destination Settings
Destination Type
Select File System, FTP Server, External Viewer, or On Camera from the drop
‐
down list to save
to a remote file system server.
•
Network Files System:
Reveals options for saving to an external file system folder.
Network Files System.
The customer will determine where on their system the images files
will be saved. Their IT department will provide the Server Path, Username, and password.
They will also determine how the images will be saved on their server and determine
whether each cameras images will be saved in Different Directories or all cameras images will
be saved to the same location. Their IT department will also provide the Destination
Directory on their server where the images will be saved. The Directory Splitting options Use
the explanation below
•
FTP Server:
Reveals options for save to an FTP server IP Address/Port Number
‐
the IP
address and Port Number where the FTP Server is located will be provided by the customer IT
department
•
External Viewer:
Provides a field for the Destination IP Address of the viewer. The External
Viewer is only used as a diagnostic and calibration tool
•
On Camera:
Provides options to store images on the camera to be retrieve by your system.
These files can be accessed either through e
‐
Genius under Diagnostics
‐
Images” on page 224 or by connecting to the camera’s on board FTP server. The Host or
Image Ethernet connection can be used to connect to the FTP server.
Username:
dluser
Password:
plop.
Server Settings Network File System
Server Path
Enter the complete path of the server.
Username
Enter a valid username.
Password
Click
to activate the “The Text Entry Tool” on page 59 and enter the password required to
access the server.
Содержание AV500
Страница 1: ...AV500 PRODUCT REFERENCE GUIDE 2D CAMERA...
Страница 53: ...MOUNTING PRODUCT REFERENCE GUIDE 33...
Страница 73: ...CBX510 CONNECTION BOX PRODUCT REFERENCE GUIDE 53 Photoelectric Sensor to CBX510 NPN...
Страница 74: ...ELECTRICAL INSTALLATION 54 AV500 2D CAMERA Photoelectric Sensor to CBX510 PNP...
Страница 84: ...ELECTRICAL INSTALLATION 64 AV500 2D CAMERA Photoelectric Sensor to CBX100 and CBX800 NPN...
Страница 86: ...ELECTRICAL INSTALLATION 66 AV500 2D CAMERA...
Страница 91: ...FOCUSING DEVICE WIRING PRODUCT REFERENCE GUIDE 71 Unpowered Outputs...
Страница 113: ...OPERATING MODE PRODUCT REFERENCE GUIDE 93...
Страница 203: ...PRODUCT REFERENCE GUIDE 183 12 Click Next Step and the following screen appears...
Страница 205: ...PRODUCT REFERENCE GUIDE 185...
Страница 218: ...E GENIUS 198 AV500 2D CAMERA...
Страница 230: ...E GENIUS 210 AV500 2D CAMERA...
Страница 231: ...PRODUCT REFERENCE GUIDE 211...
Страница 234: ...E GENIUS 214 AV500 2D CAMERA...
Страница 241: ...PRODUCT REFERENCE GUIDE 221 Click on Diagnostic Messages and a Diagnostic Messages window opens...
Страница 249: ...PRODUCT REFERENCE GUIDE 229...
Страница 253: ...PRODUCT REFERENCE GUIDE 233...
Страница 260: ...E GENIUS 240 AV500 2D CAMERA...
Страница 263: ...PRODUCT REFERENCE GUIDE 243 4 Select Auto Learn from the drop down and the following auto learn options appear...
Страница 266: ...E GENIUS 246 AV500 2D CAMERA...
Страница 299: ...AV500 CALIBRATION PRODUCT REFERENCE GUIDE 279...
Страница 321: ...NOTES...
Страница 322: ...NOTES...
Страница 323: ...NOTES...


