Optyma Plus
TM
User
Guide RS8GD602 © Danfoss 2015-10
13
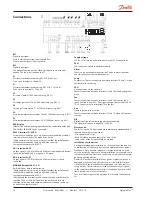
Light-emitting diodes (LED) on front panel
The LED’s on the front panel will light up when the relevant relay
is activated.
= Refrigeration
= heating element in crankcase is on
=
Fan running
The light-emitting diodes will flash when there is an alarm.
In this situation you can download the error code to the display
and cancel/sign for the alarm by giving the upper button a brief
push.
The buttons
When you want to change a setting, the upper and the lower but-
ton will give you a higher or lower value depending on the button
you are pushing. But before you change the value, you must have
access to the menu. You obtain this by pushing the upper button
for a couple of seconds - you will then enter the column with pa-
rameter codes. Find the parameter code you want to change and
push the middle buttons until value for the parameter is shown.
When you have changed the value, save the new value by once
more pushing the middle button.
(If not operated for 20 (5) seconds, the display will change back to
the Ts/Tc temperature display).
Examples
Set menu
1. Push the upper button until a parameter r05 is shown
2. Push the upper or the lower button and find that parameter you
want to change
3. Push the middle button until the parameter value is shown
4. Push the upper or the lower button and select the new value
5. Push the middle button again to freeze the value.
Display
The values will be shown with three digits, and with a setting you
can determine whether the temperature is to be shown in °C or in
°F.
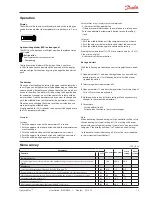
Operation
Get a good start
With the following procedure you can start regulation very quick-
ly:
1
Open parameter r12 and stop the regulation (in a new and not
previously set unit, r12 will already be set to 0 which means
stopped regulation.
2
Select refrigerant via parameter o30
3
Open parameter r12 and start the regulation. Start/stop at input
DI1 or DI2 must also be activated.
4
Go through the survey of factory settings. Make any necessary
changes in the respective parameters.
5
For network.
- Set the address in o03
- Activate scan function in the system manager.
Note
When delivering the condensing unit, the controller will be set to
the condensing unit type (setting o61). This setting will be com-
pared with your refrigerant setting. If you select a "non-permitted
refrigerant", the display will show "ref" and await a new setting.
(In the event of a controller change, 061 must be set as indicated
in the instructions from Danfoss)
Cutout alarm relay / receipt alarm/see alarm code
• A short press of the upper button
If there are several alarm codes they are found in a rolling stack.
Push the uppermost or lowermost button to scan the rolling
stack.
Set point
1. Push the middle button until the temperature value is shown
2. Push the upper or the lower button and select the new value
3. Push the middle button again to conclude the setting.
Reading the temperature at Ts (if Tc is the primary display) or Tc (if Ts
is the primary display)
• A short press of the lower button
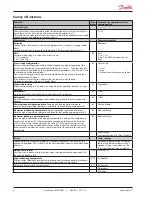
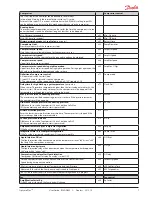
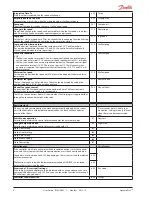
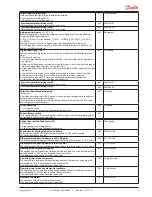
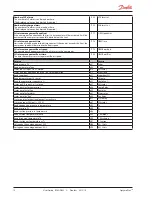
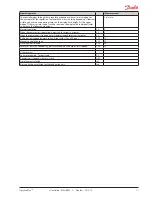
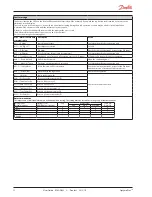
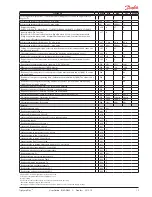
Menu survey
SW = 3.0x
Parameter
Min.-value Max.-value
Factory
setting
Actual
setting
Function
Code
Normal operation
Set point (regulation reference follows the number of degrees above the outside temperature
Tamb)
- - -
2.0 K
20.0 K
8.0 K
Regulation
Select SI or US display. 0=SI (bar and °C). 1=US (Psig and °F)
r05
0/°C
1/F
0/°C
Internal Main Switch. Manual and service = - 1, Stop regulation = 0, Start regulation =1
r12
-1
1
0
Offset during night operation. During night operation the reference is raised by this value
r13
0 K
10 K
2 K
Set point for suction pressure Ts
r23
-25 °C
10°C
-7°C
Readout of reference for Tc
r29
-
-
-
-
Min. condensing temperature (lowest permitted Tc reference)
r82
0°C
40°C
10°C


