


User's Manual
329
Procedure
Step 1
Select
Main Menu
>
NETWORK
>
Port
.
The
Port
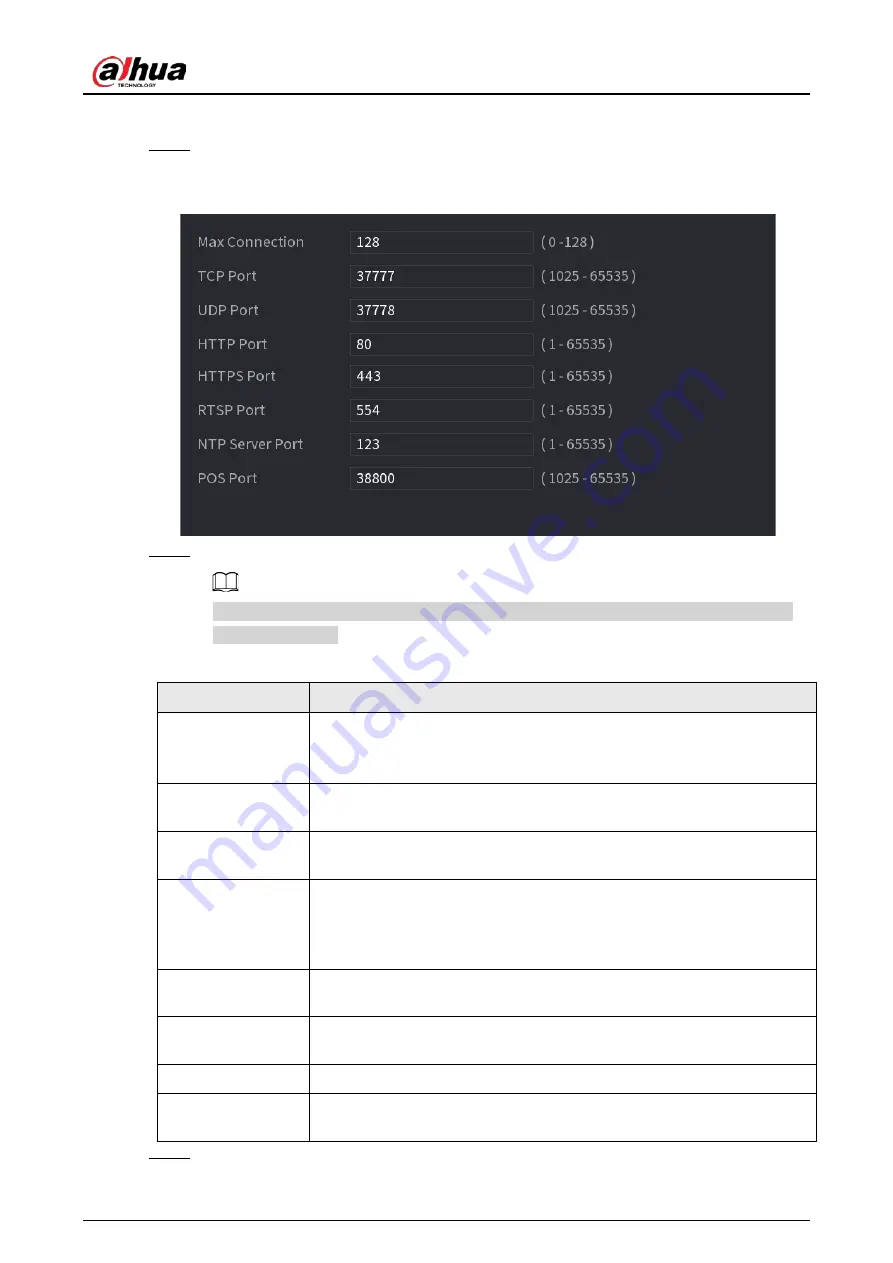
interface is displayed. See Figure 4-215.
Figure 4-215
Step 2
Configure the settings for the connection parameters. See Table 4-66.
The connection parameters except Max Connection cannot take effects until the Device
has been restarted.
Table 4-66
Parameter
Description
Max Connection
The allowable maximum clients accessing the Device at the same time,
such as WEB, Platform, and Mobile Phone.
Select a value between 1 and 128. The default value setting is 128.
TCP Port
The default value setting is 37777. You can enter the value according to
your actual situation.
UDP Port
The default value setting is 37778. You can enter the value according to
your actual situation.
HTTP Port
The default value setting is 80. You can enter the value according to your
actual situation.
If you enter other value, for example, 70, and then you should enter 70
after the IP address when logging in the Device by browser.
RTSP Port
The default value setting is 554. You can enter the value according to your
actual situation.
POS Port
Data transmission. The value range is from 1 through 65535. The default
value is 38800.
HTTPS Enable
Enable
HTTPS
.
HTTPS Port
HTTPS communication port. The default value setting is 443. You can
enter the value according to your actual situation.
Step 3
Click
Apply
to complete the settings.
Содержание NVR41-4KS2 Series
Страница 1: ...Dahua Network Video Recorder User s Manual ZHEJIANG DAHUA VISION TECHNOLOGY CO LTD V1 1 0 ...
Страница 74: ...User s Manual 58 Figure 2 79 Alarm input port Figure 2 80 Alarm input port ...
Страница 101: ...User s Manual 85 Figure 3 41 Step 9 Secure the HDD bracket and put the top cover back ...
Страница 114: ...User s Manual 98 3 6 15 NVR616 4KS2 Series The following figure is for reference only Figure 3 58 ...
Страница 132: ...User s Manual 116 Figure 4 19 Modify IP Step 3 Set parameters See Table 4 5 ...
Страница 147: ...User s Manual 131 Figure 4 29 Period Step 3 Set record type See Figure 4 30 ...
Страница 319: ...User s Manual 303 The Exception interface is displayed See Figure 4 190 Figure 4 190 Figure 4 191 Figure 4 192 ...
Страница 420: ...User s Manual 404 Figure 4 290 File management Step 2 Click Add The Add interface is displayed See Figure 4 291 ...
Страница 452: ...User s Manual ...


