7-18
Motion Area Setup Window
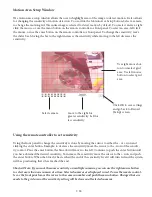
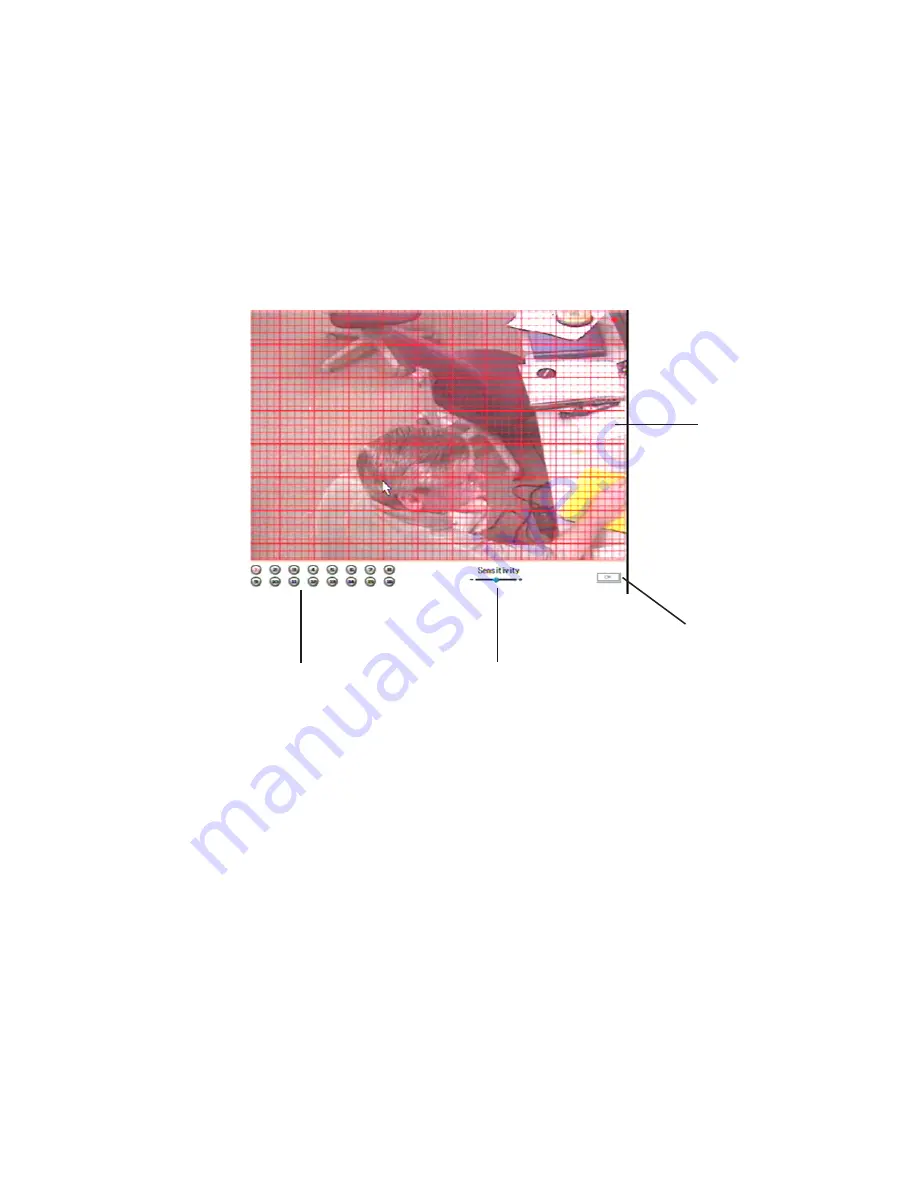
The motion area setup window allows the user to highlight areas of the image to detect motion. It also allows
for changing the sensitivity of motion detection. To use, click the Motion Area Setup button. Select a camera
to change the motion grid. The entire image is selected to detect motion by default. To unselect an area, right
click the mouse, or use the menu button on the remote controller or front panel. To select an area, left click
the mouse, or use the enter button on the remote controller or front panel. To change the sensitivity, move
the slider bar. Moving the bar to the right increases the sensitivity while moving to the left decreases the
sensitivity.
Select camera
move to the right for
greater sensitivity. Left for
less sensitivity
Using the remote controller to set sensitivity
Using the front panel to change the sensitivity is done by moving the cursor to either the - or + icon and
clicking the enter button. Example: to decrease the sensitivity, move the cursor to the - icon of the sensitiv-
ity control. Press the enter button, the blue dot will move to the left. Continue to push the enter button until
you have obtained the desired sensitivity. To increase the sensitivity move the cursor to the + icon and push
the enter button. When the blue dot has reached the end of the sensitivity level it will turn red and the system
will beep indicating that it has reached the end.
Shortcut Note: If you want the same sensitivity on multiple cameras, you can use the right mouse button
to select more than one camera at a time. Selected cameras are displayed in red. To use the remote control-
ler or the front panel move the cursor to the camera number and push the menu button. Changes that are
made to the grid area or the sensitivity setting will be done on all selected cameras.
Use right mouse but-
ton to unselect grid
area. Use left mouse
button to select grid
area.
Click OK to save settings
and go back to Record
(Setup) screen.


