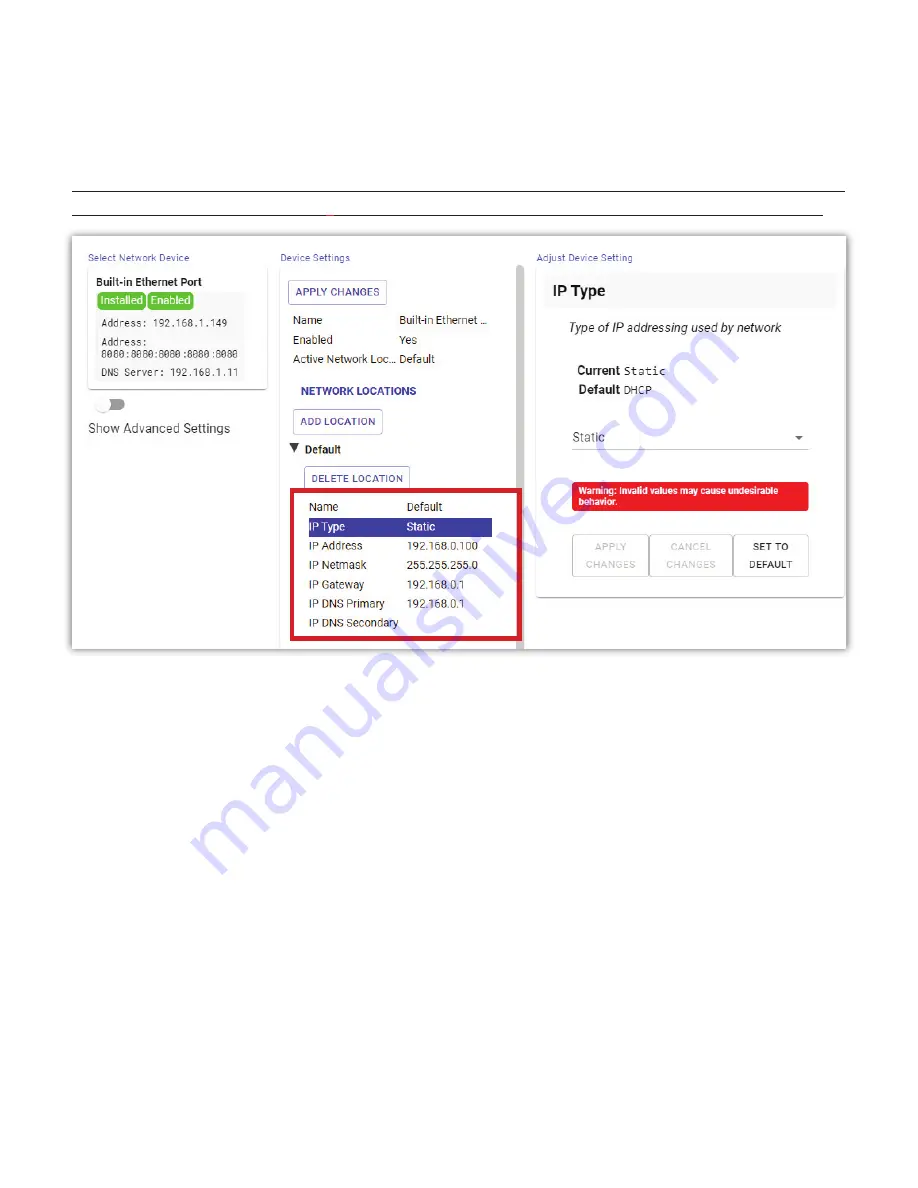
A er selec ng
Sta
Ɵ
c
from the drop down list, click the “Apply Changes” bu on. This will save the new IP type and
allow new op ons in the “Device Se ngs” sec on (
1
in
Figure 30
).
Sta c mode
requires network-speci
fi
c values to
be entered in each of these new
fi
elds. Enter BRIC-Link II’s new
IP address
, its
Netmask
and its
Gateway Address
,
as well as at least one
DNS Server Address
. Be sure to click “Apply Changes” a er each value is entered.
Note: Once the IP address, Netmask, Gateway and DNS have been entered, a new “
Apply Changes
” bu on appears
in the center “Device Se ngs” panel (
2
in
Figure 30
). Clicking this will
fi
nalize the new IP se ngs for BRIC-Link II.
NETWORK LOCATIONS
While using or modifying the “Default”
Network Loca on
may work for many users in a sta onary environment,
BRIC-Link II also allows new “Loca ons” to be added for increased versa lity. A “Loca on” is a selectable set
of network con
fi
gura ons that o
ff
ers on-the-
fl
y connec on to di
ff
erent Networks. Storing se ngs in this way
allows for opera on in mul ple physical loca ons (i.e., di
ff
erent studios, etc.) without overwri ng the network
con
fi
gura ons set for previous places. For example, when opera ng in a new studio in New York City, a user can
create a
Loca on
called “New York” and apply the necessary IP se ngs for just that studio; then BRIC-Link II can be
brought back to its own studio in Paris and simply change the
Ac ve Network Loca on
back to one called “Paris”. In
general, the most o en-used IP se ngs should be applied to the “Default” Network Loca on, and less frequently-
used se ngs should be applied to new Loca ons
as needed.
To create a new Network Loca on, click the
Add Loca on
bu on under the “Network Loca ons” header. Then
click to expand the
New Loca on
se ngs that appear below, and proceed with con
fi
gura on as described in the
previous sec on. The process from here is the same as edi ng the “Default” loca on, except that users can change
the name of the “New Loca on” to something more memorable for a par cular usage. Once a Network Loca on
has been added, it can be implemented through the
Ac ve Network Loca on
op on in the “Device Se ngs”
panel.
As always, be sure to click “Apply Changes” a er selec ng any new op ons.
1
2
Содержание BRIC-Link II
Страница 1: ...Product Manual ...
Страница 2: ...BRIC Link II June 2021 ...
Страница 3: ... ...
Страница 4: ... ...
Страница 5: ... ...
Страница 6: ... ...
Страница 7: ... ...
Страница 8: ... ...


