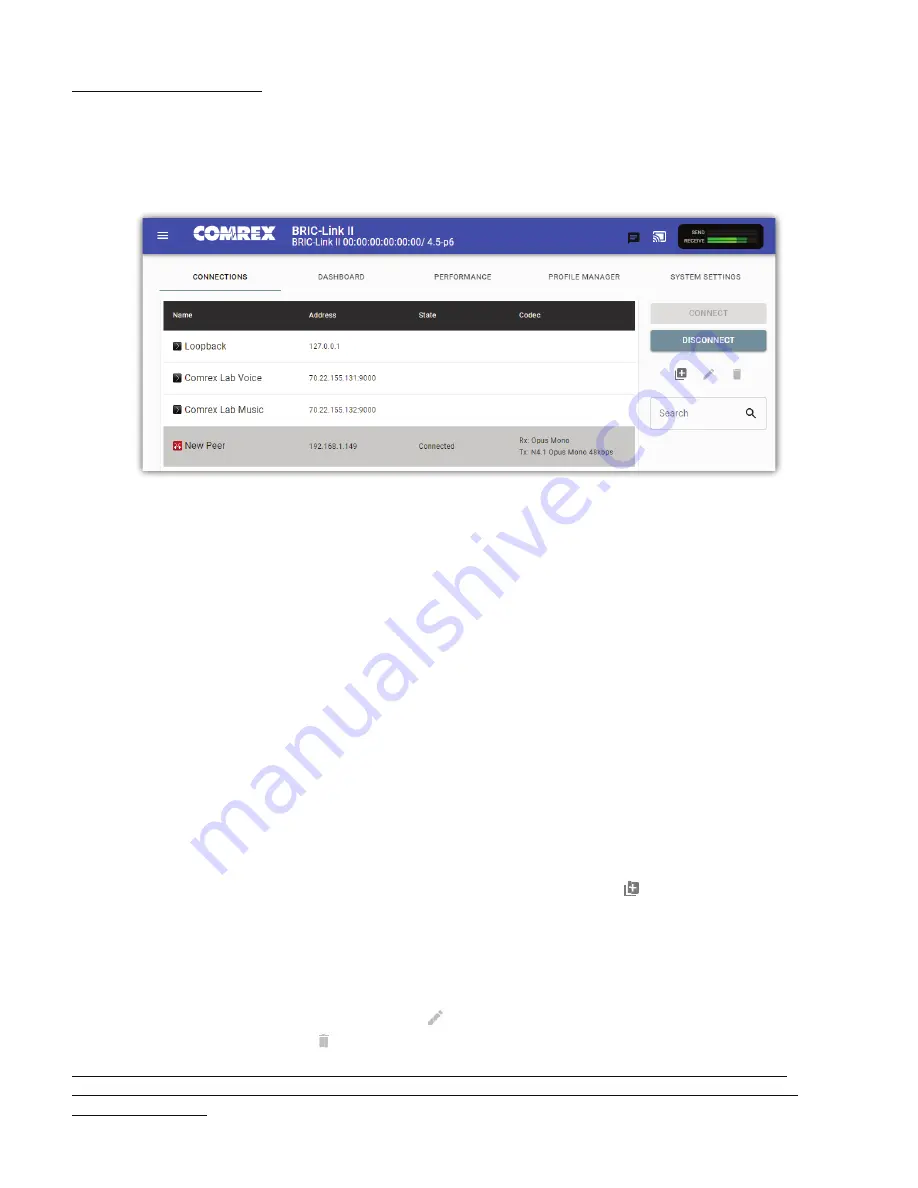
CONNECTIONS TAB
The
Connec ons
Tab is the
fi
rst window in the user interface. This allows for monitoring device connec vity and
controlling connec ons. This tab displays the
names
and
IP addresses
of all saved remotes, or “peers”. As seen in
Figure 14
, ac ve connec ons will also display
status
informa on and the
encoding algorithms
being used by each
end of the connec on. This informa on is only available during an ac ve connec on.
If there are no other connec ons ac ve, a connec on can be ini ated by selec ng a remote from the list and
clicking “Connect” on the right side of the screen. To end an ac ve connec on, select the ac ve remote and click
“Disconnect”.
By default, three factory remotes appear on the list. These remotes are used for troubleshoo ng connec vity:
1.
Loopback
: Allows for tes ng of localhost. BRIC-Link II will make an ac ve connec on to itself (input audio
will be encoded then decoded and output from the same unit). This veri
fi
es proper func onality of the
BRIC-Link II, as well as the chosen audio pro
fi
les and input/output wiring.
2.
Comrex Lab Voice
: This provides a talk feed (mono input) from the Comrex headquarters in
Massachuse s, USA for tes ng remote connec ons.
3.
Comrex Lab Music
: This provides a music feed (stereo input) from the Comrex headquarters in
Massachuse s, USA for tes ng remote connec ons.
CREATING NEW REMOTES
To add a new remote unit to the list, click the
Add a new remote connec on
icon ( ) on the right side of the
screen. A dialogue box will appear and require the
IP address
of the remote unit to be input (as seen in
Figure 15
).
Users may assign a
Remote Name
and either choose an audio
Pro
fi
le
or proceed with the “Default Pro
fi
le”, which
is automa cally selected. To get started, BRIC-Link II includes
factory pro
fi
les
to choose from. Custom pro
fi
les are
possible and are covered in a later sec on (see
page 32
).
A stored remote can be edited using the
Pencil icon
( ). In the event that a stored remote is no longer desired, it
can be deleted using the
Trash icon
( ).
Note: When adding a remote, the default network port will be
UDP 9000
. If the “receiving” unit is set for a
non-standard network port, it must be entered in the “calling” unit’s
Remote
entry, a er the IP address (e.g.
192.168.7.23:9004).
)
Содержание BRIC-Link II
Страница 1: ...Product Manual ...
Страница 2: ...BRIC Link II June 2021 ...
Страница 3: ... ...
Страница 4: ... ...
Страница 5: ... ...
Страница 6: ... ...
Страница 7: ... ...
Страница 8: ... ...


