10
Pre-Operation and Daily Safety Checklist
PERIODIC MAINTENANCE
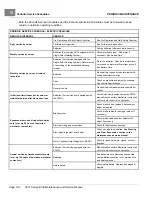
Use the following checklist, in conjunction with the Pre-Operation and Daily Safety Checklist, as a guide to inspect the
vehicle and check daily for proper operation. Any problems should be corrected by a Club Car distributor/dealer or a
trained technician.
All Vehicles
•
Forward/Reverse control:
Check for proper operation.
•
Brakes:
Be sure the brakes function properly. When brake pedal is fully pressed under moderate pressure,
it should not go more than halfway to the floor, and vehicle should come to a smooth, straight stop. If the brake
pedal goes more than halfway to the floor, or if the vehicle swerves or fails to stop, have the brake system checked
and adjusted as required. Brake adjustment must be maintained so that the brake pedal cannot be pressed to the
floor under any circumstance.
•
Park brake:
When latched, the park brake should lock the wheels and hold the vehicle stationary (on an incline of
20% or less). It should release when either the accelerator or brake pedal is pressed.
•
Reverse buzzer:
The reverse buzzer should sound as a warning when the Forward/Reverse handle or switch is in
the REVERSE position.
•
Steering:
The vehicle should be easy to steer and should not have any play in the steering wheel.
•
General:
Listen for any unusual noises such as squeaks or rattles. Check the vehicle ride and performance. Have
a Club Car distributor/dealer or a trained technician investigate anything unusual.
Electric Vehicles
•
Accelerator:
With the key switch in the ON position and the Forward/Neutral/Reverse control (FNR) in the F
position, as the accelerator pedal is pressed, the motor should start and the vehicle should accelerate smoothly
to full speed. Club Car vehicles operate at reduced speed in reverse. When the pedal is released, it should
return to the original position and the motor should rotate freely or go into motor braking mode.
See Pedal Up
Motor Braking below.
•
Walk Away Braking:
With the vehicle parked on level ground and the park brake disengaged, place the Run/Tow
switch in the RUN position and attempt to push the vehicle. Motor braking should engage and limit rolling to no
more than 1 to 3 mph (1.6 to 4.8 km/h) with the Forward/Neutral/Reverse control (FNR) in any position. When walk
away motor braking is engaged, the reverse buzzer should emit a distinct pattern of beeps.
•
Motor Braking:
Accelerate down an incline with the accelerator pedal fully pressed. When the vehicle reaches
maximum programmed speed, motor braking should engage and limit the vehicle to its maximum programmed
speed. On very steep grades, the vehicle may slightly exceed its maximum programmed speed, requiring the use of
the brake pedal. Also, travel downhill with the accelerator pedal partially pressed. Motor braking should limit speed
to less than top speed and maintain speeds proportional to the accelerator pedal position. On a level surface,
accelerate the vehicle to full speed and then release the accelerator pedal. Motor braking should smoothly slow the
vehicle to a complete stop or else allow the vehicle to coast freely, depending on the selected controller setting.
Gasoline Vehicles
•
Accelerator for pedal-start vehicles:
With the key switch in the ON position and the Forward/Neutral/Reverse
control (FNR) in the F position, as the accelerator pedal is pressed, the engine should start and the vehicle
should accelerate smoothly to full speed. When the pedal is released, it should return to the original position and
the engine should stop.
•
Accelerator for key-start vehicles:
After starting the engine with the key switch and placing the
Forward/Neutral/Reverse control (FNR) in the F position, the vehicle should accelerate smoothly to full speed as the
accelerator pedal is pressed. When the accelerator pedal is released, it should return to the original position and
the engine should idle.
•
Governor:
Check maximum speed of the vehicle on a level surface. Refer to Vehicle Specifications beginning on
page 2-4 for the rated speed of the vehicle.
Page 10-2
2021 Carryall 300 Maintenance and Service Manual
Содержание Carryall 300 2021
Страница 2: ......
Страница 16: ......
Страница 54: ...Pagination Page 4 Floor Mat BODY AND TRIM Page 4 20 2021 Carryall 300 Maintenance and Service Manual...
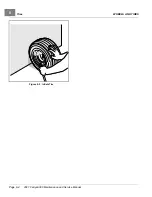
Страница 112: ...8 Tires WHEELS AND TIRES Figure 8 2 Inflate Tire Page 8 4 2021 Carryall 300 Maintenance and Service Manual...
Страница 118: ...Pagination Page 9 Jounce Bumpers REAR SUSPENSION Page 9 6 2021 Carryall 300 Maintenance and Service Manual...
Страница 406: ...Pagination Page 20 Snubber GASOLINE VEHICLE ENGINE Page 20 10 2021 Carryall 300 Maintenance and Service Manual...
Страница 454: ...Pagination Page 23 Driven Clutch GASOLINE VEHICLE CLUTCHES Page 23 20 2021 Carryall 300 Maintenance and Service Manual...
Страница 470: ...Pagination Page 24 Shifter Cable GASOLINE VEHICLE TRANSAXLE Page 24 16 2021 Carryall 300 Maintenance and Service Manual...
Страница 551: ...80 2018 by Kohler Co All rights reserved KohlerEngines com 17 690 15 Rev...
Страница 552: ...Pagination Page 25 Shifter Cable KOHLER ENGINE SERVICE MANUAL Page 25 2 2021 Carryall 300 Maintenance and Service Manual...
Страница 565: ...GASOLINE ENGINE HARNESS Wiring Diagrams Gasoline Engine Harness 26...
Страница 566: ...Page intentionally left blank...
Страница 567: ...GASOLINE KEY START MAIN HARNESS Wiring Diagrams Gasoline Key Start Main Harness 26...
Страница 568: ...Page intentionally left blank...
Страница 569: ...GASOLINE PEDAL START MAIN HARNESS Wiring Diagrams Gasoline Pedal Start Main Harness 26...
Страница 570: ...Page intentionally left blank...
Страница 571: ...GASOLINE INSTRUMENT PANEL HARNESS Wiring Diagrams Gasoline Instrument Panel Harness 26...
Страница 572: ...Page intentionally left blank...
Страница 573: ...GASOLINE FNR HARNESS Wiring Diagrams Gasoline FNR Harness 26...
Страница 574: ...Page intentionally left blank...
Страница 575: ...ELECTRIC MAIN HARNESS Wiring Diagrams Electric Main Harness 26...
Страница 576: ...Page intentionally left blank...
Страница 577: ...ELECTRIC INSTRUMENT PANEL HARNESS Wiring Diagrams Electric Instrument Panel Harness 26...
Страница 578: ...Page intentionally left blank...
Страница 579: ...ELECTRIC ACCESSORIES HARNESS Wiring Diagrams Electric Accessories Harness 26...
Страница 580: ...Page intentionally left blank...
Страница 588: ...NOTES...
Страница 589: ...NOTES...
Страница 590: ...NOTES...
Страница 591: ...NOTES...
Страница 592: ...NOTES...
Страница 593: ...NOTES...
Страница 594: ...NOTES...
Страница 595: ......
Страница 596: ......

