OPERATION
Roadster/Mirage S+ User’s Manual
3-65
Christie
Edge Blending
is an innovative set of software functions that can quickly and
easily blend the edges of multiple adjacent full screen images to create a single
seamless larger image.
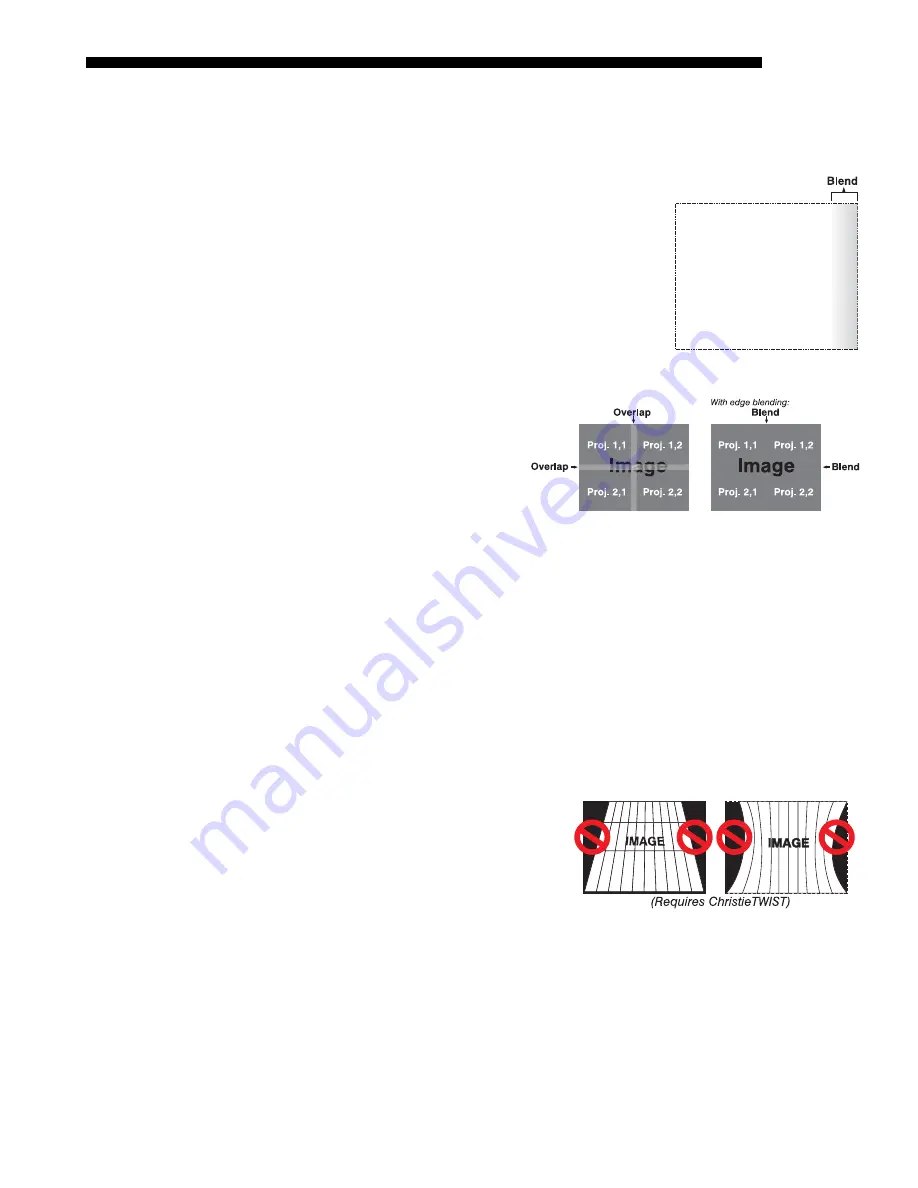
What is a Blend?
In simple terms, a blend appears as a gradient strip
along an edge of a projected image. It is darkest along
the extreme edge of the image, and lightens nearer to
the rest of the image (see Figure 3.33). This area runs
along the edge of the projector’s internal DMDs
(display area); it cannot be located on interior pixels.
How Are Blends Used?
In multiple-projector walls,
complementary blends between
neighboring images can
compensate for the extra
“brightness” or intensity where
these edges overlap. By
controlling blend width and
other properties, you can achieve
uniformity across the group of
images. Visible overlaps will
disappear as illustrated in Figure 3.34.
For best results, use the same projector model and type throughout your display wall.
In addition, avoid high-gain screens whenever possible—the optical performance of
such screens demands minimal image offset, thus projectors must be located very
close to one another. Note too that the requisite tiling of the image—with data
repeated along internal edges that will overlap—must be correctly done by your
source.
Flat Blends vs. Warped Blends
FLAT BLENDS:
It is important to
remember that the projector’s standard
edge blending controls affect the
outer
edges
of the projector’s display panel,
and that each blend is consistent along
its length (refer back to Figure 3.33).
The standard
Edge Blending
menu
controls can blend multiple
flat
full-
panel displays if they have no warping
or keystoning applied.
WARPED BLENDS:
When using the optional
ChristieTWIST
module for warping
images on to
curved
screens, work with its separate
ChristieTWIST
PC application to
create more specialized blends required. Such a blend can vary along its length to
compensate for curves. Once downloaded to the projector, simply apply the desired
custom “user” blend by selecting it in the
Blending Enable
pull-down list.
Edge Blending
'
Figure 3.33
Figure 3.34. Edge Blending Concept
(NOTE: TILING DONE AT SOURCE)
Содержание Mirage S+
Страница 6: ......
Страница 112: ......
Страница 136: ......
Страница 144: ......
Страница 145: ...Appendix B Keypad Reference Roadster Mirage S User s Manual B 1 Figure B 1 Remote Keypad...
Страница 146: ...KEYPAD REFERENCE B 2 Roadster Mirage S User s Manual Figure B 2 Brick Rental Staging Remote Roadster...
Страница 148: ...SERIAL COMMUNICATION CABLES C 2 Roadster Mirage S User s Manual...
Страница 158: ......


