50
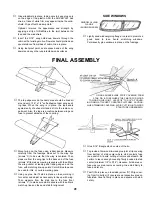
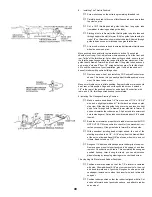
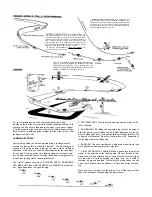
10b. Hooking Up Aileron Pushrods ("A" or "B" Wing Only).
Re-install aileron servo in wing. Tape ailerons in neutral position
(so flat bottom of wing and ailerons are flush).
Install horn brackets on aileron horns as shown. Install mini-
snaps on each 7" True 1/16" threaded rod, then connect mini-
snaps to horn brackets. Align each rod to its respective hole in-
servo wheel. Allow additional 5/16" past servo wheel holes,
then cut and bend forward end of pushrods, same as elevator
pushrod procedure.
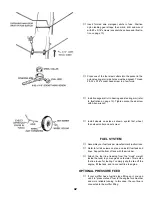
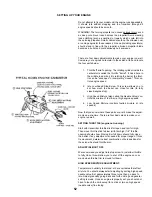
11. Installing Switch and Charging Jack.
Temporarily set battery and Rx in fuse. Position switch and
charging jack cover plates on outside of fuse on side opposite
to engine exhaust, and where they will not obstruct the battery
or Rx, Mark through cover plates (or holes and openings.
Remove battery and Rx.
Make holes through fuse side Make sure hole for switch button
is long enough for it to move to ON and OFF positions.
Install switch and jack.
Later, when radio is operating, identify ON and OFF positions
with decals provided. Preferred "ON" position is forward.
12. Battery Pack.
You must have fully charged nicads or fresh dry cells for flying.
Wrap battery in 1/2" very soft foam rubber to cushion it from
vibration and shock. Use rubber bands or tape to hold the foam
around the battery. It is also good to place battery and Rx in
individual plastic bags to protect against fuel and oil.
Position battery in fuse, and hold in place with additional foam
rubber
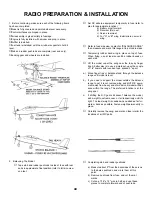
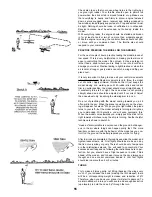
13. Receiver (Rx).
Do not cut the antenna wire attached to the Rx.
Wrap Rx carefully in foam like the battery.
Re-connect all cables so R/C system is operational; be sure
that each servo is plugged into its respective Rx terminal.
Place Rx in fuse behind the battery.
Lead the antenna wire up and back along cabin top doubler and
out top rear of cabin. Tape wire inside cabin.
Using clip supplied with radio, suspend antenna from top of fin
as shown above. Adjust antenna in clip so it is just slightly taut,
not tight. Let excess wire hang loose from clip.
Gather all excess cables together behind Rx, and hold them
down with foam.
Apply "ON/OFF" decals to outside of fuse to identify switch
positions.
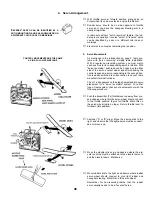
All pushrods must move freely, without binding; adjust if required for
smooth operation. When setting control travel, be cautious that no servo
is hooked to a control in a manner that prevents the servo wheel from
moving through its complete range of rotation, For example, if the throt-
tle servo "buzzes" when moved to "full-throttle" position, the servo still
has movement left, but is jammed against the engine's full-throttle limit
position, This can damage the servo and drain the battery, leading to
loss of control, and a crash.
Содержание Eagle 2
Страница 28: ...27 ...

