38
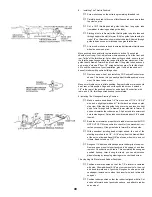
For inside comers, slit covering and fold it around the
edges.
Using your iron (or a special covering "heat gun,") set at
relatively high heat, shrink the covering tight. Neatly trim
off any surplus.
Following the same procedure, cover the remaining
wing sections, both top and bottom. Be sure to over-
lap seam at least 1/4". The ailerons should be covered
in the same manner, beginning with the top and then
covering the bottom, and overlapping the seams.
NOTE: Once the aileron sections have been covered,
and while the hinge locations are still fresh in
your memory, immediately slit the covering to
open up the hinge holes. (Refer to the plan for
help in locating the hinge holes.)
For best results, a darker color should go over a lighter
one. Smaller designs should be positioned and tacked in
place at one end. Then, work the iron down the rest of
the design, smoothing out the design as you go. Larger
designs (such as sunbursts) should be positioned and the
widest end tacked down first. Then, working towards the
narrow end, iron the design down.
INSTALLING WING TIPS
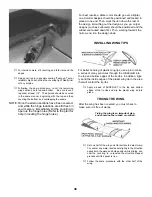
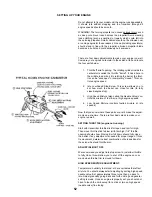
For better bonding of plastic wing tips, use a pin to make
a series of many punctures through the UltraCote® into
the top and bottom edges of the tip ribs. In addition, light-
ly sand the inside edges of the plastic wing tip in the area
that will contact the tip ribs.
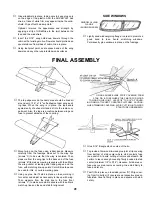
Apply a bead of SUPER JET to the top and bottom
edges of the tip ribs and slip the plastic wing tip into
place.
TRUING THE WING
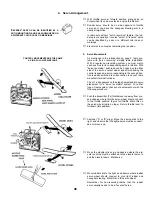
Set one half of the wing on a flat surface to detect warp.
To counter any warp, twist panel slightly in the direction
opposite to the warp and hold position while gliding iron
over the covering to re-tension the structure. Repeat
process until the panel is true.
Follow the same procedure with the other half of the
wing.
After the wing has been covered, you must check to
make sure it is free of warps.
Truing the wing Is an important step,
and should not be rushed or omitted.
Содержание Eagle 2
Страница 28: ...27 ...


