16
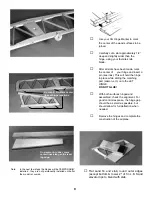
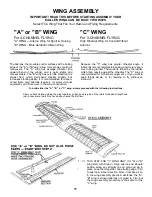
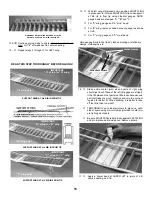
Position “T2” stamp
near spar.
Wing upside down
1-1/2”
1/8” Balsa rib No. 1
*For bolt on wing option only*
Glue T.E. filler blocks
Ailerons & inboard sections shown reversed
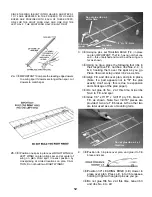
18.
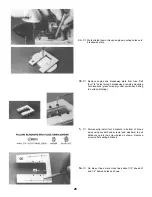
Apply two ribbons of SUPER JET to one side of both
joiners, near the top and bottom, Position one end of
joiner in place and swing the other end up against spars
— hold momentarily. Repeat for other joiner — immedi-
ately reinstall clamps (from step 16) to hold both joiners
tight on spars.
* IMPORTANT I *
SEE BOLT-ON WING OPTION
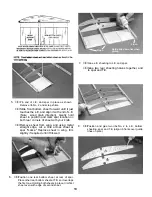
19.
For "A" or "B" wing, cut opening in rib No. 1 for your
servo at stamped line on rib.
Position front and rear halves of one rib No. 1 so one
side aligns with centerline of wing. Adjust rib to align
with spar center joint, T.E., bottom sheeting, and L..E.
joints. Glue in place.
Glue remaining halves of second No. 1 rib to first rib,
making double thickness center rib at center joint.
Be sure to glue any joints in the wing still needing glue.
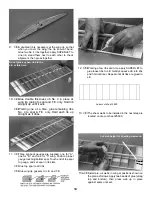
20.
Remove all clamps, etc.
Try top sheeting in place, trimming to fit as required.
Match edge of sheeting with center of rib No. 1. Glue in
place.
Turn wing upside down and glue any joints still needing
glue. For "C" wing only, proceed directly to step 34a.
21.
Using Center Line Marker, make a center line along
entire lengths of T.E., inboard section, and ailerons.
Mark front of ailerons 1 -1/4" from inner ends.
22.
Make a clearance groove 1-1/4" long at the inner end of
the ailerons. The groove must be deep enough so that
the aileron wire wilt lie recessed in the aileron.
Содержание Eagle 2
Страница 28: ...27 ...

