15
IMPORTANT:
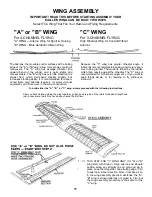
“A” at top for “A” wing.
“A” wing only!
IMPORTANT:
“B” at top for “B” wing.
IMPORTANT:
“C” at top for “C” wing.
“B” wing only!
“C” wing only!
Dihedral Joiners
Joiner clamps
15.
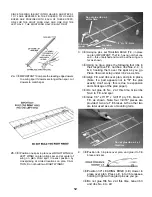
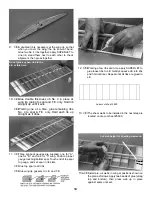
With left wing still pinned down, position RIGHT WING
in place next to it. Raise RIGHT WING tip and support it
at 4th rib in from tip using dihedral gauges. NOTE:
gauge ends are stamped, "A," "B" and "C."
For "A" wing, gauge end "A" must be up.
For "B" wing, remove shaded area of gauge (as shown
at left).
For "C" wing, gauge end "C" must be up.
Hold gauges firmly to the ribs by tack-cementing or stationary
clamps, clothespins, etc.
16.
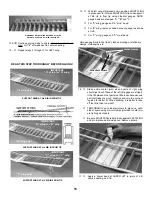
Study entire center joint; all end parts of right wing
should just touch those of the left (tiny gaps are alright).
If the fit between most parts is a little loose because one
part protrudes too much: slightly sand only the protrud-
ing part for better fit. When sanding, it is better to take
off too little than too much!
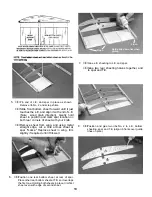
TEMPORARILY set dihedral joiners in place on each
side of spars, using die-cut clamps provided to hold join-
ers tight against spars.
Be sure RIGHT WING is held firmly against LEFT WING
and pin in place as shown above. Remove joiners.
17.
Apply a liberal bead of SUPER JET to joints of L.E.
spars, sheeting, and T.E.
13b.
Continue gluing webs to spars at locations shown on
plan; cut 1/4" off webs next to center sheeting.
14.
Repeat steps 2 through 13 for LEFT wing.
READ THIS STEP THOROUGHLY BEFORE GLUING!
WEBS MUST BE INSTALLED BETWEEN ALL RIBS
REFER TO PLAN FOR ALL WEB LOCATIONS.
SUPPORT WING AT 4th RIB IN FROM TIP
SUPPORT WING AT 4th RIB IN FROM TIP
SUPPORT WING AT 4th RIB IN FROM TIP
Содержание Eagle 2
Страница 28: ...27 ...

