39
COVERING THE TAIL
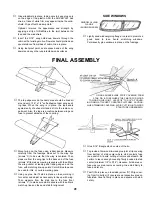
Following the same procedure as with the wing, cover the
stabilizer/elevator and the fin/rudder. After covering over
the hinge holes, immediately go back and slit the cover-
ing to open the holes where the hinges will be installed.
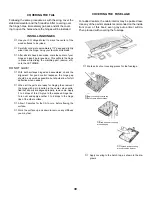
INSTALLING HINGES
Use your CG Hinge Marker to mark the center of the
wood surfaces to be joined.
Carefully cut a slot approximately 1/2" deep and slightly
wider than the hinge, using your favorite knife blade.
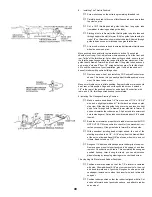
After all slots have been made, mark the center of your
hinge and insert a pin (see illus.) This will hold the hinge
in place while sliding the matching part (aileron, etc.)
onto the JET HINGE.
DO NOT GLUE!
With both surfaces hinged and assembled, check the
alignment. For good control response, the hinge gap
should be as small as possible, but should allow for full
deflection when needed.
When all the parts are ready for hinging then remount
the hinge with a pin inserted in the center, when satis-
fied that all parts are aligned properly, remove pin. Apply
3 to 4 drops of thin CA glue to the exposed hinge line.
Turn over and apply another 3 to 4 drops to the hinge
line of the other surface.
Allow 10 minutes for the CA to cure, before flexing the
surface.
Work the surface up and down to remove any stiffness
you may feel.
COVERING THE FUSELAGE
For added realism, the cabin interior may be painted now.
Use any of the paint materials recommended on the inside
front cover of this book; even gray auto primer will do.
Then proceed with covering the fuselage.
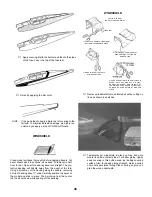
Mark and cut out covering pieces for the fuselage.
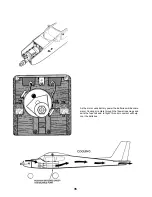
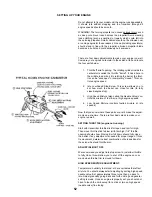
Apply covering to the hatch top, as shown in the dia-
grams.
Apply covering to hatch top.
Cut corners and slit sides.
Wrap and seal covering
around edges.
Trim and wrap covering
around to hatch bottom.
Содержание Eagle 2
Страница 28: ...27 ...

