41
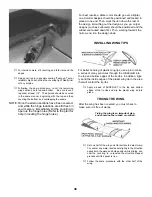
Glue windshield in place, taking care to keep glue only
on the edge of the plastic. After the SUPER JET has
dried, a trace of white film may appear inside the wind-
shield. Wipe off with a damp cloth.
Optional: Improve the appearance and strength by
applying a strip of UltraStripe to the joint between the
fuse and the windshield.
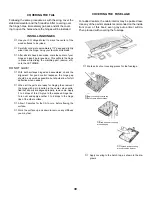
Insert the 5/16" wing hold-down dowels through the
cabin with a twisting motion. Dowels should protrude an
equal distance from sides of cabin. Glue in place.
Using fuel-proof paint, seal exposed ends of the wing
dowels and any other unprotected wood surfaces.
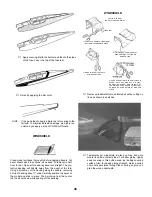
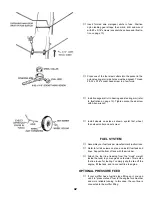
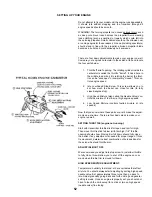
Lightly sand window-gluing flange, in order to promote a
good bond to fuse. Avoid scratching windows.
Permanently glue windows in place on the fuselage.
SIDE WINDOWS
WINDOW GLUING
FLANGE
(SHOWN SHADED)
FINAL ASSEMBLY
The top edge around the cabin area should be lined all
around with 1/16" x 1/4" self-adhesive foam wing seat-
ing tape. When the wing is in place, the tape seals
against entry of exhaust oil and dirt into the radio com-
partment. Also, the tape is a cushion between wing and
fuse to prevent abrasion of the covering.
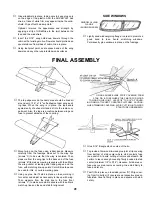
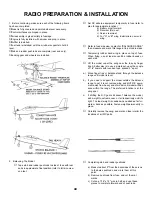
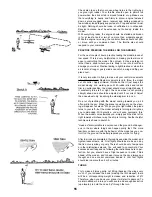
Mount wing on the fuse using rubber bands. Measure
carefully from the fuselage sides out to the wing tips
(arrows 'A') to be sure that the wing is centered. Then
measure from the wing tips to the back end of the fuse
(arrows 'B') to make sure wing is square with fuse. Mark
the wing center at leading and trailing edges, and the
fuse, with matching line-up points. Color-Stripe tape can
be used for this, or certain marking pens.
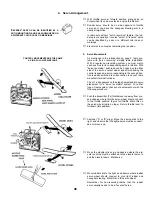
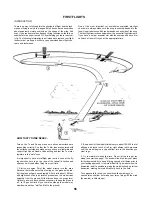
Using no glue, trial fit stab in place on fuse, marking it
for center, and adjust as necessary to line up with wing.
Then measure from the stab tips to the fuse front
(arrows 'C') to make sure stab is square with fuse. Mark
match-up lines on fuse and stab for alignment.
Glue 5/16" triangle stock on side of the tin.
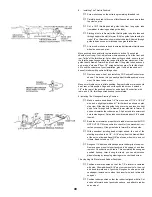
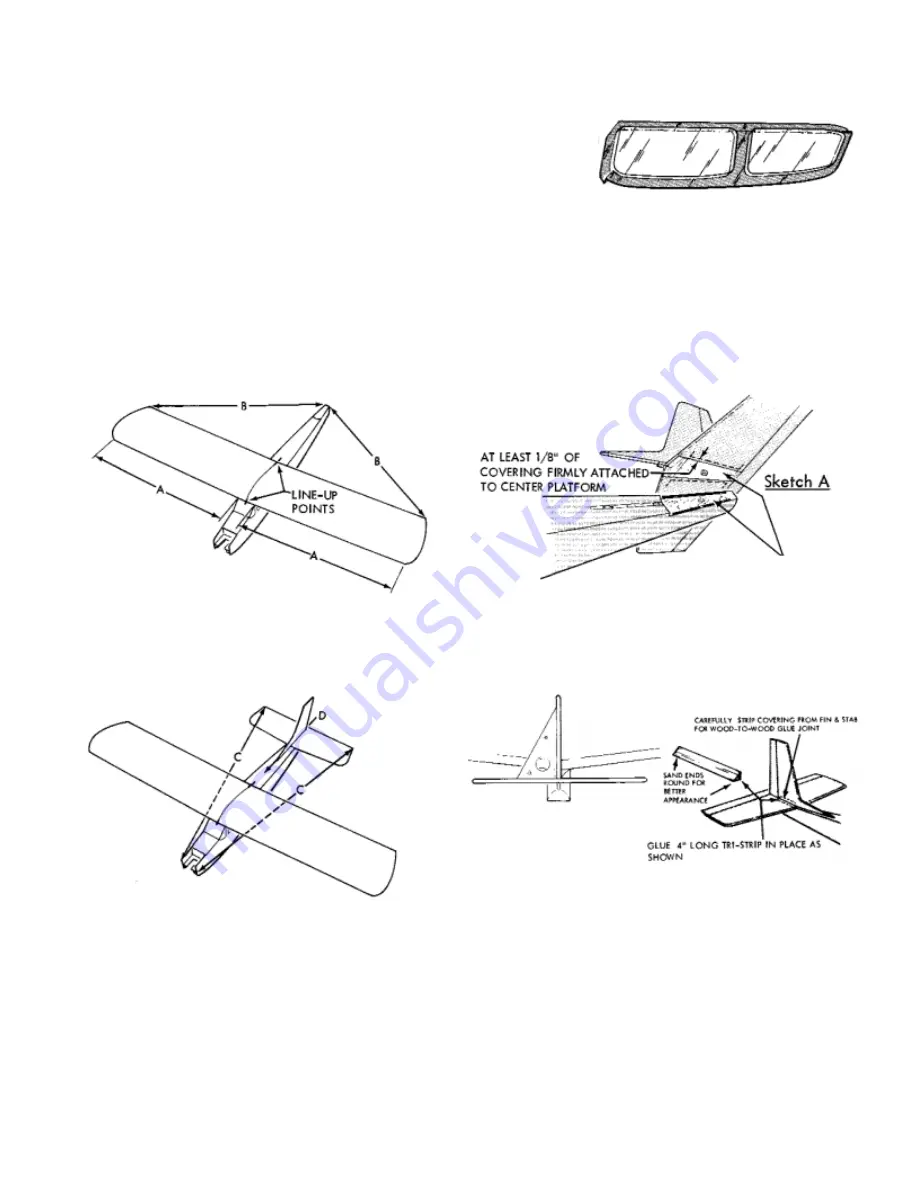
To provide a firm wood-to-wood glue joint, strip covering
from bottom of stab center where stab contacts fuse
(see sketch A) avoid cutting structure underneath. Be
certain to leave enough covering firmly bonded to stab
center (minimum 1/8" to 3/16"). Likewise, if slab area on
fuse was covered, remove covering. Glue stab firmly to
fuse and let dry.
Trial fit fin in place on fuse/stab (arrow 'D'). Strip cover-
ing from fin bottom (if covered) and respective area on
fuse/stab. Glue fin firmly in place, and square with stab.
Let dry.
USING A SHARP BLADE, STRIP COVERING FROM
STAB, FIN, & FUSE WHERE THEY MATE, FOR WOOD
TO WOOD GLUE JOINT. LEAVE 1/8" TO 3/16" OF COVER-
ING FIRMLY ATTACHED TO CENTER PLATFORM. CAUTION:
WHEN TRIMMING COVERING, AVOID CUTTING INTO WOOD
STRUCTURE UNDERNEATH.
Содержание Eagle 2
Страница 28: ...27 ...


