12
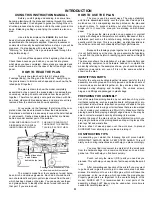
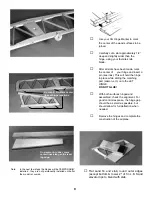
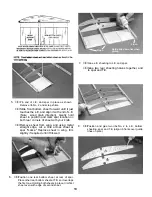
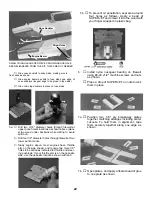
No notch
here
Rib scrap
wood
1/8” ply T.E. brace
Do not glue rib no. 2
at this time.
SINCE THE WING IS BUILT IN TWO HALVES, AND STEPS 2
TO 14 ARE REPEATED IN THE PROCESS, TWO CHECK
BOXES ARE PROVIDED WITH EACH OF THESE STEPS,
ONE FOR THE RIGHT WING HALF AND ONE FOR THE
LEFT HALF. THE RIGHT WING HALF IS BUILT FIRST.
3.
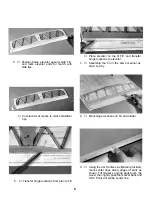
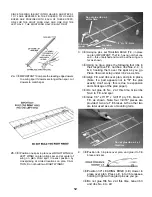
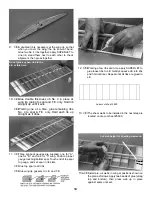
Using no pins, set TRAILING EDGE (T.E.) in place
on plan. IMPORTANT: The T.E. has no notch at one
end — this unnotched end must be at the wing cen-
ter as shown.
Using no glue, place the following four ribs in
their respective T.E. notches: ribs Nos. 2. 4, 4,
& 4, hooking them over the spar as you go.
Place rib wood scrap under rib 2 as a shim.
Align T.E. and ribs over plan, and pin in place,
(Note: if a part appears not to "fit" the plan
exactly, don't worry; this is due to expansion
and shrinkage of the plan paper).
Do not glue rib No. 2 at this time. Glue ribs
No.4 to T.E. and spar.
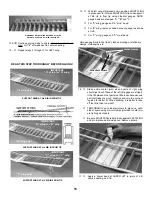
Glue 1/8" x 7/16"" x 3-9/16" ply T.E. brace to
T.E. as shown. Note: four 3-9/16" pieces are
provided; two are T.E braces & the other two
are later used as servo mounting rails.
Do not glue rib no. 2 at
this time.
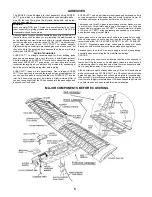
4.
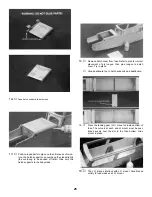
Position rib 3 in place over plan, and glue it to T.E.
brace and spar.
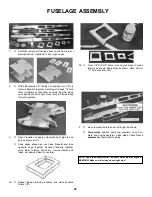
Position 30" LEADING EDGE (LE.) dowel in
place over plan. Press L.E. into rib recesses,
holding it tight with angled pins as you go.
Do not glue Rib No. 2 at this time. Glue rib 3
and ribs No. 4 to LE.
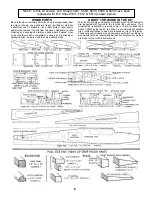
2a.
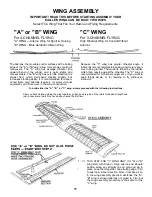
IMPORTANT! Compare the leading edge dowels
to a wing spar If dowels are longer than spar, cut
dowels to match spar.
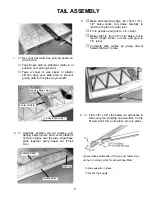
2b.
Position one spar in place over RIGHT WING (or
LEFT WING) on plan. Align spar end at center of
wing on plan. Hold spar in exact position by
crosspinning at circled locations on plan. CAU-
TION; Do not build two RIGHT WINGS!
Содержание Eagle 2
Страница 28: ...27 ...

