29
ENG
“optiMist” +0300065EN - rel. 1.6 - 18/06/2021
8. STARTING AND USER INTERFACE
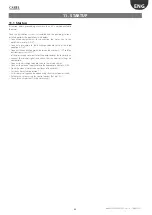
Before starting the humidifier check:
water and air connections (chap. 2). In the event of water leaks do not
start the humidifier before having resolved the problem;
electrical connections (cap. 3)
8.1 Starting
1
0
ON
1
0
OFF
8.2 Stopping
1
0
ON
1
0
OFF
Note
: if the system is stopped for an extended time, open the
valve at the end of the water line to assist drainage. If the system
is fitted with drain solenoid valves at the end of the line (optional), this is
done automatically.
8.3 First start-up (setting the language)
On power-up, the following screen is displayed:
Display
Description
Range
Def. UoM
LANGUAGE
Language
View current languages
English, Italiano,
Deutsche,
Espanol, Français
ENTER to change,
ESC to confirm
Pressing ENTER changes
the chosen language, ESC
exits to the next page
Tab. 8.a
Legenda:
Display = visualized on display; Def. = default; UoM = unit of
measure
Note:
The language can also be changed from the maintenance
menu (maintenance menu > system info > language).
8.4 Wizard
At machine start-up, once the language is selected, a guided procedure
(Wizard) is accessed which allows the installer to configure the principle
machine operations.
The following lists the parameters that can be configured using this
procedure:
•
Unit of measure.
•
Number of steps and respective nominal flow-rates
•
Type of installation (only Humidification, only Evaporative Cooling,
Humidif Evaporative Cooling).
•
Configuration of the control inputs (with indications for verifying the
fitness of the electrical connections).
Once this procedure is correctly completed, the machine will be ready
to operate.
Access to the Wizard section will then be possible through the Installer
Menu - Wizard, or when the machine is restarted (if the option “Show
Wizard at start-up” has not been disabled).
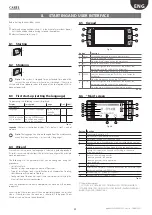
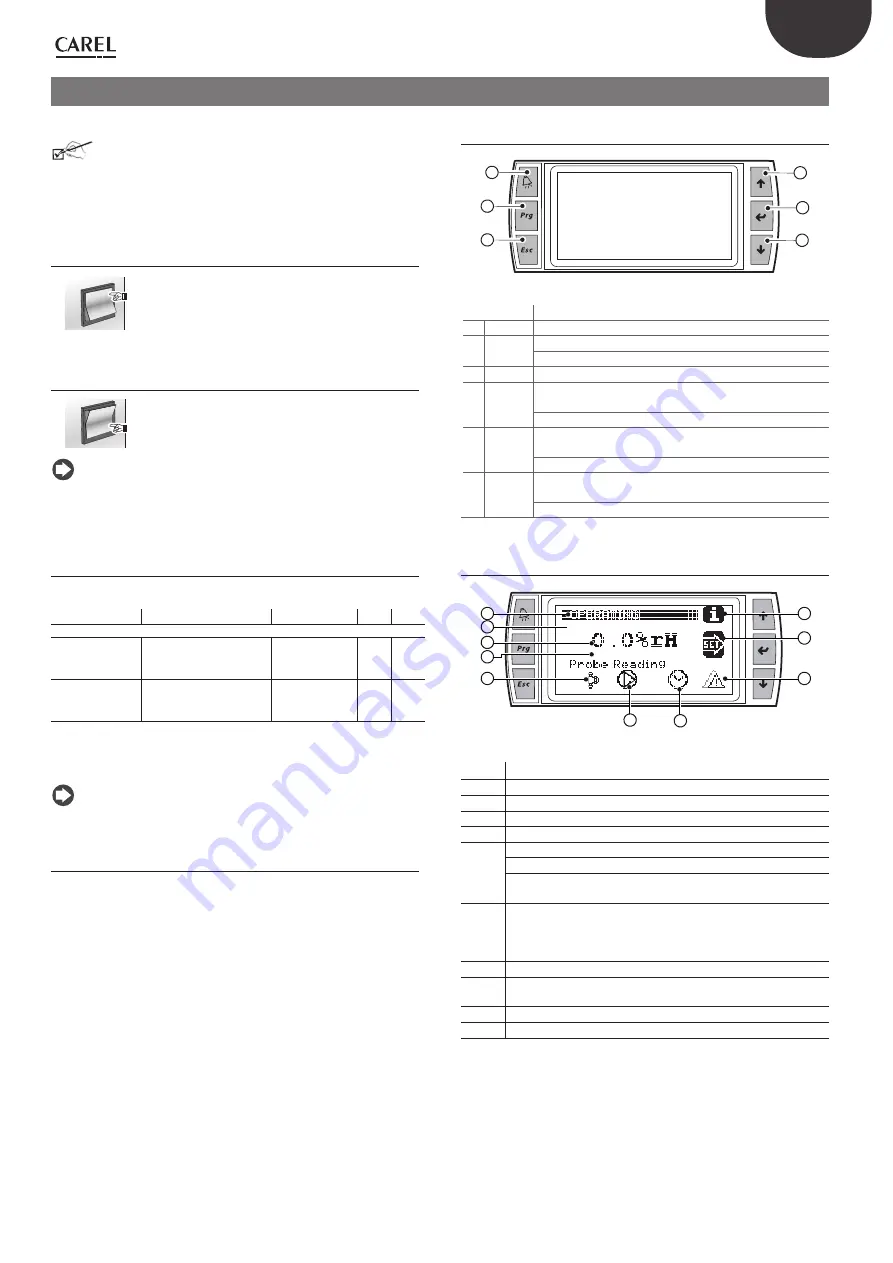
8.5 Keypad
6
4
5
3
2
1
Fig. 8.a
button
function
1
alarm
list active alarms and reset any alarms present
2
PRG
return to the “main” screen
from the “main” screen access the main menu
3
ESC
return to the previous screen/display
4
UP
circular navigation inside the menus, the screens, the
parameters and the values of the parameters
from the “main” screen, access an “INFO menu”
5
ENTER
select and confirm (like the “Enter” key on a computer
keyboard)
from the main menu, access the “SET” screen
6
DOWN
circular navigation inside the menus, the screens, the
parameters and the values of the parameters
from the main screen, access the warning screens
Tab. 8.b
8.6 “Main” screen
1
2
3
1
3
2
4
6
5
7
8
9
Fig. 8.b
Button Function
1
Zone status description (*)
2
Main control signal from the active zone.
3
Limit signal reading from the active zone.
4
Active work zone (humidification or indirect evaporative cooling)
5
Display:
• pump in operation (flashing triangle in the centre of the icon);
• pump not in operation (triangle not flashing in the centre
of the icon, empty)
6
Status of the atomising nozzles:
• atomising nozzles in operation;
• atomising nozzles not in operation;
• zone disabled
7
Scheduler set
8
Accesses the "Warnings" screen which contains the alarm messages
that have been received (DOWN key)
9
Accesses the "SET" screen (ENTER key)
10
Accesses the "INFO" screen (UP key)
Tab. 8.c
(*) Types of descriptions:
1. < OFF FROM SCHEDULER / OFF FROM REMOTE / OFF FROM KEYPAD /
OFF SUPERVISOR / OFF FLOW SWITCH / OFF BACKUP / ALARM / WARNING /
FILLING / WASHING / OPERATING >
Содержание optiMist EC005 0 Series
Страница 1: ...optiMist NO POWER SIGNAL CABLES TOGETHER READ CAREFULLY IN THE TEXT User manual evaporative cooling ...
Страница 2: ......
Страница 4: ......
Страница 6: ......
Страница 45: ......


