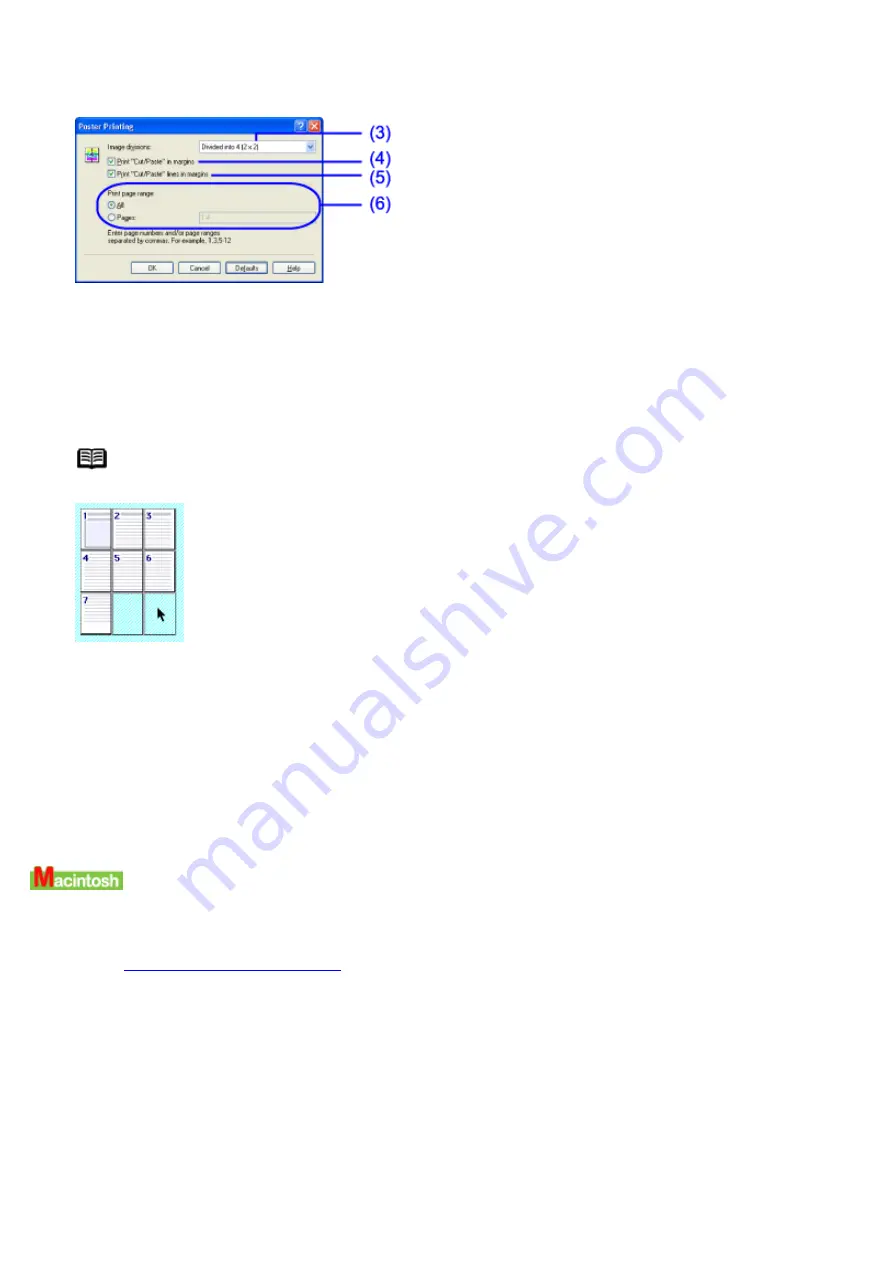
(1)
Select Poster Printing.
(2)
Click this button.
The Poster Printing dialog box opens.
(3)
Select the number of image divisions. The more divisions selected, the greater the number of printout
pages and the larger the final poster will be when assembled.
(4)
Select this check box to print the words Cut/Paste in the margins for later joining.
(5)
Select this check box to print lines in the margins for later joining.
(6)
Enter numbers to specify the range of pages to be printed/not printed.
Note
You can specify areas to print/not print in the Preview area by clicking.
4
Click OK.
5
Click OK on the Page Setup tab.
6
Click Print in the Print dialog box.
Printing will now begin.
1
Open the Print dialog box.
See
2
Click Options....
The Options dialog box opens.
3
Specify the Poster Printing settings.
Содержание i70 Series
Страница 1: ......
Страница 21: ......
Страница 24: ...Printable area ...
Страница 38: ......
Страница 46: ...Note For details on the BJ Status Monitor select the Help menu and click on the topic of interest ...
Страница 51: ......
Страница 65: ......
Страница 71: ......
Страница 86: ...Move the slide bar to adjust the print density Moving the bar to the right increases the density ...
Страница 88: ......
Страница 130: ......
Страница 140: ...5Click Print in the Print dialog box Printing will now begin ...
Страница 146: ...3Click Print in the Print dialog box Printing will now begin ...
Страница 155: ...Index ...
Страница 169: ...Printable area ...


