


Fax
5-42
Specifying Destinations
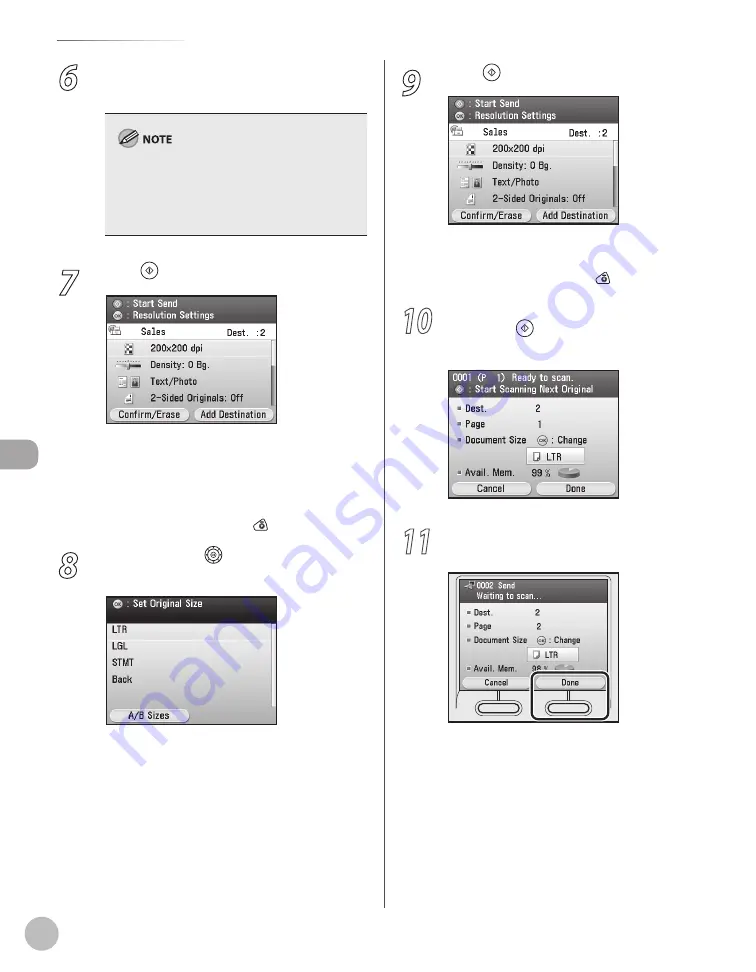
6
Repeat step 4 and 5 until all the
destinations are set.
Up to 32 new destinations can be specified. If
you add destinations, specify them from
Address Book.
You cannot specify the detail settings for each
destination.
–
–
7
Press (Start).
Scanning starts if the original is placed in the
feeder, and the scanned data is sent to the
specified destination when scanning is
complete.
To cancel scanning, press the left Any key to
select <Cancel> or press (Stop).
8
Use [
▼
], [
▲
] or (Scroll Wheel) to select
the original size, then press [OK].
–
–
9
Press (Start).
Scanning starts.
To cancel scanning, press the left Any key to
select <Cancel> or press (Stop).
10
Follow the instructions on the display,
then press (Start) once for each
original.
11
When scanning is complete, press the
right Any key to select <Done>.
The scanned data is sent to the specified
destination.
–
–
Содержание Color imageCLASS MF9220Cdn
Страница 25: ...Legal Notices xxiv Legal Notices ...
Страница 53: ...Before Using the Machine 1 28 Timer Settings ...
Страница 83: ...2 30 Setting Paper Size and Type Originals and Print Media ...
Страница 147: ...3 64 Storing Editing One Touch Registering Destinations in the Address Book ...
Страница 150: ...Copying 4 3 Overview of Copy Functions p 4 23 p 4 31 p 4 37 ...
Страница 224: ...Fax 5 3 Overview of Fax Functions p 5 30 p 5 56 p 5 63 p 5 58 p 5 121 p 5 113 ...
Страница 373: ...Fax 5 152 Checking Changing the Status of Fax Documents in Memory ...
Страница 376: ...E mail 6 3 Overview of E Mail Functions ...
Страница 384: ...Printing 7 3 Overview of Print Functions p 7 10 p 7 11 p 7 8 ...
Страница 411: ...Printing 7 30 Checking and Canceling Print Jobs Checking Print Logs ...
Страница 414: ...Scanning 8 3 Overview of Scanner Functions ...
Страница 425: ...Scanning 8 14 Basic Scanning Operations ...
Страница 503: ...12 48 If You Cannot Solve a Problem Troubleshooting ...


