


148
of 216
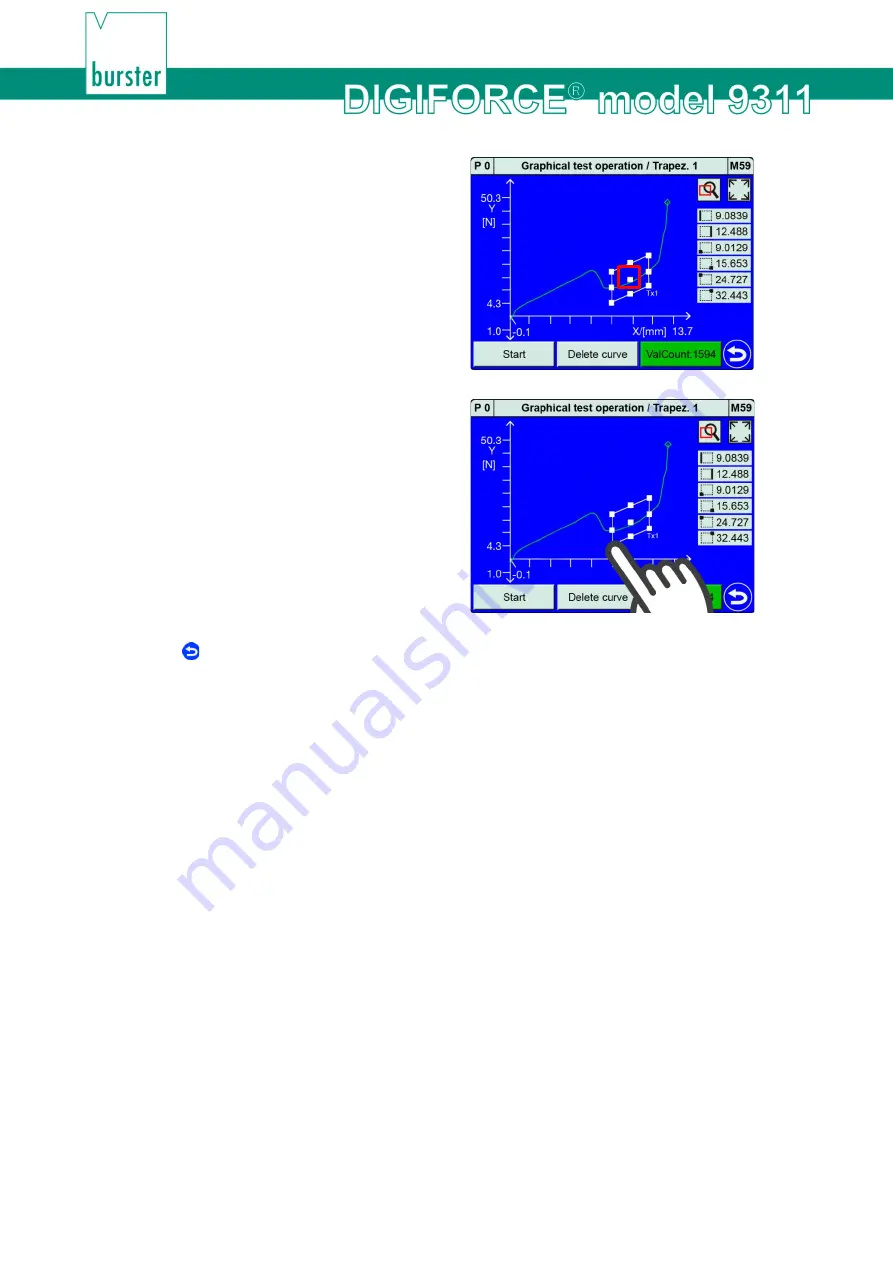
2
Place your finger in the centre of the
trapezoid and drag it in the direction in which
you want to move the trapezoid.
3
Place your finger on one of the corners and
drag it across the touchscreen to change the
limits.
4
Tap to close the setup.
Configuring a trapezoid - AutoSize
You can use
[AutoSize]
to fit the Trapezoid size initially to the current graph scale. You can then choose
to adjust the size by changing the limits. You can adjust the limits either as described in "Configuring a
trapezoid – Limits" in section 6.3.5.4 "Graphical Test Operation – Configuring a trapezoid" on page 145 or
in the "Trapezoid window configuration" menu (M13) as described in section 6.3.3.2 “Trapezoid” on page
Note:
If you are configuring a graphical evaluation element for a measurement curve with a forward
and return segment, make sure you assign the correct curve segment to the element
("Forward", "Return" or "Complete curve"). To specify the curve segment, open the "Trapezoid
window configuration" menu (M13) using the
[Numerical]
button.
Содержание DIGIFORCE 9311
Страница 3: ...3of 216...


