


Scanning
45
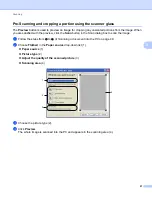
3
d
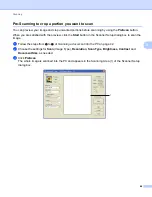
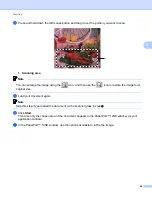
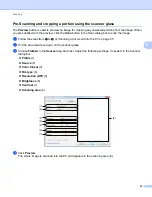
Press and hold down the left mouse button and drag it over the portion you want to scan.
1 Scanning area
Note
You can enlarge the image using the
icon, and then use the
icon to restore the image to its
original size.
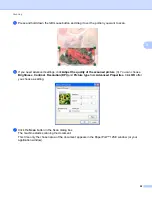
e
Load your document again.
Note
Skip this step if you loaded the document on the scanner glass in step
f
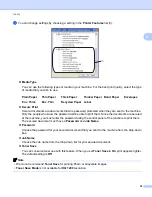
Click
Start
.
This time only the chosen area of the document appears in the PaperPort™ 12SE window (or your
application window).
g
In the PaperPort™ 12SE window, use the options available to refine the image.
1
Содержание DCP-7060D
Страница 9: ...Section I Machine operation keysI Using the control panel 2 ...
Страница 133: ...Section III Apple Macintosh III Printing and Faxing 126 Scanning 155 ControlCenter2 171 Remote Setup 193 ...
Страница 145: ...Printing and Faxing 137 8 Mac OS X 10 5 x to 10 6 x Choose Even Only and print and then choose Odd Only and print ...
Страница 158: ...Printing and Faxing 150 8 c Choose Send Fax from the pop up menu d Choose Facsimile from the Output pop up menu ...
Страница 195: ...ControlCenter2 187 10 ...
Страница 203: ...Section IV Using The Scan key IV Scanning For USB cable users 196 Network Scanning 201 ...


