


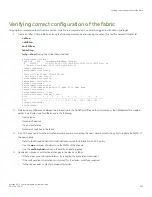


Verifying correct configuration of the fabric
Copying the command outputs from this section into a file is recommended. You must be logged in with Admin privileges.
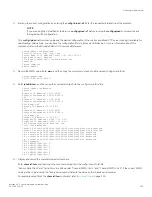
1. Create an "after" SAN profile by entering the following commands and copying the output to a text file named SANafter.txt:
•
nsShow
•
nsAllShow
•
switchShow
•
fabricShow
•
lscfg --show
(if using the Virtual Fabric feature)
switch:admin> nsshow
Type Pid COS PortName NodeName TTL(sec)
N 020f00; 3;10:00:00:01:73:00:29:46;10:00:00:01:73:00:29:46; na
Fabric Port Name: 20:0f:00:60:69:90:03:f0
<output truncated>
switch:admin> nsallshow
{
020f00 021fda 021fdc 021fe0 021fe1
5 Nx_Ports in the Fabric}
switch:admin> switchshow
switchName: rsl8-st03-01
<output truncated>
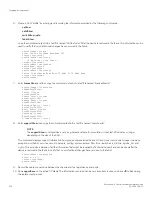
switch:admin> fabricshow
Switch ID Worldwide Name Enet IP Addr FC IP Addr Name
<output truncated>
switch:admin>lscfg --show
Created switches: 128(ds) 1 2(bs)
Port 0 1 2 3 4 5 6 7 8 9
-------------------------------------------------------------------
FID 1 | 1 | 1 | 1 | 1 | 128 | 128 | 128 | 128 | 128 |
<output truncated>
switch:admin>
2. Determine any differences between the information in the SANafter.txt file and the information in the SANbefor.txt file created
earlier. In particular, look for differences in the following:
•
Device types
•
Number of devices
•
ISL and port states
•
Number of switches in the fabric
3. If an SCC policy exists on the active fabric where you are connecting the new chassis, modify the policy to include the WWN of
the new chassis.
•
Refer to the
Brocade Fabric OS Administration Guide
for information on SCC policy.
•
Use the
wwn
command to determine the WWN of the chassis.
•
Use the
secPolicyAdd
command to modify an existing policy.
4. Resolve any issues or unintentional changes to the device or fabric:
•
If there are any mechanical problems, try reseating the associated component.
•
If the configuration information is not correct for the device, modify as required.
•
If other issues exist, contact your support provider.
Verifying correct configuration of the fabric
Brocade X6-4 Director Hardware Installation Guide
53-1004106-07
223
Содержание X6-4
Страница 12: ...Brocade X6 4 Director Hardware Installation Guide 12 53 1004106 07...
Страница 20: ...Brocade X6 4 Director Hardware Installation Guide 20 53 1004106 07...
Страница 28: ...Brocade X6 4 Director Hardware Installation Guide 28 53 1004106 07...
Страница 64: ...Brocade X6 4 Director Hardware Installation Guide 64 53 1004106 07...
Страница 86: ...Brocade X6 4 Director Hardware Installation Guide 86 53 1004106 07...
Страница 102: ...Brocade X6 4 Director Hardware Installation Guide 102 53 1004106 07...
Страница 130: ...Brocade X6 4 Director Hardware Installation Guide 130 53 1004106 07...
Страница 140: ...Brocade X6 4 Director Hardware Installation Guide 140 53 1004106 07...
Страница 166: ...Brocade X6 4 Director Hardware Installation Guide 166 53 1004106 07...
Страница 196: ...Brocade X6 4 Director Hardware Installation Guide 196 53 1004106 07...
Страница 200: ...Brocade X6 4 Director Hardware Installation Guide 200 53 1004106 07...
Страница 204: ...Brocade X6 4 Director Hardware Installation Guide 204 53 1004106 07...
Страница 210: ...Brocade X6 4 Director Hardware Installation Guide 210 53 1004106 07...
Страница 224: ...Brocade X6 4 Director Hardware Installation Guide 224 53 1004106 07...
Страница 238: ...Brocade X6 4 Director Hardware Installation Guide 238 53 1004106 07...