


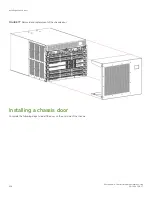


Chassis door
•
•
•
•
Chassis door overview
The chassis door must be installed to ensure that the device meets EMI and other regulatory certifications. A receiving hole is located on
each corner on the back side of the door. Each hole snaps into a ball stud located on a matching corner of the chassis.
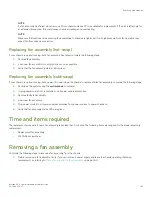
Time and items required
The first-time installation procedure for the chassis door takes 15 minutes or longer because you must remove the logo bezel and install
ball studs to mount the door. Thereafter, removal and reinstallation should take less than 5 minutes.
Required for installation are the door assembly, packaged separately from the chassis, and ball studs for the door. Ball studs are
packaged with the door assembly.
Removing a chassis door
Support the door to prevent it from falling. Pull and remove the door. It will pop off the ball studs.
Brocade X6-4 Director Hardware Installation Guide
53-1004106-07
205
Содержание X6-4
Страница 12: ...Brocade X6 4 Director Hardware Installation Guide 12 53 1004106 07...
Страница 20: ...Brocade X6 4 Director Hardware Installation Guide 20 53 1004106 07...
Страница 28: ...Brocade X6 4 Director Hardware Installation Guide 28 53 1004106 07...
Страница 64: ...Brocade X6 4 Director Hardware Installation Guide 64 53 1004106 07...
Страница 86: ...Brocade X6 4 Director Hardware Installation Guide 86 53 1004106 07...
Страница 102: ...Brocade X6 4 Director Hardware Installation Guide 102 53 1004106 07...
Страница 130: ...Brocade X6 4 Director Hardware Installation Guide 130 53 1004106 07...
Страница 140: ...Brocade X6 4 Director Hardware Installation Guide 140 53 1004106 07...
Страница 166: ...Brocade X6 4 Director Hardware Installation Guide 166 53 1004106 07...
Страница 196: ...Brocade X6 4 Director Hardware Installation Guide 196 53 1004106 07...
Страница 200: ...Brocade X6 4 Director Hardware Installation Guide 200 53 1004106 07...
Страница 204: ...Brocade X6 4 Director Hardware Installation Guide 204 53 1004106 07...
Страница 210: ...Brocade X6 4 Director Hardware Installation Guide 210 53 1004106 07...
Страница 224: ...Brocade X6 4 Director Hardware Installation Guide 224 53 1004106 07...
Страница 238: ...Brocade X6 4 Director Hardware Installation Guide 238 53 1004106 07...