background image

189


Web Configurator Easy Access 
 

With UPnP, you can access web-based configuration for the BiPAC 7800DXL without first finding out 
the IP address of the router. This helps if you do not know the router’s IP address. 
Follow the steps below to access web configuration. 

 
Step 1: 

Click Start and then Control Panel. 

Step 2: 

Double-click Network Connections. 

Step 3: 

Select My Network Places under Other Places.  


Step 4: 

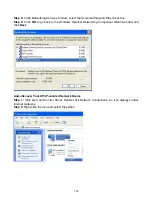
An icon describing each UPnP-enabled device shows under Local Network. 

Step 5: 

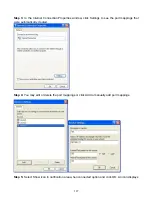
Right-click on the icon of your BiPAC 7800DXL and select Invoke. The web configuration 

login screen displays.  

Step 6: 

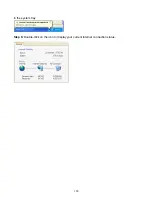
Right-click on the icon of your BiPAC 7800DXL and select Properties. A properties window 

displays basic information about the BiPAC 7800DXL.  


Содержание BiPAC 7800DXL

Страница 1: ...BiPAC 7800DXL Dual band Wireless N 3G 4G LTE ADSL2 Router User Manual Version Released 2 23 Last revised date January 15 2013 ...

Страница 2: ...tion 10 TheFrontLEDs 10 TheRearPorts 11 Cabling 12 Chapter 3 Basic Installation 13 Connecting Your Router 14 Network Configuration 16 ConfiguringaPCinWindows7 16 ConfiguringaPCinWindowsVista 19 ConfiguringaPCinWindowsXP 22 ConfiguringPCinWindows2000 24 ConfiguringPCinWindows95 98 Me 25 ConfiguringPCinWindowsNT4 0 26 Factory Default Settings 27 Information from your ISP 29 Easy Sign On EZSO 30 Chap...

Страница 3: ...Ethernet 112 3G LTE 119 DSL 122 SNR 123 System 124 Internet Time 124 Firmware Upgrade 125 Backup Update 126 Access Control 127 Mail Alert 128 Configure Log 129 USB 130 Storage Device Info 130 User Account 131 Print Server 136 DLNA 141 IPTunnel 143 IPv6inIPv4 143 IPv4inIPv6 145 Security 146 IP Filtering Outgoing 146 IP Filtering Incoming 148 MAC Filtering 150 Blocking WAN PING 151 Time Restriction ...

Страница 4: ...179 DNS Proxy 181 StaticARP 182 UPnP 183 Certificate 190 Trusted CA 190 Multicast 193 Management 195 SNMP Agent 195 TR 069 Client 196 Remote Access 198 Power Management 199 Time Schedule 200 Diagnostics 201 Push Service 201 Diagnostics 202 Fault Management 203 Restart 204 Chapter 5 Troubleshooting 205 Appendix Product Support Contact 207 ...

Страница 5: ...ress space than IPv4 This results from the use of a 128 bit address whereas IPv4 uses only 32 bits The new address space thus supports 2128 about 3 4 1038 addresses This expansion provides flexibility in allocating addresses and routing traffic and eliminates the primary need for network address translation NAT which gained widespread deployment as an effort to alleviate IPv4 address exhaustion IP...

Страница 6: ...D and capability set Alternatively multiple Virtual APs might advertise the same SSID but a different capability set allowing access to be provided via Web Portal WEP and WPA simultaneously Where APs are shared by multiple providers Virtual APs provide each provider with separate authentication and accounting data for their users as well as diagnostic information without sharing sensitive manageme...

Страница 7: ...red Equivalent Privacy WEP support SOHO Firewall Security with DoS Preventing and Packet Filtering Quality of Service Control for traffic prioritization and Bandwidth management Universal Plug and Play UPnP Compliance Supports IPTV Application 2 Supports Storage Service Ease of Use with Quick Installation Wizard EZSO ADSL Compliance Compliant with ADSL Standard Full rate ANSI T1 413 Issue 2 G dmt ...

Страница 8: ...ocol port number and address Firewall Built in NAT Firewall Stateful Packet Inspection SPI DoS attack prevention Packet Filtering v4 v6 port source IP address destination IP address MAC address URL Content Filtering v4 v6 string or domain name detection in URL string MAC Filtering Quality of Service Control Supports the DiffServ approach Traffic prioritization and bandwidth management based on IPv...

Страница 9: ...with IEEE 802 11 a b g n standards 2 4 GHz and 5GHz radio band for wireless Up to 300 300 Mbps wireless operation rate 64 128 bits WEP supported for encryption WPS Wi Fi Protected Setup for easy setup Supports WPS v2 Wireless Security with WPA PSK WPA2 PSK support WDS repeater function support USB Application Server 3G LTE dongle support Storage FTP server Samba server DLNA Printer Server ...

Страница 10: ...d local management Supports DHCP server client relay Supports SNMP v1 v2 MIB I and MIB II TR 069 1 supports remote management Available Syslog Mail alert for WAN IP changed Auto failover and fallback Push Service 1 On request for Telco ISP projects 2 IPTV application may require subscription to IPTV services from a Telco ISP 3 Specifications on this datasheet are subject to change without prior no...

Страница 11: ...t USB 2 0 port for storage service and printer server Ethernet 4 port 10 100 1000Mbps auto crossover MDI MDI X Switch EWAN Ethernet port 4 can be configured as a WAN interface for Broadband connectivity Factory default reset button WPS push button WPS push button Power jack Power switch ...

Страница 12: ...tents BiPAC 7800DXL Dual band Wireless N 3G 4G LTE ADSL2 Router Quick Start Guide CD containing the on line manual Two fixed dual band antennas RJ 45 Cat 5e STP Ethernet cable RJ 11 ADSL telephone cable Power adapter Splitter Micro filter Optional ...

Страница 13: ...3 Do not open or repair the case yourself If the router is too hot turn off the power immediately and have it repaired at a qualified service center 4 Avoid using this product and all accessories outdoors Attention 1 Place the router on a stable surface 2 Only use the power adapter that comes with the package Using a different voltage rating power adapter may damage the router ...

Страница 14: ...Green Wireless connection established 3 Wireless Green blinking Sending receiving data Green blinking WPS configuration being in progress 4 WPS Off WPS process completed or WPS is off Green Blinking DSL synchronizing or waiting for DSL synchronizing Green Successfully connected to an ADSL DSLAM Line Sync 5 DSL Off DSL cable unplugged Red Obtaining IP failure Green Having obtained an IP address suc...

Страница 15: ...PS Push WPS button to trigger Wi Fi Protected Setup function 5 USB Connect the USB device Printer USB 2 0 storage 3G LTE 3G USB modem to this port 6 Ethernet Connect a UTP Ethernet cable Cat 5 or Cat 5e to one of the four LAN ports when connecting to a PC or an office home network of 10Mbps 100Mbps 1000Mbps Note Port 4 can be configured as a WAN Interface for Broadband connectivity 7 DSL Connect t...

Страница 16: ... you have a line filter with all devices e g telephones fax machines analogue modems connected to the same telephone line and the wall socket unless you are using a Central Splitter or Central Filter installed by a qualified and licensed electrician and ensure that all line filters are correctly installed and the right way around Missing line filters or line filters installed the wrong way around ...

Страница 17: ...o obtain an IP address through a DHCP server or a fixed IP address that must be in the same subnet as the router The default IP address of the router is 192 168 1 254 and the subnet mask is 255 255 255 0 i e any attached PC must be in the same subnet and have an IP address in the range of 192 168 1 1 to 192 168 1 253 The best and easiest way is to configure the PC to get an IP address automaticall...

Страница 18: ...14 Connecting Your Router Users can connect the ADSL2 router as the following ADSL Router mode Broadband Router mode ...

Страница 19: ...15 3G LTE Router mode ...

Страница 20: ...tart Click on Control Panel Then click on Network and Internet 2 When the Network and Sharing Center window pops up select and click on Change adapter settings on the left window panel 3 Select the Local Area Connection and right click the icon to select Properties ...

Страница 21: ...ties 5 In the TCP IPv4 properties window select the Obtain an IP address automatically and Obtain DNS Server address automatically radio buttons Then click OK to exit the setting 6 Click OK again in the Local Area Connection Properties window to apply the new configuration ...

Страница 22: ...ies 5 In the TCP IPv6 properties window select the Obtain an IPv6 address automatically and Obtain DNS Server address automatically radio buttons Then click OK to exit the setting 6 Click OK again in the Local Area Connection Properties window to apply the new configuration ...

Страница 23: ...ork 2 Then click on Network and Sharing Center at the top bar 3 When the Network and Sharing Center window pops up select and click on Manage network connections on the left window pane 4 Select the Local Area Connection and right click the icon to select Properties ...

Страница 24: ...ties 6 In the TCP IPv4 properties window select the Obtain an IP address automatically and Obtain DNS Server address automatically radio buttons Then click OK to exit the setting 7 Click OK again in the Local Area Connection Properties window to apply the new configuration ...

Страница 25: ...es 9 In the TCP IPv6 properties window select the Obtain an IPv6 address automatically and Obtain DNS Server address automatically radio buttons Then click OK to exit the setting 10 Click OK again in the Local Area Connection Properties window to apply the new configuration ...

Страница 26: ...Network Connections 2 Double click Local Area Connection 3 In the Local Area Connection Status window click Properties 4 Select Internet Protocol TCP IP and click Properties 5 Select the Obtain an IP address automatically and the Obtain DNS server address automatically radio buttons 6 Click OK to finish the configuration ...

Страница 27: ...t you should install it first Act as shown below 1 On the desktop Click Start Run type cmd then press Enter key in the keyboard the following screen appears 2 Key in command ipv6 install Configuration is OK now you can test whether it works ok ...

Страница 28: ...Dial up Connections 2 Double click Local Area Connection 3 In the Local Area Connection Status window click Properties 4 Select Internet Protocol TCP IP and click Properties 5 Select the Obtain an IP address automatically and the Obtain DNS server address automatically radio buttons 6 Click OK to finish the configuration ...

Страница 29: ... Network and choose the Configuration tab 2 Select TCP IP NE2000 Compatible or the name of your Network Interface Card NIC in your PC 3 Select the Obtain an IP address automatically radio button 4 Then select the DNS Configuration tab 5 Select the Disable DNS radio button and click OK to finish the configuration ...

Страница 30: ... 1 Go to Start Settings Control Panel In the Control Panel double click on Network and choose the Protocols tab 2 Select TCP IP Protocol and click Properties 3 Select the Obtain an IP address from a DHCP server radio button and click OK ...

Страница 31: ...tention If you have forgotten the username and or password of the router you can restore the device to its default setting by pressing the Reset Button more than 5 seconds Device LAN IPv4 settings IPv4 Address 192 168 1 254 Subnet Mask 255 255 255 0 Device LAN IPv6 settings IPv6 Address prefix Default is a link local address and is different from each other as MAC address is different from one to ...

Страница 32: ...dresses continuing from 192 168 1 100 through 192 168 1 199 The PPPoE function is enabled to automatically get the WAN port configuration from the ISP IPv6 LAN Port WAN Port IPv6 address prefix Default is a link local address and is different from each other as MAC address is different from one to one For example fe80 204 edff fe01 1 64 the prefix initiates by fe80 DHCP server function Enabled The...

Страница 33: ...your ISP when you connect or be set manually PPPoA RFC2364 VPI VCI VC LLC based multiplexing Username Password and Domain Name System DNS IP address it can be automatically assigned by your ISP when you connect or be set manually DHCP Client VPI VCI VC LLC based multiplexing Domain Name System DNS IP address it can be automatically assigned by your ISP when you connect or be set manually IPoA RFC1...

Страница 34: ...that you enter some basic information that you have obtained from your ISP By following the instructions given carefully and through the information you provide the router will be configured in no time and you will find yourself surfing the internet sooner than you realize DSL mode Before configuring with DSL mode please confirm you have correctly connected the DSL line and it is now synchronized ...

Страница 35: ...will enter the web configuration page 5 After the configuration is successful click Next to Wireless button and you may proceed to configure the Wireless setting The 7800DXL supports dual band wireless here you can set to activate wireless on which band or both and set the SSID and encryption Key 1 Leave it empty to disable the wireless security 2 Fill in the Key and the encryption mode will be WP...

Страница 36: ...32 6 Continue to set 5GHz wireless 7 Success in configuring the EZSO Click link 192 168 1 254 it will lead you to the following page ...

Страница 37: ...the username password from your ISP for IP and DNS settings also refer to your ISP Here IPv6 service is enabled by default 3 Wait while the device is configured 4 WAN port configuration is success Click Done web configuration will be loaded you will enter the web configuration page ...

Страница 38: ...etting The 7800DXL supports dual band wireless here you can set to activate wireless on which band or both and set the SSID and encryption Key 1 Leave it empty to disable the wireless security 2 Fill in the Key and the encryption mode will be WPA2 PSK AES 6 Continue to set 5GHz wireless 7 Success in configuring the EZSO ...

Страница 39: ...35 Click 192 168 1 254 it will lead you to the following page ...

Страница 40: ... the APN username password from your ISP for settings about Authentication method PIN etc also refer to your ISP 3 Wait while the device is configured 4 WAN port configuration is success Click Done web configuration will be loaded you will enter the web configuration page ...

Страница 41: ...etting The 7800DXL supports dual band wireless here you can set to activate wireless on which band or both and set the SSID and encryption Key 1 Leave it empty to disable the wireless security 2 Fill in the Key and the encryption mode will be WPA2 PSK AES 6 Continue to set 5GHz wireless 7 Success in configuring the EZSO ...

Страница 42: ...38 Click 192 168 1 254 it will lead you to the following page ...

Страница 43: ...the IP address of your router which by default is 192 168 1 254 and click or press Enter key on the keyboard a login prompt window will appear The default root username and password are admin and admin respectively Congratulations You are now successfully logged in to the Firewall Router ...

Страница 44: ...vigation pane links you directly to the setup pages which include Status Summary WAN Statistics Bandwidth Usage Route 3G LTE Status ARP DHCP Log Quick Start Quick Start Configuration LAN Wireless 2 4G wl0 Wireless 5G wl1 WAN System USB IP Tunnel Security Quality of Service NAT Wake On LAN Advanced Setup Routing DNS Static ARP UPnP Certificate Multicast Management Diagnostics ...

Страница 45: ...ves users an easy access to the information about the working router and access to view the current status of the router Here Summary WAN Statistics Bandwidth Usage 3G LTE Status Route ARP DHCP and Log subsections are included ...

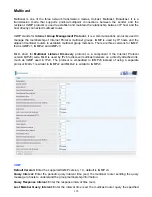
Страница 46: ...fault is a Link Local address but when connects to ISP it will display the Global Address like above figure MAC Address Displays the MAC address DSL PHY and Driver Version Display DSL PHY and Driver version Wireless Driver Version Displays wireless driver version WAN Line Rate Upstream Kbps Displays Upstream line Rate in Kbps Line Rate Downstream Kbps Displays Downstream line Rate in Kbps Default ...

Страница 47: ...ce The WAN connection interface Description The description of this connection Type The protocol used by this connection Status To disconnect or connect the link Connection Time The WAN connection time since WAN is up IPv4 Address The WAN IPv4 Address the device obtained IPv6 Address The WAN IPv6 Address the device obtained ...

Страница 48: ...each LAN interface P1 P4 indicates the four LAN interfaces Bytes Display the Received and Transmitted traffic statistics in Bytes Packets Display the Received and Transmitted traffic statistics in Packets Errors Display the statistics of errors arising in Receiving or Transmitting data Drops Display the statistics of drops arising in Receiving or Transmitting data Reset Press this button to refres...

Страница 49: ... to refresh the statistics xTM The Statistics xTM screen displays all the xTM statistics Port Number Shows number of the port for xTM In Octets Number of received octets over the interface Out Octets Number of transmitted octets over the interface In Packets Number of received packets over the interface Out Packets Number of transmitted packets over the interface In OAM Cells Number of OAM cells r...

Страница 50: ...DSL link Link Power State Show link output power state Line Coding Trellis Trellis on off SNR Margin 0 1 dB show the Signal to Noise Ratio SNR margin Attenuation 0 1 dB This is estimate of average loop attenuation of signal Output Power 0 1 dBm show the output power Attainable Rate Kbps The sync rate you would obtain Rate Kbps show the downstream and upstream rate in Kbps ...

Страница 51: ...number of RS words with uncorrectable errors HEC Errors Total number of Header Error Checksum errors OCD Errors Total number of out of cell Delineation errors LCD Errors Total number of Loss of Cell Delineation Total Cells Total number of cells Data Cells Total number of data cells Bit Errors Total number of bit errors Total ES Total Number of Errored Seconds Total SES Total Number of Severely Err...

Страница 52: ...48 When it is OK the following test result window will appear You can view the quality of ADSL connection Here the connection is OK Reset Click this button to reset the statistics ...

Страница 53: ...usage LAN Note P4 can be configured as EWAN and when the device is in EWAN profile there is no P4 EWAN interface as P4 is working as a WAN port DSL Press View LAN Transmitted button to change the diagram to the statistics from a Received Bytes of view Note means Ethernet port 3 and the traffic information of the port 3 is identified with green the same color with P3 in the diagram other ports all ...

Страница 54: ...50 When you press View WAN Traffic concurrently button the WAN Bandwidth Usage pops up so that users can view the WAN traffic concurrently ...

Страница 55: ...51 WAN Service Press View WAN Transmitted button to change the diagram to the statistics from a Received Bytes of view ...

Страница 56: ...52 Press View LAN Traffic concurrently button to directly switch to the LAN Bandwidth Usage page to view the LAN traffic concurrently ...

Страница 57: ...cates current 3G signal strength Network Name The network name that the device is connected to Network Mode The current operation mode for 3G LTE card it depends on service provider and card s limitation GSM or UMTS Card Name The name of the 3G LTE card Card Firmware The current firmware for the 3G LTE card ...

Страница 58: ... not the subnet G Show that the outside gateway is needed to forward packets in this route R Show that the route is reinstated from dynamic routing D Show that the route is dynamically installed by daemon or redirecting M Show the route is modified from routing daemon or redirect Metric Display the number of hops counted as the Metric of the route Service Display the service that this route uses I...

Страница 59: ...the route resolving is processing well M Marked as permanent entry the route is permanent P publish entry publish this route item MAC Address Shows the MAC address that is corresponded to the IP address of the device it is mapped to Device here refers to the physical interface it is a concept to identify Clients from LAN or WAN For example the Clients in LAN here displays br0 Neighbor Cache Table ...

Страница 60: ...address which is assigned to the host with this MAC address Expires in Show the remaining time after registration Note The devices are free to access each other through device name on condition that they all obtain their IPs from the DHCP If the device IP is obtained from the DHCP other devices can access the device through the device name For example the PC ytt PC can ping the billion 17bc6f1 usi...

Страница 61: ...cumulated up to the present time You can trace historical information with this function And the log policy can be configured in Configure Log section Refresh Click to update the system log Clear Click to clear the current log from the screen ...

Страница 62: ...ng Outgoing IP Filtering Incoming URL Filter to determine if you want to log this information Also you can turn to Configure Log section below to determine the level to log the message You can use this to track potential threats to your system and network Refresh Click to update the system log Clear Click to clear the current log from the screen ...

Страница 63: ...o internet DSL mode 1 Select DSL press Continue to go on to next step 2 Enter the username password from your ISP for IP and DNS settings also refer to your ISP Here IPv6 service is enabled by default If the DLS line is not synchronized the page will pop up warning of the DSL connection failure ...

Страница 64: ...s button and you may proceed to configure the Wireless setting The 7800DXL supports dual band wireless here you can set to activate wireless on which band or both and set the SSID and encryption Key 1 Leave it empty to disable the wireless security 2 Fill in the Key and the encryption mode will be WPA2 PSK AES 6 Continue to set 5GHz wireless ...

Страница 65: ...61 7 Success If Quick Start is finished user can turn to Status Summary to see the basic information ...

Страница 66: ...if you only want to configure Wireless press Jump to Wireless setting 2 Enter the username password from your ISP for IP and DNS settings also refer to your ISP Here IPv6 service is enabled by default 3 Wait while the device is configured 4 WAN port configuration is successful ...

Страница 67: ... band wireless connections in Quick Start part users can only enable or disable the wireless on the band and the exact SSID and encryption Key 1 Leave it empty to disable the wireless security 2 Fill in the Key and the encryption mode will be WPA2 PSK AES For detail setting please go to the Wireless part in this Manual 6 Continue to set 5GHz wireless ...

Страница 68: ...64 7 Success ...

Страница 69: ... only want to configure Wireless press Jump to Wireless setting 2 Select the 3G mode and enter the APN username password from your ISP and check with your ISP with the authentication method setting 3 Wait while the device is configured 4 WAN port configuration is successful ...

Страница 70: ... band wireless connections in Quick Start part users can only enable or disable the wireless on the band and the exact SSID and encryption Key 1 Leave it empty to disable the wireless security 2 Fill in the Key and the encryption mode will be WPA2 PSK AES For detail setting please go to the Wireless part in this Manual 6 Continue to set 5GHz wireless ...

Страница 71: ...67 7 Success If Quick Start is finished user can turn to Status Summary to see the basic information ...

Страница 72: ... display the sub items that will allow you to further configure your router LAN Wireless 2 4G wl0 Wireless 5G wl1 WAN System USB IP Tunnel Security Quality of Service NAT and Wake On LAN The function of each configuration sub item is described in the following sections ...

Страница 73: ... is it is forwarded to all ports With IGMP snooping multicast traffic of a group is only forwarded to ports that have members of that group When enabled you will see two modes Standard Mode In standard mode multicast traffic will flood to all bridge ports when no client subscribes to a multicast group Blocking Mode In blocking mode the multicast data will be blocked when there are no client subscr...

Страница 74: ...he DHCP Server used to assign to the Clients End IP Address The end IP address f the range the DHCP Server used to assign to the Clients Leased Time hour The leased time for each DHCP Client Option 66 Click Enable to activate DHCP option 66 for some special devices like IPTV Set Box The devices can get firmware or some special service from the TFTP server User needs to set the IP or hostname of th...

Страница 75: ...multiple virtual IP interfaces on this router It helps to connect two or more local networks to the ISP or remote node IP Alias Check whether to enable this function IP Address Specify an IP address on this virtual interface Subnet Mask Specify a subnet mask on this virtual interface Click Apply to apply your settings ...

Страница 76: ...te its own addresses using a combination of locally available information MAC address and information prefix advertised by routers Routers advertise prefixes that identify the subnet s associated with a link while hosts generate an interface identifier that uniquely identifies an interface on a subnet An address is formed by combining the two When using stateless configuration you needn t configur...

Страница 77: ...LA address in the RA messages ULA unique local address is an IPv6 address in the block fc00 7 It is approximately the IPv6 counterpart of the IPv4 private address They are not routable in the global IPv6 Internet RADVD Type The way that ULA prefix is generated Randomly Generated Statically Configured select to set manually in the following parameters Prefix Set the prefix manually Preferred Life T...

Страница 78: ...de thus the PCs in LAN are configured through RA mode to obtain the prefix message and generate an address using a combination of locally available information MAC address and information prefix advertised by routers With both DHCPv6 and Issue Router Advertisement Enabled With this method the PCs addresses in LAN are configured like above method but they can obtain such information like DNS from D...

Страница 79: ...e PCs addresses are configured the same as in IPv4 that is addresses are assigned by DHCPv6 server With both DHCPv6 and Issue Router Advertisement Enabled With this method the PCs addresses are configured the same like above and the address information in RA packets will be neglected ...

Страница 80: ...ical location A VLAN has the same attributes as a physical LAN but it allows for end stations to be grouped together even if they are not located on the same network switch Each group will perform as an independent network To support this feature you must create mapping groups with appropriate LAN and WAN interfaces using the Add button Please Note P4 can be configured as EWAN and when the device ...

Страница 81: ...rfaces you want to group as a single group from Available LAN Interfaces Automatically Add Clients with following DHCP Vendor IDs Enter the DHCP Vendor IDs for which you want the Clients automatically added into the group DHCP vendor ID DHCP 60 is an Authentication for DHCP Messages Click Apply to confirm your settings and your added group will be listed in the Interface Grouping table below ...

Страница 82: ...p add the DHCP vendor ID string By configuring a DHCP vendor ID string any DHCP client request with the specified vendor ID DHCP option 60 will be denied an IP address from the local DHCP server If a vendor ID is configured for a specific client device please REBOOT the client device attached to the modem to allow it to obtain an appropriate IP address Each LAN interface can only be added into one...

Страница 83: ... connection for users Wl0 operating on 2 4GHz has sub items as Basic Security MAC Filter Wireless Bridge Advanced and Station Info here Wl1 running on 5GHz are to set with the same ways as in Wl0 Note The dual band wireless is simultaneous with different clients not the same one Users can freely choose the optimum radio band wireless connection base on your environment ...

Страница 84: ... change the default wlan ap 2 4g to a unique ID name to the AP already built in to the router s wireless interface It is case sensitive and must not excess 32 characters Make sure your wireless clients have exactly the SSID as the device in order to get connected to your network Note SSID is case sensitive and must not exceed 32 characters BSSID Basic Set Service Identifier it is a local managed I...

Страница 85: ...accounting data for their users as well as diagnostic information without sharing sensitive management traffic or data between providers You can enable the virtual AP Here you can enable some Virtual APs according to the request And the other parameters of virtual APs are the same to the above Click Apply to apply your settings ...

Страница 86: ...nfiguration Manual Setup AP Select SSID select the SSID you want these settings apply to Network Authentication Open WEP Encryption Select to enable or disable WEP Encryption Here select Enable Encryption Strength Select the strength 128 bit or 64 bit Current Network Key Select the one to be the current network key Please refer to key 1 4 below Network Key 1 4 Enter 13 ASCII characters or 26 hexad...

Страница 87: ...r the port number of RADIUS authentication server here RADIUS Key Enter the password of RADIUS authentication server WEP Encryption Select to enable or disable WEP Encryption Here select Enable Current Network Key Select the one to be the current network key Please refer to key 2 3 below Network Key 1 4 Enter 13 ASCII characters or 26 hexadecimal digits for 128 bit encryption keys Enter 5 ASCII ch...

Страница 88: ...ntication server WPA WAPI Encryption There are two Algorithms AES Advanced Encryption Standard and TKIP Temporal Key Integrity Protocol which help to protect the wireless communication WPA PSK WPA2 PSK WPA WAPI passphrase Enter the WPA WAPI passphrase you can click here to display to view it WPA Group ReKey Internal The period of renewal time for changing the security key automatically between wir...

Страница 89: ...is in seconds RADIUS Server Port Enter the port number of RADIUS authentication server here RADIUS Key Enter the password of RADIUS authentication server WPA WAPI Encryption There are two Algorithms AES Advanced Encryption Standard and TKIP Temporal Key Integrity Protocol which help to protect the wireless communication Mixed WPA2 WPA WPA2 Preauthentication When a wireless client wants to handoff ...

Страница 90: ...on Standard and TKIP Temporal Key Integrity Protocol which help to protect the wireless communication Mixed WPA2 WPA PSk WPA WAPI passphrase enter the WPA WAPI passphrase you can click here to display to view it WPA Group ReKey Internal The period of renewal time for changing the security key automatically between wireless client and Access Point AP The unit is second WPA WAPI Encryption There are...

Страница 91: ...igure WPS WPS Select enable to enable WPS function Please note that WPS can only be available when WPA2 PSK or OPEN mode is configured Note 1 WPS feature is only available when in WPA2 or OPEN mode in security settings 2 Here wireless can be configured as Registrar and Enrollee mode respectively When AP is configured as Registrar you should select Configured in the WPS AP Mode below and default WP...

Страница 92: ...m Enrollee Station 16837546 in this example Or else users can alternatively enter the authorized station MAC Help it is to help users to understand the concept and correct operation 3 Click Station PIN Station MAC Note Users can alternatively input PIN from Enrollee Station or enter the authorized station MAC ...

Страница 93: ...the wireless client s WPS utility eg Ralink Utility Set the Config Mode as Enrollee press the WPS button on the top bar select the AP eg Wlan ap 2 4g from the WPS AP List column Then press the PIN button located on the middle left of the page to run the scan ...

Страница 94: ...s SSID and security settings will now be configured to match the SSID and security settings of the registrar You can check the message in the red ellipse with the security parameters you set here we all use the default ...

Страница 95: ...91 Configure AP as Enrollee Add Registrar with PIN Method 1 Set AP to Unconfigured Mode and Click Config AP button ...

Страница 96: ...ty eg Ralink Utility Set the Config Mode as Registrar Enter the PIN number 13076542 device for example in the PIN Code column then choose the correct AP eg wlan ap 2 4g from the WPS AP List section before pressing the PIN button to run the scan ...

Страница 97: ...router s AP s SSID and security setting will now be configured to match the SSID and security setting of the registrar 4 Do Web Page refresh after ER complete AP Configuration to check the new parameters setting ...

Страница 98: ...ess the wireless network Deny deny the hosts with the following listed MACs to access the wireless network Click Add to add the MACs MAC Address enter the MAC address es The format of MAC address could be xx xx xx xx xx xx or xx xx xx xx xx xx Click Apply to apply your settings and the item will be listed below If you don t need a rule check the remove checkbox and press Remove to delete it ...

Страница 99: ...ridges Wireless Bridge the gateway communicates with other WDS devices only In this mode the gateway doesn t communicate with client devices If your wireless network includes repeaters that use WDS the gateway in wireless bridge mode will also communicate with your repeaters The gateway in wireless bridge mode will not communicate with a repeater that uses a proprietary non WDS mode Bridge Restric...

Страница 100: ...emote bridge MAC addresses Disable Does not restrict the gateway communicating with bridges that have their MAC address listed but it is still open to communicate with all bridges that are in the same network Click Apply to apply your settings ...

Страница 101: ...lect bandwidth The higher the bandwidth the better the performance will be Control Sideband only available for 40MHz It allows you to select upper sideband or lower sideband Sideband refers to the frequency band either above upper sideband or below lower sideband the carrier frequency within which fall the spectral components produced by modulation of a carrier wave 802 11n Rate This allows you to...

Страница 102: ...7 max length will disable the RTS DTIM Interval Delivery Traffic Indication Message DTIM The entry range is a value between 1 and 255 A DTIM is countdown variable that informs clients of the next window for listening to broadcast and multicast messages When the AP has buffered broadcast or multicast messages for associated clients it sends the next DTIM with a DTIM interval value AP clients hear t...

Страница 103: ...ated List all the stations that are associated with the Access Point If a station is idle for too long it is removed from this list Authorized List those devices with authorized access SSID Show the current SSID of the client Interface To show which interface the wireless client is connected to Refresh To get the latest information ...

Страница 104: ...C 7800DXL uses to radio band 2 4GHz and 5GHz simultaneously to run wireless connection for users Wl1 operating on 5GHz has sub items as Basic Security MAC Filter Wireless Bridge Advanced and Station Info here See Wireless 2 4G wl0 ...

Страница 105: ...ork systems WAN Service Two WAN interfaces are provided for WAN connection DSL and Ethernet Click Add to add new WAN connections DSL In DSL mode there are two transfer modes for you to configure for WAN connection namely ATM and PTM configuration of PTM mode is similar as ATM mode here take ATM mode WAN configuration for example Layer2 Interface 2 transfer mode ATM or PTM ...

Страница 106: ...assword obtained from the ISP Service Name The item is for identification purpose user can define it yourselfe Authentication Method Default is Auto Or else your ISP will advise you the appropriate mode Fullcone NAT Enable or disable fullcone NAT Fullcone is a kind of NAT in this mode all requests from the same internal IP address and port are mapped to the same external IP address and port Furthe...

Страница 107: ...smission Unit the size of the largest datagram excluding media specific headers that IP will attempt to send through the interface PPPoE with Pass through Enable or disable PPPoE pass through If it is enabled PCs behind the router can dial itself IGMP Multicast Proxy Check whether to enable this feature IGMP Internet Group Management Protocol Proxy intercepts the IGMP request from Clients and set ...

Страница 108: ...r address Auto and static mode Obtain IPv6 DNS info from a WAN interface WAN Interface selected select one configured IPv6 WAN connection from the menu to be as an IPv6 DNS Static DNS IPv6 Address Primary IPv6 DNS Server Secondary IPv6 DNS Server type the specific primary and secondary IPv6 DNS Server address If you don t need a service select the item you want to remove check the checkbox then pr...

Страница 109: ...onfigure WAN Service if it is OK you can access the internet You can go to Status WAN or Summary to view the WAN connection information if your ISP provides IPv6 service then you will obtain an IPv6 address IPv4 or IPv6 ...

Страница 110: ...e Fullcone NAT or disable Fullcone NAT and only use NAT the default NAT type is Port Restricted cone NAT With Port Restricted cone NAT the restriction includes port numbers Specifically an external host can send a packet with source IP address X and source port P to the internal host only if the internal host had previously sent a packet to IP address X and port P IPv4 Address Select whether to se...

Страница 111: ...the multicast forwarding table it takes over some of the router s job simplifying the router s job and multicast communication MLD Multicast Proxy check whether to enable this function MLD Multicast Listener Discovery Protocol Proxy intercepts the MLD request from Clients a set up the multicast forwarding table it takes over some of the router s job simplifying the router s job and multicast commu...

Страница 112: ...on tagged 0 4094 untagged 1 Here two modes are supported for users to deal with the IP and DNS You can select obtain automatically or manually input the information according to your ISP Obtain an IP address automatically Check whether to enable this function Option 60 Vendor ID Enter the associated information by your ISP This option is used by DHCP clients to optionally identify the vendor type ...

Страница 113: ...on your LAN have their own public IP addresses to access the Internet NAT function can be disabled When enabled a Fullcone NAT parameter will appear you can determine whether to enable Fullcone NAT While only NAT enabled the default NAT type Port Restricted cone NAT will be used Fullcone NAT Enable or disable fullcone NAT Fullcone is a kind of NAT in this mode all requests from the same internal I...

Страница 114: ... enable Fullcone NAT While only NAT enabled the default NAT type Port Restricted cone NAT will be used Fullcone NAT Enable or disable fullcone NAT Fullcone is a kind of NAT in this mode all requests from the same internal IP address and port are mapped to the same external IP address and port Furthermore any external host can send a packet to the internal host by sending a packet to the mapped ext...

Страница 115: ...ion commonly for friendly use 802 1P Priority The parameter indicates the frame priority level from 0 lowest to 7 highest which can be used to prioritize different classes of traffic voice video data etc Enter the priority identification tagged 0 1 untagged 1 802 1Q VLAN ID It is a parameter to specify the VLAN which the frame belongs Enter the VLAN ID identification tagged 0 4094 untagged 1 ...

Страница 116: ...ly use 802 1P Priority The parameter indicates the frame priority level from 0 lowest to 7 highest which can be used to prioritize different classes of traffic voice video data etc Enter the priority identification tagged 0 1 untagged 1 802 1Q VLAN ID It is a parameter to specify the VLAN which the frame belongs Enter the VLAN ID identification tagged 0 4094 untagged 1 ...

Страница 117: ...4 address get from the ISP Dial on demand It is a parameter to let users to dial for connection to internet themselves It is useful when saving internet fees Inactivity Timeout The set Inactivity timeout period unit minutes It is combined use with Dial on Demand users should specify the concrete time interval for dial on demand IPv6 for this service Enable to use IPv6 service IPv6 Address Select w...

Страница 118: ... available interfaces IPv6 DNS Server s operation is similar to IPv4 DNS server There are two modes to get DNS server address Auto and static mode Obtain IPv6 DNS info from a WAN interface WAN Interface selected Select one configured IPv6 WAN connection from the menu to be as an IPv6 DNS Static DNS IPv6 Address Primary IPv6 DNS Server Secondary IPv6 DNS Server Type the specific primary and seconda...

Страница 119: ...dit button to re edit this service settings Here the corresponding WAN Service have been configured if it is OK you can access the internet You can go to Status WAN or Summary to view the WAN connection information if your ISP provides IPv6 service then you will obtain an IPv6 address IPv4 or IPv6 The device summary information ...

Страница 120: ... ISP This option is used by DHCP clients to optionally identify the vendor type and configuration of a DHCP client The information is a string of n octets interpreted by servers Vendors may choose to define specific vendor class identifiers to convey particular configuration or other identification information about a client Option 61 IAID Enter the associated information provided by your ISP You ...

Страница 121: ...er to enable Fullcone NAT While only NAT enabled the default NAT type Port Restricted cone NAT will be used Fullcone NAT Enable or disable fullcone NAT Fullcone is a kind of NAT in this mode all requests from the same internal IP address and port are mapped to the same external IP address and port Furthermore any external host can send a packet to the internal host by sending a packet to the mappe...

Страница 122: ...cates the frame priority level from 0 lowest to 7 highest which can be used to prioritize different classes of traffic voice video data etc Enter the priority identification tagged 0 1 untagged 1 802 1Q VLAN ID It is a parameter to specify the VLAN which the frame belongs Enter the VLAN ID identification tagged 0 4094 untagged 1 ...

Страница 123: ...In this mode 3G LTE work as a backup for the WAN connectivity While if disabled 3G LTE serves as a normal interface and can only be brought up when it has been configured to achieve a mobile connectivity Mode There are 6 options of phone service standards GSM 2G only UTMS 3G only GSM 2G preferred UMTS 3G preferred Automatic and Use 3G LTE 3g dongle settings If you are uncertain what services are a...

Страница 124: ...ork service provider Connect on Demand If you want to make UMTS GPRS call only when there is a packet requesting access to the Internet i e when a program on your computer attempts to access the Internet In this mode you must set Idle Timeout value at same time Click on Connect on Demand the Idle Timeout field will display Idle Timeout Auto disconnect the broadband firewall gateway when there is n...

Страница 125: ...121 Here you can configure WAN Service if it is OK you can access the internet You can go to Status WAN or Summary to view the WAN connection information Here user can see the 3G LTE failover ...

Страница 126: ... and SRA Enable that user can select for this connection Bitswap Enable Allows bitswaping function SRA Enable Allows seamless rate adaptation Click Apply to confirm the settings Click to future configure DSL Select the Test Mode or leave it as default Tone Selection This should be left as default or be configured by an advanced user The frequency band of ADSL is split up into 256 separate tones ea...

Страница 127: ...a measure used in science and engineering that compares the level of a desired signal to the level of background noise It is defined as the ratio of signal power to the noise power SNR Change the value to adjust the DSL link rate more suitable for an advanced user ...

Страница 128: ...ther than those in the drop down list simply enter its IP address in their appropriate blanks provided as shown above Your ISP may also provide an SNTP server for you to use Choose your local time zone from the drop down menu After a successful connection to the Internet the router will retrieve the correct local time from the NTP server you have specified If you prefer to specify an NTP server ot...

Страница 129: ...pgrading Your router s firmware is the software that allows it to operate and provides all its functionality Think of your router as a dedicated computer and the firmware as the software it runs Over time this software may be improved and revised and your router allows you to upgrade the software it runs to take advantage of these changes Clicking on Browse will allow you to select the new firmwar...

Страница 130: ...s It is advisable to backup your router s settings before making any significant changes to your router s configuration Click Backup Settings a window appears click save then browse the location where you want to save the backup file Click Browse and browse to the location where your backup file is saved the click Open Then in the above page click Update Settings the following process indicating s...

Страница 131: ... username and password are admin and admin respectively Remote username for the remote user to login corresponding default username and password are support and support respectively Local username for the general user when logon to the web page only lit items would be listed for common user corresponding default username password are user and user respectively Username the default username for eac...

Страница 132: ...any unexpected event the alert message will be sent to your specified E mail Apply all settings to check whether you want to have a copy of the settings to apply to other WAN port suppose the above Main port is DSL then if you enable this function then Ethernet port will have the same configuration SMTP Server Enter the SMTP server that you would like to use for sending emails Username Enter the u...

Страница 133: ...at the chosen level and above For instance if you set the log level to Critical all critical alert and emergency events are logged but none of the others are recorded Display Level Display the log according to the level you set when you view system log Once you set the display level the logs of the same or higher priority will be displayed Mode Select the mode the system log adopted Three modes lo...

Страница 134: ...ume the used and the remaining capacity of the device Volume Name Display the storage volume name FileSystem Display the storage device s file system format well known is FAT Total Space Display the total space of the storage with unit MB Used Space Display the remaining space of each partition unit MB Unmount Click Unmount button if you want to uninstall the USB device Please Note that first clic...

Страница 135: ...efault user admin Click Add button enter the user account adding page Username user defined name but simpler and more convenient to remember would be favorable Password Set the password Confirm Password Reset the password for confirmation Volume Name Select Volume name as to create access to the volume of the specified partition of the storage For example a user test is setup behind the usb1_1 ...

Страница 136: ...132 Accessing mechanism of Storage In your computer Click Start Run enter 192 168 1 254 ...

Страница 137: ...the User Accounts section When first logged on to the network folder you will see the public folder Public The public sharing space for each user in the USB Storage When user register a USB account and log successfully a private folder the same name as the user account registered exclusive for each user is established Go on to see the details ...

Страница 138: ...134 Access the folder public ...

Страница 139: ...135 When successfully accessed the private folder of each user is established and user can see from the following picture The test fold in the picture is the private space for each user ...

Страница 140: ...print server on the 7800DXL 3 Install the printer drivers on the PC you want to print from On board Print Server Check Enable to activate the print server Printer Name Enter the Printer name for example OfficePrinter Make and Model Enter in the Make and Model information for the printer for example Epson Stylus Photo R290 Note The Printer name can be any text string up to 40 characters It cannot c...

Страница 141: ...137 Step 2 Click Add a Printer Step 3 Click Add a network wireless or Bluetooth printer ...

Страница 142: ...elect a shared printer by name Enter http 7800DXL LAN IP 631 printers printer name or Make sure printer s name is the same as what you set in the 7800DXL earlier For Example http 192 168 1 254 631 printers OfficePrinter OfficePrinter is the Printer Name we setup earlier ...

Страница 143: ...139 Step 6 Click Next to add the printer driver If your printer is not listed and your printer came with an installation disk click Have Disk find it and install the driver Step 7 Click Next ...

Страница 144: ...140 Step 8 Click Next and you are done You will now be able to see your printer on the Devices and Printers Page ...

Страница 145: ...s the types of devices server renderer controller that DLNA supports and the mechanism for accessing media over a network Overall DLNA allows more convenience more choices and enjoyment of your digital content through DLNA certified devices Any DLNA certified devices or software can access the DLNA server With USB storage 7800DXL can serve as a DLNA server On board digital media server Enable to s...

Страница 146: ...142 Take Windows media player in Windows 7 accessing the DLNA server for example for usage of DLNA ...

Страница 147: ...to IPv6 6in4 uses tunneling to encapsulate IPv6 traffic over explicitly configured IPv4 links The 6in4 traffic is sent over the IPv4 Internet inside IPv4 packets whose IP headers have the IP Protocol number set to 41 This protocol number is specifically designated for Ipv6 capsulation 6RD 6RD is a mechanism to facilitate IPv6 rapid deployment across IPv4 infrastructures of internet service provide...

Страница 148: ...Common Bit Length Specify the length of IPv4 address carried in IPv6 prefix for example 0 means to carry all the 32 bits of IPv4 address while 8 carries 24 bits of the IPv4 address 6rd Prefix with Prefix Length Enter the 6rd prefix and prefix length you uniquely designate to 6rd by the ISP The 6rd prefix and prefix length are to replace the standard 6to4 prefix 2002 16 by an IPv6 prefix that belon...

Страница 149: ...private IPv4 addresses for the LAN clients the same as a NAT device The subnet information is chosen by the customer identically to the NAT model However instead of performing the NAT itself the CPE encapsulates the IPv4 packet inside an IPv6 packet Click Add button to manually add the 4in6 rules Tunnel Name User defined tunnel name Mechanism It is the 4in6 tunnel operation technology Please selec...

Страница 150: ...ck Add button to enter the exact rule setting page Filter Name A user defined rule name User can select simply from the list box for the application for quick setup IP Version Select the IP Version IPv4 or IPv6 Protocol Set the traffic type TCP UDP TCP UDP ICMP that the rule applies to Source IP address This is the Address Filter used to allow or block traffic to from particular IP address es feat...

Страница 151: ...e precise time when the rule works like 01 00 of Sun to 19 00 of Friday Or you can select the already set timeslot in Time Schedule during which the rule works And when set to Disable the rule is disabled See Time Schedule Log check the check box to record the security log To check the log users can turn to Security Log Example For example if there is an outgoing rule set as follows then the 21 ap...

Страница 152: ...or block traffic to from particular IP address es featured in the IP range If you leave empty it means any IP address Source Port port or port port The port or port range defines traffic from the port specific application or port in the set port range blocked to go through the router Default is set port from range 1 65535 Destination IP address Traffic from LAN with the particular traffic destinat...

Страница 153: ... set the precise time when the rule works like 01 00 of Sun to 19 00 of Friday Or you can select the already set timeslot in Time Schedule during which the rule works And when set to Disable the rule is disabled See Time Schedule Log check the check box to record the security log To check the log users can turn to Security Log ...

Страница 154: ...Change checkbox and then press Change Policy to change the settings to the interface For example from above the interface atm0 1 is of bridge mode and all the MAC layer frames will be forward but you can set some rules to let some item matched the rules to be blocked Click Add button to add the rules Protocol type Select from the drop down menu the protocol that applies to this rule Destination So...

Страница 155: ...151 Blocking WAN PING This feature is enabled to let your router not respond to any ping command when someone others Ping your WAN IP ...

Страница 156: ...ind out the MAC address of a window based PC go to command window and type ipconfig all Note The maximum entries configured 32 Click Add to add the rules Host Label User defined name MAC Address Enter the MAC address es you want to allow or block to access the router and LAN The format of MAC address could be xx xx xx xx xx xx or xx xx xx xx xx xx For convenience user can select from the list box ...

Страница 157: ...re you can see that the user child_use with a MAC of 18 a9 05 04 12 23 is blocked to access the router from 00 00 to 23 59 Monday through Friday If you needn t this rule you can check the box press Remove it will be OK ...

Страница 158: ...nly Domains Filtering This function checks the whole URL address but not the IP address against your list of domains to block or allow If it is matched the URL request will either be sent Trusted or dropped Forbidden Restrict URL Features Click Block Java Applet to filter web access with Java Applet components Click Block ActiveX to filter web access with ActiveX components Click Block Cookie to f...

Страница 159: ...side the item and press Edit Delete Click Return to be back to the previous page Domain Filtering Note Maximum number of entries 32 Click to add Domains Domain Filtering enter the domain you want this filter to apply Type select the action this filter deals with the Domain Forbidden Domain The domain is forbidden access Trusted Domain The domain is trusted and allowed access Enter a domain and sel...

Страница 160: ...d excluded from the URL filtering rules in effect For specific process please refer to Keywords Filtering For example users can set IPv4 client 192 168 1 103 in your network as a exception address that is not limited to the rules set in URL filter or IPv4 clients a range And also an IPv6 client 2000 1211 1002 6ba4 d160 5adb 9009 87ae or IPv6 clients a range can be the exceptions from the URL rules...

Страница 161: ... Application Assign a name that identifies the new QoS application rule Select from the list box for quick setup Direction Shows the direction mode of the QoS application LAN to WAN You want to control the traffic from local network to the outside Upstream You can assign the priority for the application or you can limit the rate of the application Eg you have a FTP server inside the local network ...

Страница 162: ...It also is the maximum rate for this policy When you choose Limited type the Ratio proportion As above FTP server example you may want to throttle the outgoing FTP speed to 20 of 256K and limit to it you may use this type Prioritization Specify the rate type control for the rule to used If you choose Prioritization for the rule you parameter Priority would be available you can set the priority for...

Страница 163: ...s On the rule will work all time and also you can set the precise time when the rule works like 01 00 of Sun to 19 00 of Friday Or you can select the already set timeslot in Time Schedule during which the rule works And when set to Disable the rule is disabled See Time Schedule ...

Страница 164: ...Give outgoing VoIP traffic more priority The default queue priority is normal so if you have VoIP users in your local network you can set a higher priority to the outgoing VoIP traffic 2 Give regular web http access a limited rate ...

Страница 165: ...rnet access for other users within your network you can then use QoS to set a rule that has low priority In this way P2P application will not congest the data transmission with other applications Other applications like FTP Mail access users can use QoS to control based on need ...

Страница 166: ...e sharing applications and are using NAT Network Address Translation then you will usually need to configure your router to forward these incoming connection attempts using specific ports to the PC on your network running the application You will also need to use port forwarding if you want to host an online game server The reason for this is that when using NAT your publicly accessible IP address...

Страница 167: ...e in the above parameter Server IP Address Enter your server IP Address here User can select from the list box for quick setup External Port Start Enter a port number as the external starting number for the range you want to give access to internal network End Enter a port number as the external ending number for the range you want to give access to internal network Internal Port Start Enter a por...

Страница 168: ... drop down menu then the port will automatically appear modify some as you like or you can just leave it as default Remember to enter your server IP Address 2 Press Apply to conform and the items will be list in the Virtual Servers Setup table ...

Страница 169: ...If you don t need a specified Server you can remove it Check the check box beside the item you want to remove then press Remove it will be OK ALG The ALG Controls enable or disable protocols over application layer ...

Страница 170: ...lick Add to add a port triggering rule Interface Select from the drop down menu the interface you want the port triggering rules apply to Application Preinstalled applications or Custom Application user can customize the utility yourself Custom Application It is a kind of service to let users themselves customizes the service they want Enter the user defined service name here Trigger Port Start En...

Страница 171: ...an outgoing connection on port 4099 to the Aim Talk server but when the computer is behind the NAT the NAT silently drops this connection because it does not know which computer behind the NAT to send the request to connect So in this case port triggering in the router is working when an outbound connection is attempted on port 4099 or any port in the range set it should allow inbound connections ...

Страница 172: ...168 Remove If you don t need a specified Server you can remove it Check the check box beside the item you want to remove and then press Remove ...

Страница 173: ...g port mapping does have security implications since outside users are able to connect to PCs on your network For this reason you are advised to use specific Virtual Server entries just for the ports your application requires instead of simply using DMZ or creating a Virtual Server entry for All protocols as doing so results in all connection attempts to your public IP address accessing the specif...

Страница 174: ...is circumstance it can be reached through the WAN IP of interface set in the field above Internal Address The IP address of an internal device in the LAN For example you have an ADSL connection of pppoe_0_8_35 ppp0 1 interface with three fixed global IP and you then can assign the other two global IPs to two internal devices respectively If you have a WEB server IP address 192 168 1 3 and a FTP se...

Страница 175: ...ion for the host Select Select MAC address of the computer that you want to wake up or turn on remotely Add After selecting click Add then you can perform the Wake up action Edit Delete Click to edit or delete the selected MAC address Ready Yes indicating the remote computer is ready for your waking up No indicating the machine is not ready for your waking up Delete Delete the selected MAC address...

Страница 176: ...172 Advanced Setup There are sub items within the System section Routing DNS Static ARP UPnP Certificate Multicast Management and Diagnostics ...

Страница 177: ... ones you have set in WAN section here select the one you want to be the default gateway by moving the interface via or And select a Default IPv6 Gateway from the drop down menu Note Only one default gateway interface will be used according to the priority with the first being the highest and the last one the lowest priority if the WAN interface is connected ...

Страница 178: ...ther mode of presenting submask One IPv4 address 192 168 1 0 24 submask is 255 255 255 0 While in IPv6 IPv6 address composes of two parts thus the prefix and the interface ID the prefix is like the net ID in IPv4 and the interface ID is like the host ID in IPv4 The prefix length is to identify the net ID in the address One IPv6 address 3FFE FFFF 0 CD30 0 0 0 0 64 the prefix is 3FFE FFFF 0 CD3 Inte...

Страница 179: ...175 In listing table you can remove the one you don t want by checking the checking box and press Remove button ...

Страница 180: ...defined name Physical LAN Port Select the LAN port Source IP Enter the Host Source IP Interface Select the WAN interface which you want the Source IP to access outside through Default Gateway Enter the default gateway which you want the Source IP to access outside through Click Apply to apply your settings And the item will be listed in the policy Routing listing table Here if you want to remove t...

Страница 181: ...assive only receive the routing information broadcasted by other routers and modifies its routing table according to the received information Active working in this mode the router sends and receives RIP routing information and modifies routing table according to the received information Enable check the checkbox to enable RIP rule for the interface Note RIP can t be configured on the WAN interfac...

Страница 182: ...server There are two modes to get DNS server address Auto and Static mode Obtain IPv6 DNS info from a WAN interface WAN Interface selected select one configured IPv6 WAN connection from the drop down menu to be as an IPv6 DNS Use the following Static IPv6 DNS address Primary IPv6 DNS Server Secondary IPv6 DNS Server type the specific primary and secondary IPv6 DNS Server address ...

Страница 183: ...c IP address is the WAN IP address of the router which is assigned to you by your ISP Here users can register different WAN interfaces with different DNS es Click Add to register a WAN interface with the exact DNS You will first need to register and establish an account with the Dynamic DNS provider using their website for example http www dyndns org Dynamic DNS Server Select the DDNS service you ...

Страница 184: ...o the Dynamic DNS registration service provider to register an account User test register two Dynamic Domain Names in DDNS provider http www dyndns org 1 pppoe_0_0_35 with DDNS www hometest com using username password test test 2 ipoe_eth0 with DDNS www hometest1 com using username password test test ...

Страница 185: ...y to connect to the DNS Server in public to correctly resolve Domain name to access the internet DNS Proxy Select whether to enable or disable DNS Proxy function default is enabled Host name of the Broadband Router Enter the host name of the router Default is home gateway Domain name of the LAN network Enter the domain name of the LAN network home gateway ...

Страница 186: ...resses And Static ARP here allows user to map manually the layer 3 MAC Media Access Control address to the layer 2 IP address of the device IP Address Enter the IP of the device that the corresponding MAC address will be mapped to MAC Address Enter the MAC address that corresponds to the IP address of the device Click Add to confirm the settings ...

Страница 187: ...ired settings removing the need for the user to control advanced configuration of their device Both the user s Operating System and the relevant application must support UPnP in addition to the router Windows XP and Windows Me natively support UPnP when the component is installed and Windows 98 users may install the Internet Connection Sharing client from Windows XP in order to support UPnP Window...

Страница 188: ...ouble click Add Remove Programs Step 2 Click on the Windows Setup tab and select Communication in the Components selection box Click Details Step 3 In the Communications window select the Universal Plug and Play check box in the Components selection box Step 4 Click OK to go back to the Add Remove Programs Properties window Click Next ...

Страница 189: ... and Control Panel Step 2 Double click Network Connections Step 3 In the Network Connections window click Advanced in the main menu and select Optional Networking Components The Windows Optional Networking Components Wizard window displays Step 4 Select Networking Service in the Components selection box and click Details ...

Страница 190: ...lick OK to go back to the Windows Optional Networking Component Wizard window and click Next Auto discover Your UPnP enabled Network Device Step 1 Click start and Control Panel Double click Network Connections An icon displays under Internet Gateway Step 2 Right click the icon and select Properties ...

Страница 191: ...lick Settings to see the port mappings that were automatically created Step 4 You may edit or delete the port mappings or click Add to manually add port mappings Step 5 Select Show icon in notification area when connected option and click OK An icon displays ...

Страница 192: ...188 in the system tray Step 6 Double click on the icon to display your current Internet connection status ...

Страница 193: ...ep 1 Click Start and then Control Panel Step 2 Double click Network Connections Step 3 Select My Network Places under Other Places Step 4 An icon describing each UPnP enabled device shows under Local Network Step 5 Right click on the icon of your BiPAC 7800DXL and select Invoke The web configuration login screen displays Step 6 Right click on the icon of your BiPAC 7800DXL and select Properties A ...

Страница 194: ...sted CA Certificate Name The certificate identification name Subject The certificate subject Type The certificate type information ca indicates that the certificate is a CA signed certificate self indicates that the certificate is a certificate owner signed one x 509 indicates the certificate is the one created and signed according to the definition of Public Key System suggested by x 509 Action V...

Страница 195: ...191 Click Import Certificate button to import your certificate Enter the certificate name and insert the certificate ...

Страница 196: ...192 Click Apply to confirm your settings ...

Страница 197: ...hree versions for IGMP that is IGMPv1 IGMPv2 and IGMPv3 MLD short for Multicast Listener Discovery protocol is a component if the Internet Protocol version 6 IPv6 suite MLD is used by IPv6 to discover multicast listeners on a directly attached link much as IGMP used in IPv4 The protocol is embedded in ICMPv6 instead of using a separate protocol MLDv1 is similar to IGMPv2 and MLDv2 is similar to IG...

Страница 198: ...le the faster join at startup MLD Default Version Enter the supported MLD version 1 2 default is MLDv2 Query Interval Enter the periodic query interval time sec the multicast router sending the query message to hosts to understand the group membership information Query Response Interval Enter the response interval time sec Last Member Query Interval Enter the interval time sec the multicast router...

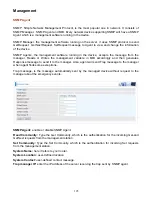
Страница 199: ...IB accordingly and then generates Response message to send it to the manager Also agent will send Trap message to the manager when agent finds some exceptions Trap message is the message automatically sent by the managed device without request to the manager about the emergency events SNMP Agent enable or disable SNMP Agent Read Community Type the Get Community which is the authentication for the ...

Страница 200: ...e Auto Configuration Servers ACS and establish the configuration automatically and let ACS configure CPE automatically Inform select enable to let CPE be authorized to send Inform message to automatically connect to ACS Inform Interval Specify the inform interval time sec which CPE used to periodically send inform message to automatically connect to ACS When the inform interval time arrives the CP...

Страница 201: ...197 GetRPCMethods Supported by both CPE and ACS display the supported RFC listing methods Click Apply to apply your settings ...
Страница 202: ...access system web GUI Valid Enable Disable Allowed Access IP Address Range IP Address Range Specify the IP address Range IPv4 and IPv6 address range can be supported users can set IPv4 and IPv6 address range individually Click Add to add an IP Range to allow remote access Note 1 If user wants to grant remote access to IPs first enable Remote Access 2 Remote Access enabled 1 Enable Valid for the sp...

Страница 203: ...agement is a feature of some electrical appliances especially computers that turn off the power or switch to a low power state when inactive Five main parameters are listed for users to check to manage the performance of the router ...

Страница 204: ...he Internet by users or applications This Time Schedule correlates closely with router s time since router does not have a real time clock on board it uses the Simple Network Time Protocol SNTP to get the current time from an SNTP server from the Internet Refer to Internet Times for details You router time should correspond For example user can add a timeslot named timeslot1 features a period from...

Страница 205: ...ient s E mail Enter the destination mail address The email is used to receive system log system configuration security log sent by the device when the Push Now button is pressed information sent only when pressing the button but the mail address is not remembered Note Please first set correct the SMTP server parameters in Mail Alert ...

Страница 206: ...stics Check the connections including Ethernet connection Internet Connection and wireless connection Click Help link that can lead you to the interpretation of the results and the possible simply troubleshooting ...

Страница 207: ...ames through the relay function drops all CFM frames of its level or lower that come from the wire side Link Trace Link Trace messages otherwise known as Mac Trace Route are Multicast frames that a MEP transmits to track the path hop by hop to a destination MEP which is similar in concept to User Datagram Protocol UDP Trace Route Each receiving MEP sends a Trace route Reply directly to the Origina...

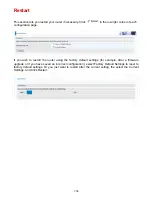
Страница 208: ...If you wish to restart the router using the factory default settings for example after a firmware upgrade or if you have saved an incorrect configuration select Factory Default Settings to reset to factory default settings Or you just want to restart after the current setting the select the Current Settings and Click Restart ...

Страница 209: ...admin If this fails you can restore your router to its factory settings by pressing the reset button on the device rear side Problems with WAN interface Problem Suggested Action Frequent loss of ADSL line sync disconnections Ensure that all other devices connected to the same telephone line as your router e g telephones fax machines analogue modems have a line filter connected between them and the...

Страница 210: ... should be on for the port that has a PC connected If it does not lit check to see if the cable between your router and the PC is properly connected Make sure you have first uninstalled your firewall program before troubleshooting Verify that the IP address and the subnet mask are consistent for both the router and the workstations ...

Страница 211: ...act the dealer from where you purchased your product Contact Billion Worldwide http www billion com MAC OS is a registered Trademark of Apple Computer Inc Windows 7 98 Windows NT Windows 2000 Windows Me Windows XP and Windows Vista are registered Trademarks of Microsoft Corporation ...

Отзывы: