Alaris™ GP (Guardrails™) Volumetric Pump
Basic Features
BDDF00535
Issue 1
26/56
Changing the Infusion Set
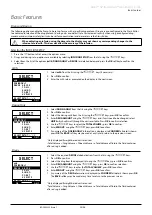
1 . Press
h
to put the Pump
ON HOLD
.
2 . Close in-line clamp and ensure the access to the patient is isolated .
3 . Disconnect the infusion set from the patient .
4 . Open Pump door and remove infusion set from the Pump and discard the set and fluid container according to hospital protocol .
5 . Prepare the new infusion set, load infusion set into Pump and close the door, see 'Loading the Infusion Set' .
6 . Restart infusion, see 'Getting Started' .
w
When changing the infusion set or the fluid container use aseptic technique according to hospital protocol .
It is recommended that infusion sets are changed in accordance with the Directions For Use .
Carefully read the Directions For Use supplied with the infusion set prior to use . The set change interval is generally
72 hours with the following exceptions;
• Transfusion (Blood) Sets
• 60953 Alaris GP Low Sorbing Infusion Set
• 60033E Alaris GP Low Sorbing Infusion Set
• 60950E Alaris GP Oncology Infusion Set
Changing the Fluid Container
1 . Press
h
to put the Pump
ON HOLD
.
2 . Remove bag spike on infusion set from empty / used container . Discard empty / used container according to hospital protocol .
3 . Insert the bag spike into the fluid container and hang following the instructions in the 'Loading an Infusion Set' section .
4 . Squeeze the drip chamber approximately half full or up to fill line (if the drip chamber is marked) with fluid .
5 . Restart infusion, see "Getting Started" .
w
When changing the infusion set or the fluid container use aseptic technique according to hospital protocol .
It is recommended that infusion sets are changed in accordance with the Directions For Use .
Carefully read the Directions For Use supplied with the infusion set prior to use .
SmartSite™ Needle-Free System Instructions
SmartSite™ Needle-Free Valve is designed to permit safe gravity flow and automated flow, injection and aspiration of fluids without the
use of needles by utilising Luer lock and luer slip connectors .
w
Precautions:
Discard if packaging is not intact or protector caps are unattached .
If Needle-Free Valve is accessed by a needle in an emergency the valve will be damaged causing leakage . Replace
Needle-Free Valve immediately .
Needle-Free Valve contraindicated for blunt cannula system .
Do not leave slip luer syringes unattended .
DIRECTIONS - Use Aseptic Technique
1 . Prior to every access, swab top of Needle-Free Valve port with 70% Isopropyl alcohol (1-2 seconds) and allow to dry (approximately
30 seconds) .
Note:
Dry time is dependent on temperature, humidity, ventilation of the area .
2 . Prime valve port . If applicable, attach syringe to Needle-Free Valve port and aspirate minuscule air bubbles .
3 . When used with administration sets always refer to individual set directions for use as change interval may vary according to clinical
application (e .g . infusions of blood, blood products, and lipid emulsions) .
Note:
During use of Needle-Free Valve port, fluid may be observed between the housing and blue piston . This fluid does not enter
the fluid path and requires no action .
Note:
For product questions or needle-free valve educational materials, contact your BD representative . Consult facility protocols .
Consult other organizations that publish guidelines useful in developing facility protocols .


