


4. Getting Started
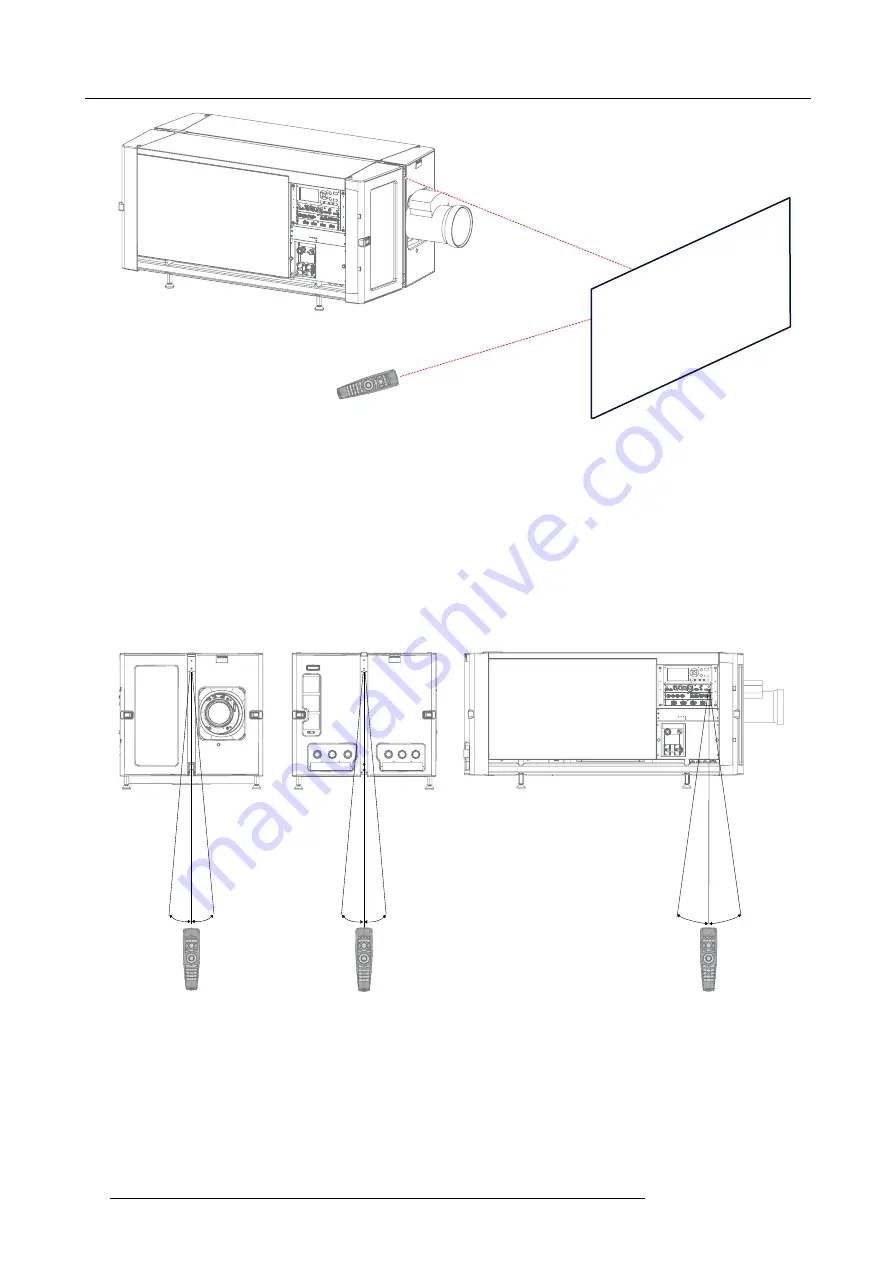
Image 4-5
IR control via re
fl
ective screen
Hardwired to the XLR input
1. Plug one end of the remote cable in the connector on the bottom of the RCU.
2. Plug the other end in the big connector on the communication interface of the projector, labelled
Remote CTRL
.
Note:
Plugging the remote control will switch the broadcast address of the remote control to the default value ’0’. This is the
only broadcast address that will work when hardwired. If you want to change the broadcast address after disconnecting
the remote control, see "Displaying and Programming addresses into the RCU", page 15.
Pointing directly to the IR sensor
When using the wireless remote control, make sure you are within the effective operating distance (30 m, 100 ft in a straight line).
The remote control unit will not function properly if strong light strikes the sensor window or if there are obstacles between the remote
control unit and the projector IR sensor.
25°
25°
25°
25°
45°
45°
Image 4-6
RCU to one of the three IR sensors
Using the RCU in combination with a 3D emitter
When using a 3D emitter that radiates IR beams (e.g. the optional 3D emitter that Barco provides), the IR beams of the 3D emitter
may interfere with the IR communication between the RCU and the projector.
If such interference occurs, connect the RCU to the projector using the remote cable with XLR connector. It is also advised to turn
the IR receivers of the projector off to avoid the 3D emitter interference. The IR receivers can be turned off in the GUI:
System
Settings
→
Communication
→
IR Control
.
34
R5906151 XDL 17/04/2018
Содержание XDL-4K75
Страница 1: ...XDL User Manual R5906151 00 17 04 2018...
Страница 4: ......
Страница 16: ...1 Safety 12 R5906151 XDL 17 04 2018...
Страница 22: ...2 Pulse Remote Control Unit 18 R5906151 XDL 17 04 2018...
Страница 42: ...4 Getting Started Take note that the update process can take a long time to complete 38 R5906151 XDL 17 04 2018...
Страница 46: ...5 Graphic User Interface GUI 42 R5906151 XDL 17 04 2018...
Страница 58: ...7 GUI Image 54 R5906151 XDL 17 04 2018...
Страница 82: ...8 GUI Installation 78 R5906151 XDL 17 04 2018...
Страница 96: ...9 GUI System Settings 92 R5906151 XDL 17 04 2018...
Страница 98: ...10 Status menu 94 R5906151 XDL 17 04 2018...
Страница 104: ...11 Maintenance procedures 100 R5906151 XDL 17 04 2018...


