


9. GUI – System Settings
What should be set up for an Ethernet address?
Two ways can be used to assign an address:
•
use the
Automatic
setting so that an automatic address will be assigned.
•
Assign manually an IP address, Net-mask (subnet-mask), (default) gateway address.
-
Set the IP-Address
fi
eld to the desired value. This must NOT be 0.0.0.0 for static IP-Address assignment. The IP address
identi
fi
es a projector’s location on the network in the same way a street address identi
fi
es a house on a city block. Just as
a street address must identify a unique residence, an IP address must be globally unique and have a uniform format.
-
Set the Subnet-Mask as appropriate for the local subnet.
-
Set the Default-Gateway to the IP-Address of the local router (MUST be on the local subnet!) on the same network as this
projector that is used to forward traf
fi
c to destinations beyond the local network. This must not be 0.0.0.0. If there is no
router on the projector’s local subnet then just set this
fi
eld to any IP-Address on the subnet.
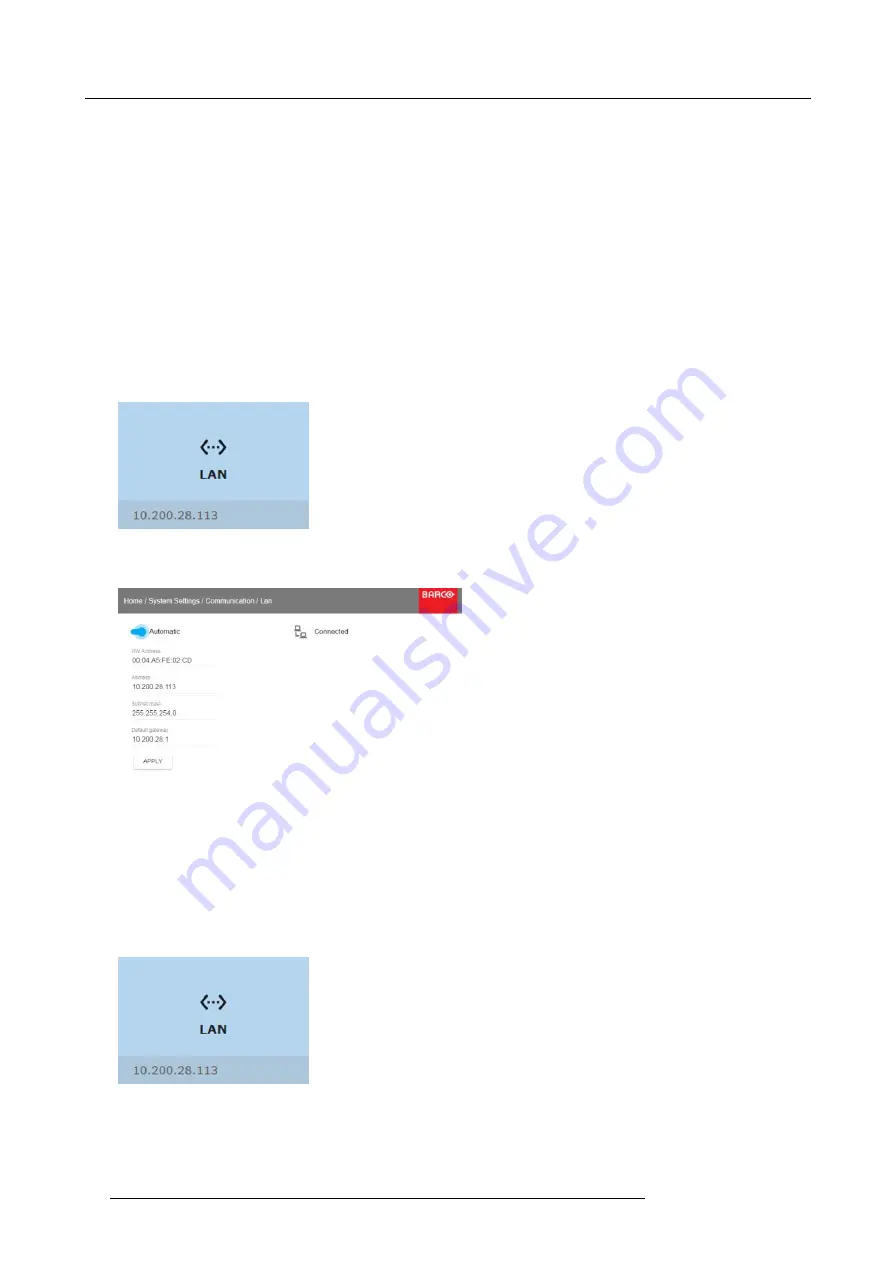
9.1.2
Wired IP address set up
How to automatically set up the IP address
1. In the main menu, select
System Settings
→
Communication
→
LAN
.
Image 9-1
Communication menu, LAN
The LAN menu is displayed
Image 9-2
LAN menu
2. To enable Automatic, put the switch to the right. The color of the switch becomes blue.
An automatic IP is assigned.
When connected, it is indicated with the connection symbol and the indication
Connected
.
3. Select
APPLY
and click
OK
.
How to manually set up the IP address
1. In the main menu, select
System Settings
→
Communication
→
LAN
.
Image 9-3
Communication menu, LAN
80
R5906151 XDL 17/04/2018
Содержание XDL-4K75
Страница 1: ...XDL User Manual R5906151 00 17 04 2018...
Страница 4: ......
Страница 16: ...1 Safety 12 R5906151 XDL 17 04 2018...
Страница 22: ...2 Pulse Remote Control Unit 18 R5906151 XDL 17 04 2018...
Страница 42: ...4 Getting Started Take note that the update process can take a long time to complete 38 R5906151 XDL 17 04 2018...
Страница 46: ...5 Graphic User Interface GUI 42 R5906151 XDL 17 04 2018...
Страница 58: ...7 GUI Image 54 R5906151 XDL 17 04 2018...
Страница 82: ...8 GUI Installation 78 R5906151 XDL 17 04 2018...
Страница 96: ...9 GUI System Settings 92 R5906151 XDL 17 04 2018...
Страница 98: ...10 Status menu 94 R5906151 XDL 17 04 2018...
Страница 104: ...11 Maintenance procedures 100 R5906151 XDL 17 04 2018...


