


8. GUI – Installation
4. Adjust the level with the arrow keys and press enter when the desired black level zone is reached.
Or,
enter the black level value with the numeric keys in the remote control.
5. Move the cursor to “Level”, press enter and adjust this level until the black level equals the level in the blend zone.
This value can also be entered by the numeric keys on the remote control.
6. Repeat the same procedure for any other projector connected to this projector, but on the opposite side.
Note:
Do not forget to disable the
Show lines
button after you achieved the desired blend zone.
8.5.3
Black Level Files
About custom Black Level Files
Next to setting your speci
fi
c Black Level Adjustment in the GUI, you can also upload or download a custom Black Level adjustment
fi
le in png, jpeg or tiff format to/from the projector.
To upload or download Black Level adjustment
fi
les you can use Projector Toolset or upload/download the Black Level adjustment
fi
le in the format of an XML
fi
le. Alternatively, you can contact the “
fi
le endpoint” directly via the curl program or some other tool that
supports http upload.
For more information on uploading/downloading Black Level
fi
les using the Projector Toolset, refer to the Projector Toolset user
manual.
For more information on uploading/downloading Black Level
fi
les using curl or other tools that supports HTTP upload, refer to the
Pulse API Reference Guide.
How to activate an uploaded Black Level adjustment
fi
le?
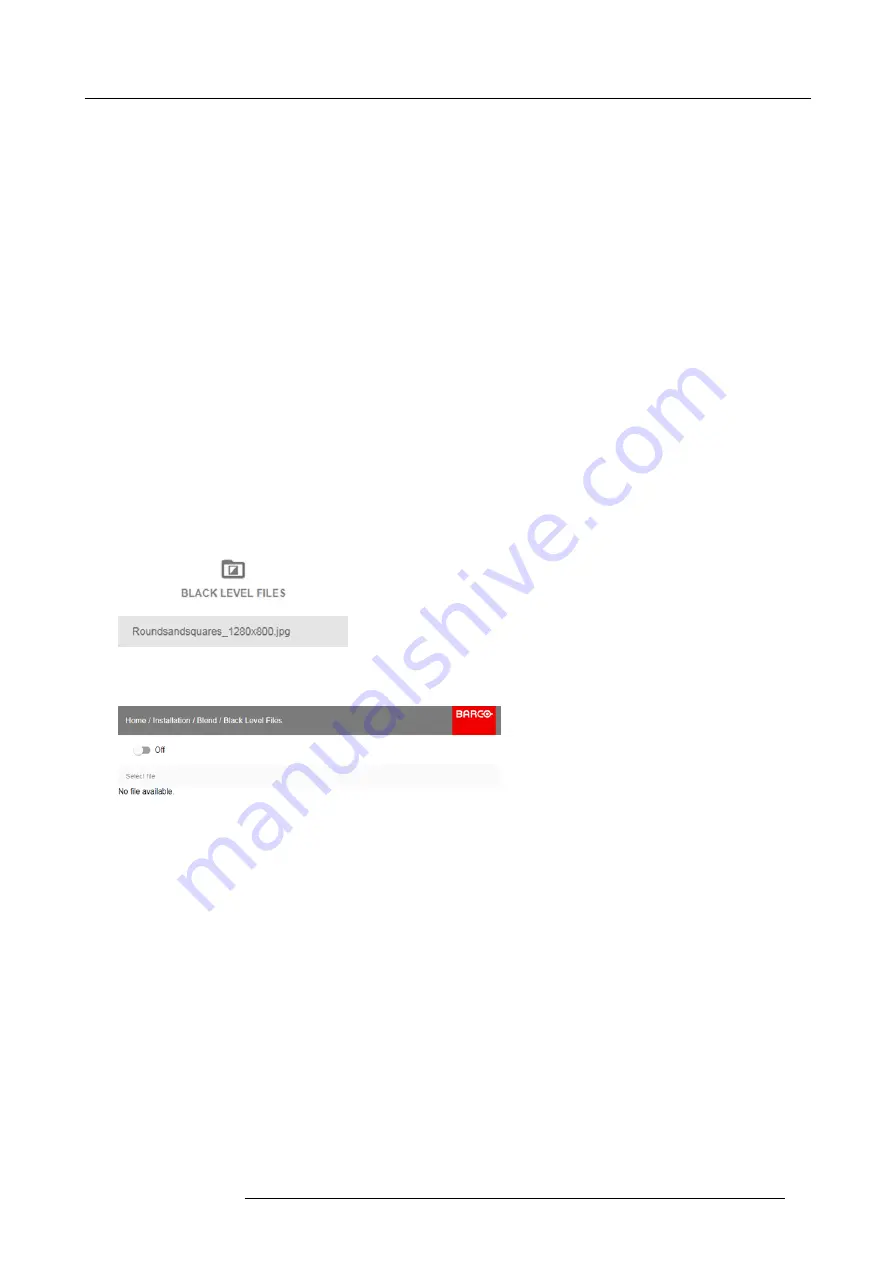
1. In the main menu, select
Installation
→
Blend and Mask
→
Black Level Files
.
Image 8-44
Blend and Mask menu, Black Level Files
The Black Level Files menu is displayed.
Image 8-45
2. If any custom Black Level adjustment
fi
les are available, select the desired
fi
le.
R5906151 XDL 17/04/2018
71
Содержание XDL-4K75
Страница 1: ...XDL User Manual R5906151 00 17 04 2018...
Страница 4: ......
Страница 16: ...1 Safety 12 R5906151 XDL 17 04 2018...
Страница 22: ...2 Pulse Remote Control Unit 18 R5906151 XDL 17 04 2018...
Страница 42: ...4 Getting Started Take note that the update process can take a long time to complete 38 R5906151 XDL 17 04 2018...
Страница 46: ...5 Graphic User Interface GUI 42 R5906151 XDL 17 04 2018...
Страница 58: ...7 GUI Image 54 R5906151 XDL 17 04 2018...
Страница 82: ...8 GUI Installation 78 R5906151 XDL 17 04 2018...
Страница 96: ...9 GUI System Settings 92 R5906151 XDL 17 04 2018...
Страница 98: ...10 Status menu 94 R5906151 XDL 17 04 2018...
Страница 104: ...11 Maintenance procedures 100 R5906151 XDL 17 04 2018...


