P/N 134421
Banner Engineering Corp. • Minneapolis, MN U.S.A.
www.bannerengineering.com • Tel: 763.544.3164
SureCross™ DX80 Web Configurator
Instruction Manual
System Tab
System Tab
The
System
tab contains system-wide settings and functions including system-level register
information, data manipulation and calculations, and network set up instructions.
Data Submenu
The
Data
submenu accesses system-level register information.
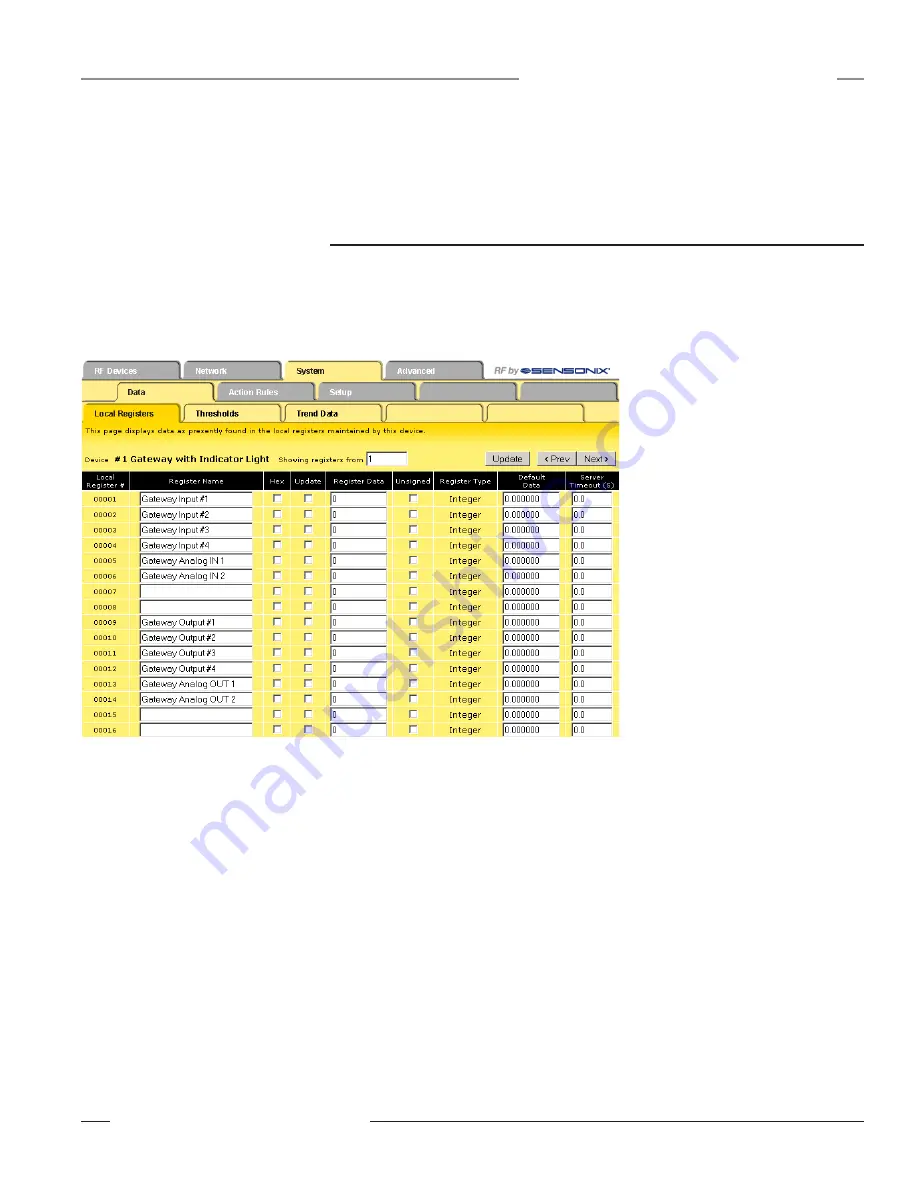
Local Registers
The
Local Registers
tab displays the data in the local registers maintained by the Gateway Pro or
Ethernet Bridge.
Default Data: When the Server Timeout
value is set to a non-zero value, the default
data is stored into the local register when the
server times out.
Hex checkbox: Select the Hex checkbox
to view or enter values in hexadecimal (not
recommended for floating point).
Register Data: Displays the register data or
can be used to change the register data. To
change the register contents, enter a new
value, select the Update checkbox, and click
the Update button.
Server Timeout: When the Server Timeout
value is set to a non-zero value, the default
data is stored into the local register when
the server times out. A server timeout occurs
when the timeout value elapses without
a remote server writing to this register. A
remote server writes to this register when
the DX80 device is acting as a Modbus slave
device.
Unsigned checkbox: Integers are 16-bit registers that may be signed or unsigned. Unsigned values
range from 0 through 65,535 and signed values range from -32,767 t32,767. This checkbox
only affects the way register information is displayed on the screen, not the way the data is stored
in the register. Select the Unsigned checkbox to treat the register as unsigned. For floating point
registers, which start at register 1001 on the Gateway, the unsigned/signed option is ignored.
Update checkbox: Select the Update checkbox and click the Update button to update the value.
Other Commands
Showing Registers box: Displays the beginning of the register range currently displayed. To jump
to a specific register, enter the register number in the Showing Registers box and click the Update
button.
Prev and Next buttons: Displays the next device’s registers. In the sample screen shown below,
clicking the Next button will display registers 17 through 32 and the device number changes to show
#2 Node.
Update button: Sends new data or settings to the Ethernet Bridge or Gateway Pro and/or updates
the screen display.


