30
Tutorial
(4) Click in the
Line sew type
selector, and
then click
Zigzag Stitch
.
(5) Click the start point 1, and then double-
click the end point 2.
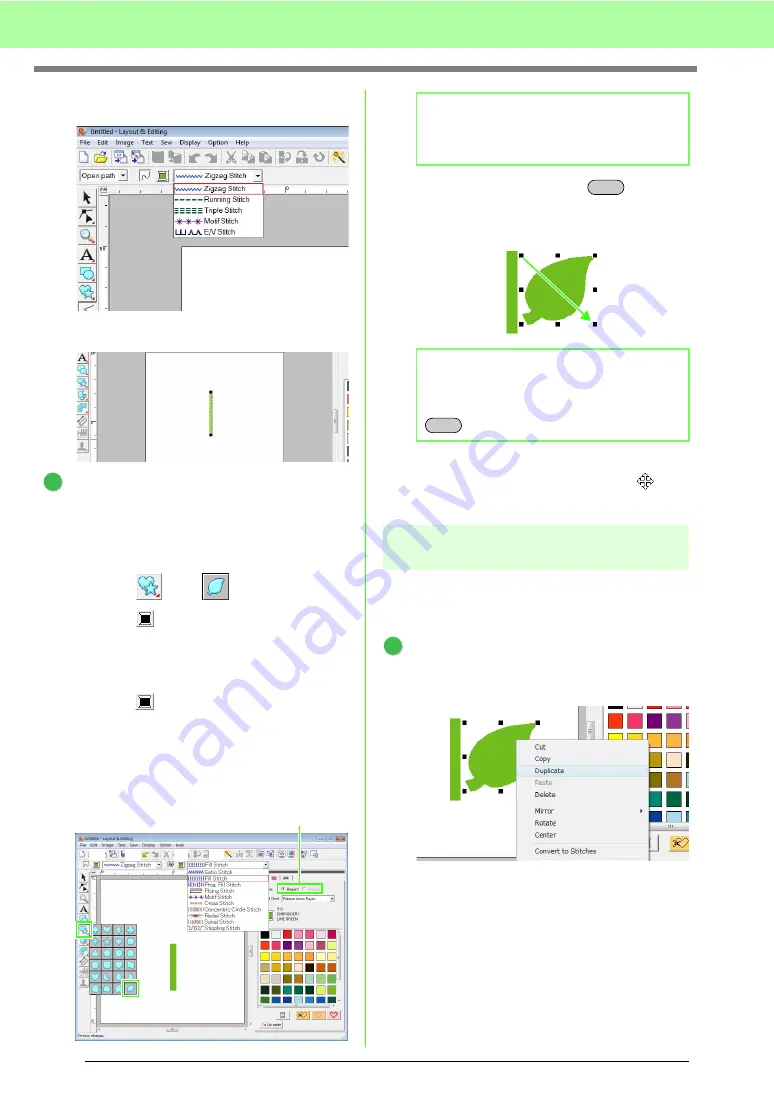
Draw the leaf on the right.
As with the stem, we will specify the color and
sew type, then draw the shape. This time,
since the shape will have a region, we will also
specify the color and sew type for the region.
(1) Click ,
then .
(2) Click
for line sewing, and then click
LIME GREEN
in the color palette.
(3) Click in the
Line sew type
selector, and
then select
Zigzag Stitch
.
(4) Click
for region sewing, and then click
LIME GREEN
in the color palette.
(5) Click in the
Region sew type
selector,
and then select
Fill Stitch
.
(6) While holding down the
key, drag
the pointer in the Design Page, as shown
in the illustration.
(7) Place the pointer over the leaf so that the
shape of the pointer changes to
, and
then drag the leaf to the desired position.
Step 2
Duplicating, flipping and
moving shapes
Now, we will duplicate the leaf on the right side, flip
it horizontally, and then move it to the left side of the
stem.
Duplicate the leaf on the right.
(1) Right-click the leaf.
(2) Click
Duplicate
.
1
2
2
To specify whether the color is being selected
for line sewing or region sewing, click a
Color
button
, or select the type of sewing here.
(1)
(2)
(3)
(4)
(5)
(1)
b
Memo:
The color, sewing attributes and size can also
be changed after the shape is drawn.
b
Memo:
To draw the shape while maintaining its
height-to-width proportion, hold down the
key while dragging the pointer.
Shift
Shift
1
Содержание Palette
Страница 1: ......
Страница 146: ...144 Arranging Embroidery Designs Layout Editing ...
Страница 200: ...198 Managing Embroidery Design Files Design Database ...
Страница 218: ...216 Creating Custom Stitch Patterns Programmable Stitch Creator ...
Страница 244: ...242 Tips and Techniques ...
Страница 264: ...262 Menus Tools ...
Страница 266: ...264 Troubleshooting ...
Страница 271: ...English ...


