221
Basic Font Creator Operations
Ba
s
ic
Font Cr
e
a
tor
Ope
ra
tions
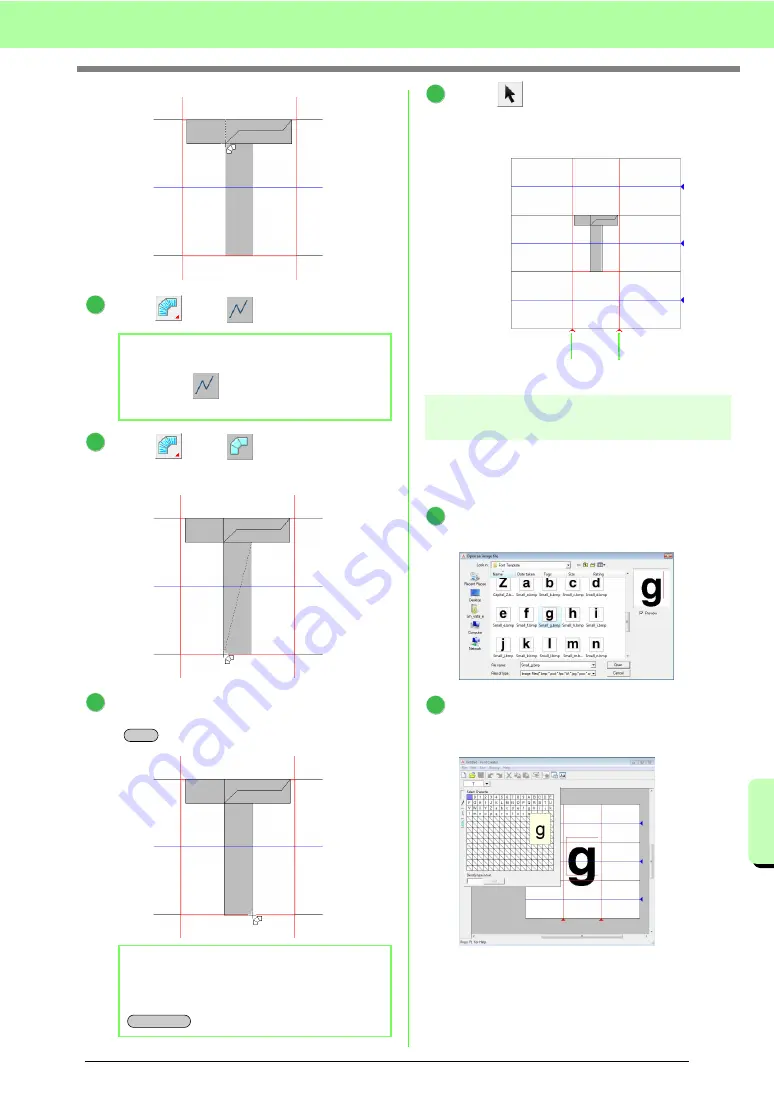
Click ,
then .
Click ,
then .
And then click points 11 through 12.
Double-click point 13 (the last point of the
entire pattern), or click point 13 and press the
key.
Click
, then drag
Set Line
to adjust the
character width.
Step 3
Creating other font
character patterns
Next, we will create another font character
pattern. For this example, we will create a pattern
for the letter “g”.
Import file
Small_g.bmp
in the same way that
“T” was imported.
Click the
Select Character
button, and then
select the character to be created. For this
example, select “g”.
b
Memo:
By clicking
at this point, overlapping
stitching can be prevented.
b
Memo:
To remove the last point that was entered,
click the right mouse button, or press the
key.
9
8
10
5
6
11
12
7
Enter
13
BackSpace
8
Set Line Set Line
1
2
Содержание Palette
Страница 1: ......
Страница 146: ...144 Arranging Embroidery Designs Layout Editing ...
Страница 200: ...198 Managing Embroidery Design Files Design Database ...
Страница 218: ...216 Creating Custom Stitch Patterns Programmable Stitch Creator ...
Страница 244: ...242 Tips and Techniques ...
Страница 264: ...262 Menus Tools ...
Страница 266: ...264 Troubleshooting ...
Страница 271: ...English ...


