219
Basic Font Creator Operations
Ba
s
ic
Font Cr
e
a
tor
Ope
ra
tions
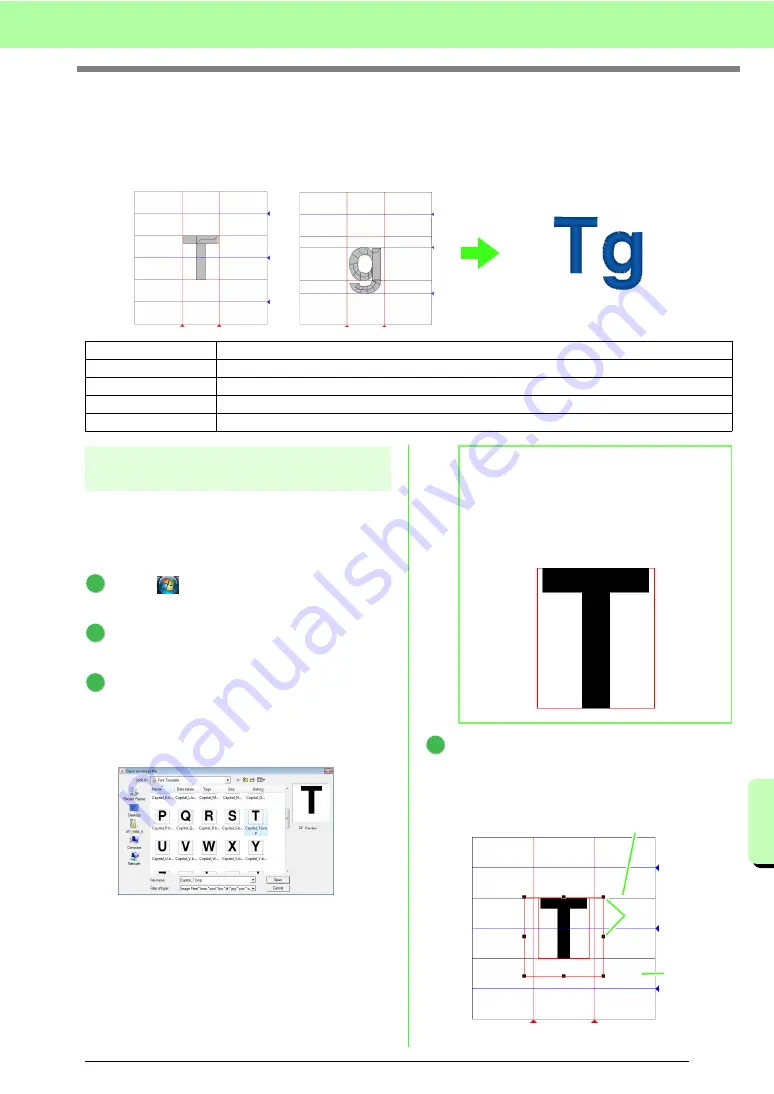
Manually Creating Custom Font
With Font Creator, custom font characters that can be used in Layout & Editing can be created and edited.
Using these custom characters, original embroidery patterns can be created.
Step 1
Opening a background
image
In order to create the custom font, we will open an
image in the background. For this example, we
will use the provided background image to create
a pattern for the letter “T”.
Click
, then select
All Programs
, then
Palette Ver.8
, then
Tools
, then
Font Creator
.
Click
File
, then
Template Open
, then
from
File
.
Import the
Capital_T.bmp
.
Select the file
Capital_T.bmp
by clicking the
documents
folder (
My documents
), then
Palette Ver.8
, then
Sample
, then
Font
Creator
, then
Font Template
.
Move the character so that the top aligns with
the
Capital Line
. To adjust the height of the
character, drag a handle to adjust the height
between the
Capital Line
and the
Base Line
.
Step 1
Step 2
Creating a font character pattern
Step 3
Creating other font character patterns
Step 4
Save the font character pattern
Step 5
Creating an embroidery pattern using the created font characters
1
2
3
b
Memo:
The
Base Line
,
Capital Line
and
Set Lines
,
which appear as red lines in the sample
bitmap, have been added as guidelines so the
background image can be positioned more
easily.
4
Capital Line
Handles
Base Line
Содержание Palette
Страница 1: ......
Страница 146: ...144 Arranging Embroidery Designs Layout Editing ...
Страница 200: ...198 Managing Embroidery Design Files Design Database ...
Страница 218: ...216 Creating Custom Stitch Patterns Programmable Stitch Creator ...
Страница 244: ...242 Tips and Techniques ...
Страница 264: ...262 Menus Tools ...
Страница 266: ...264 Troubleshooting ...
Страница 271: ...English ...


