55
4.2.1
To Cut and Save the Wanted Portion of the
Recorded Video
1. Use the Playback Control buttons or drag the bar on the playback progress bar and pause on
where you want to start the cut. Then, click
Segment
button (
) to set the begin mark.
2. Use the Playback Control buttons or drag the bar on the playback progress bar and pause on
where you want to end the cut. Then, click
Segment
button (
)
to set the end mark. To
cancel segmentation or set the segment marks from the start, click
Segment
button (
)
again.
3. Click
Export
button(
)
→ Output Video Clip
button to save the wanted clip.
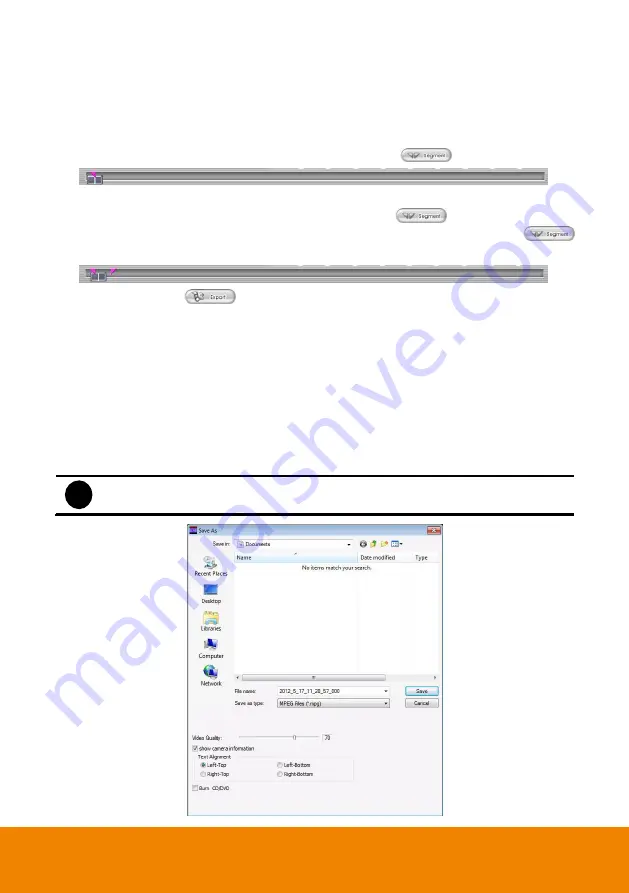
4. In the Save As dialog box, locate on where you want to save the file or choose to
Burn
the
video segment to CD/DVD ROM (only for .*mpeg file format).
5. Select the file type and select the camera information display position when playback. The
camera information will be the information of server name that user has defined in Network
Setting.
6. If the select the file type is *.avi, user can mark
Included audio
to include audio in output
video segment.
7. To adjust
Video Quality
if needed.
8. Click
Save
to save the video segment.
i
Right-click function is disabling for security issue.
Содержание IWH5000 Series
Страница 1: ...IWH5000 series IWH5416 16 IWH5416 Touch II User s Manual v 1 1 0 0 ...
Страница 54: ...46 9 User can select the Date Camera and Cycle to view the report of object counts In Out ...
Страница 65: ...57 3 Select and click one in the bookmark list to preview the file ...
Страница 88: ...80 3 After DVR system reboot Click Setup System System Configuration PPPoE Add button Broadband PPPoE ...
Страница 232: ...224 f If user wants to burn the back file into DVD disk click Burn button and select the file to burn ...
Страница 238: ...230 7 Select Add Zone Domians Service to register the domain name ...


