


100
5.2
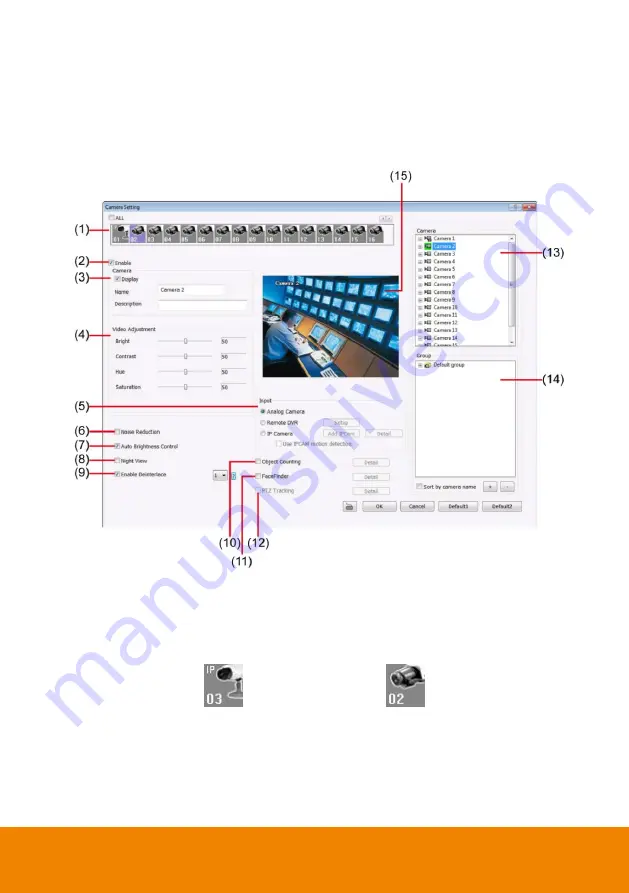
Camera Setting
In the Camera Setting dialog box, click
OK
to accept the new settings, click
Cancel
to exit without
saving, and click
Default1/ Default2
to revert back to original factory setting.
(1) Camera Icons
Select the camera number you want to adjust the video setting. To select all the cameras, enable
the
ALL
check box. To select more than one camera,
Right click
on the camera icon. To select
one camera only,
Left click
on the camera icon. The camera icon turns red when it is selected.
The camera icon will be different that depends on the camera type user selected.
IP camera icon Analog camera icon
(2) Enable
Set to enable/disable the selected camera. When there is no video source on the camera, we
suggest disabling it so that the system won’t detect it as video loss error.
Содержание IWH5000 Series
Страница 1: ...IWH5000 series IWH5416 16 IWH5416 Touch II User s Manual v 1 1 0 0 ...
Страница 54: ...46 9 User can select the Date Camera and Cycle to view the report of object counts In Out ...
Страница 65: ...57 3 Select and click one in the bookmark list to preview the file ...
Страница 88: ...80 3 After DVR system reboot Click Setup System System Configuration PPPoE Add button Broadband PPPoE ...
Страница 232: ...224 f If user wants to burn the back file into DVD disk click Burn button and select the file to burn ...
Страница 238: ...230 7 Select Add Zone Domians Service to register the domain name ...


