2-10
PR568A
PR572A
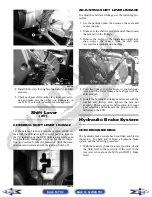
4. Install the E-clip; then tighten the nuts (A) and (B)
securely.
5. Check each gear shift position for proper gear selec-
tion and make sure the proper icon illuminates on
the LCD; then install the center console and seats.
Shift Lever
(XT)
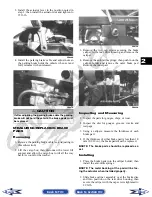
CHECKING SHIFT LEVER LINKAGE
Set the parking brake and turn the ignition switch on;
then with the shift lever in the neutral position, look for
the (N) indication on the LCD. Shift into high range and
look for the (H) indication, low range for the (L) indica-
tion, and reverse for the (R) indication. Shift the trans-
mission into neutral and turn the ignition switch off.
PR031A
ADJUSTING SHIFT LEVER LINKAGE
To adjust the shift lever linkage, use the following pro-
cedure.
1. Set the parking brake; then remove the seats and
center console.
2. Make sure the shift lever is in neutral; then loosen
the jam nut on the linkage.
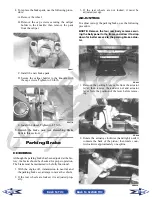
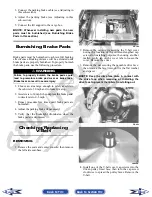
3. Remove the E-clip on the transmission shift arm;
then remove the linkage from the shift arm.
Account for a washer and a bushing.
PR461A
4. Turn the linkage rod clockwise or counterclock-
wise until the lower linkage hole aligns with the
shift arm pin.
5. Install the bushing and linkage and secure with the
washer and E-clip; then tighten the jam nut
securely. Check each gear shift position for proper
gear selection and make sure the proper icon illu-
minates on the LCD.
Hydraulic Brake System
CHECKING/BLEEDING
The hydraulic brake system has been filled and bled at
the factory. To check and/or bleed a hydraulic brake
system, use the following procedure.
1. With the master cylinder in a level position, check
the fluid level in the reservoir. If the level in the
reservoir is not above the MIN, add DOT 4 brake
fluid.
Back to TOC
Back to Section TOC
Next
Back


