background image

6-22

PR250

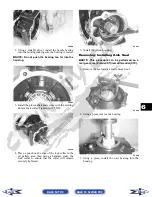
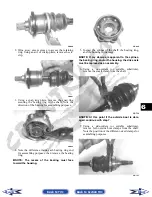
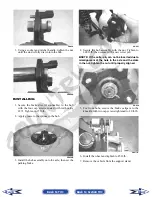
3. Using a socket and ratchet handle, tighten the nut

until the stud is fully drawn into the hub.

PR252A

INSTALLING

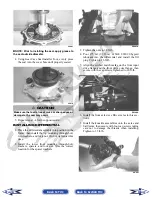
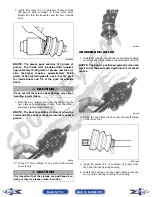
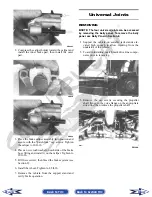
1. Secure the brake disc (if applicable) to the hub

with the four cap screws coated with red Loctite

#271. Tighten to 15 ft-lb.

2. Apply grease to the splines in the hub.

PR254B

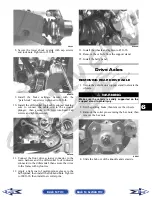
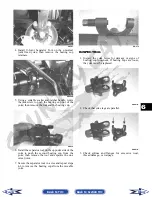
3. Install the hub assembly onto the axle; then set the

parking brake.

PR221

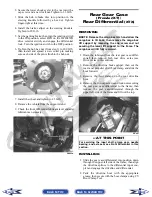
4. Secure the hub assembly with the nut. Tighten to

200 ft-lb; then secure with a new cotter pin.

„

NOTE: If the cotter pin can not be inserted due to

misalignment of the hole in the axle and the slots
in the nut, tighten the nut until properly aligned.

PR258

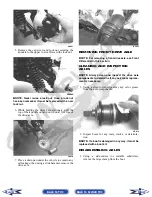
5. For front hubs, secure the brake calipers to the

knuckle with two cap screws tightened to 20 ft-lb.

PR377B

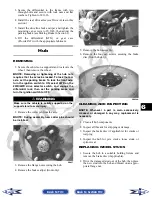
6. Install the wheel and tighten to 45 ft-lb.

7. Remove the vehicle from the support stand.

Back to TOC

Back to Section TOC

Next

Back

Содержание 2009 Prowler

Страница 1: ...fidence but also saves time and labor All Arctic Cat publications and decals display the words Warning Caution Note and At This Point to emphasize important information The symbol WARNING identifies personal safety related information Be sure to fol low the directive because it deals with the possibility of severe personal injury or even death The symbol CAUTION identifies unsafe practices which m...

Страница 2: ...xt to go Foreword 1 General Information Specifications 2 Periodic Maintenance Tune Up 3 Engine Transmission 4 Fuel Lubrication Cooling 5 Electrical System 6 Drive System 7 Suspension 8 Steering Frame 9 Controls Indicators 1 2 3 4 5 6 7 8 9 ...

Страница 3: ...neral Specifications 1 2 Torque Specifications 1 2 Torque Conversions ft lb N m 1 3 Tightening Torque General Bolts 1 3 Break In Procedure 1 4 Gasoline Oil Lubricant 1 4 Genuine Parts 1 5 Preparation For Storage 1 5 Preparation After Storage 1 6 Back to TOC ...

Страница 4: ...t Part Bolted To Torque ft lb N m A Arm Frame 33 45 Ball Joint Cap Screw Knuckle 35 48 Shock Absorber Upper Frame 33 45 Shock Absorber Lower Upper A Arm 33 45 Knuckle A Arm 33 45 SUSPENSION COMPONENTS Rear Sway Bar Bracket Frame 33 45 A Arm Frame 33 45 Shock Absorber Upper Frame 33 45 Shock Absorber Lower Lower A Arm 20 27 Knuckle A Arm 33 45 Cargo Box Hinge Cargo Box Frame 20 27 Cargo Box Cargo B...

Страница 5: ... Yoke Nut Secondary Driven Output Shaft 74 100 ft lb N m ft lb N m ft lb N m ft lb N m 1 1 4 26 35 4 51 69 4 76 103 4 2 2 7 27 36 7 52 70 7 77 104 7 3 4 1 28 38 1 53 72 1 78 106 1 4 5 4 29 39 4 54 73 4 79 107 4 5 6 8 30 40 8 55 74 8 80 108 8 6 8 2 31 42 2 56 76 2 81 110 2 7 9 5 32 43 5 57 77 5 82 111 5 8 10 9 33 44 9 58 78 9 83 112 9 9 12 2 34 46 2 59 80 2 84 114 2 10 13 6 35 47 6 60 81 6 85 115 6...

Страница 6: ...enated gasolines containing up to 10 ethanol 5 methane or 5 MTBE are acceptable gasolines When using ethanol blended gasoline it is not neces sary to add a gasoline antifreeze since ethanol will pre vent the accumulation of moisture in the fuel system RECOMMENDED ENGINE TRANSMISSION OIL The recommended oil to use is Arctic Cat ACX All Weather synthetic engine oil which has been specifi cally formu...

Страница 7: ...all the air filter and housing cover 4 On the carbureted model drain the carburetor float chamber 5 Plug the exhaust hole in the exhaust system with a clean cloth 6 Apply light oil to the plungers of the shock absorb ers 7 Tighten all nuts bolts cap screws and screws Make sure rivets holding components together are tight Replace all loose rivets Care must be taken that all calibrated nuts cap scre...

Страница 8: ...cables 7 Check the entire brake systems fluid level pads etc all controls headlights taillight brakelight and headlight aim adjust or replace as necessary 8 Tighten all nuts bolts cap screws and screws making sure all calibrated nuts cap screws and bolts are tightened to specifications 9 Check tire pressure Inflate to recommended pres sure as necessary 10 Make sure the steering moves freely and do...

Страница 9: ...e 2 4 Testing Engine Compression 2 5 Spark Plug 2 6 Muffler Spark Arrester 2 6 Engine Transmission Oil Filter 2 6 Front Differential Rear Drive Differential Lubricant 2 7 Driveshaft Coupling 2 8 Nuts Bolts Cap Screws 2 8 Headlight Taillight Brakelight 2 8 Shift Lever Prowler XTX 2 9 Shift Lever XT 2 10 Hydraulic Brake System 2 10 Parking Brake 2 12 Burnishing Brake Pads 2 14 Checking Replacing V B...

Страница 10: ...fler Spark Arrester C R Gas Vent Hoses I I R 2 Yrs Throttle Cable Ends Accelerator Pedal Pivot I I C L A R Float Chamber 650 cc D Engine RPM Idle 650 cc I I A Engine Transmission Oil Level I A Engine Transmission Oil Filter R R R R R Oil Strainer I I C Front Differential Rear Drive Differ ential Lubricant I I R 4 Yrs Tires Air Pressure I I R Steering Components I I I R V Belt I l R Suspension Ball...

Страница 11: ... Filter Use the following procedure to remove the filter and inspect and or clean it CLEANING AND INSPECTING FILTER 1 Remove the seats then remove the center console 2 Unsnap the four fasteners securing the air cleaner housing cover and remove the cover 3 Remove the air filter frame A then remove the foam filter element B PR576A 4 Fill a wash pan larger than the filter with a non flammable cleanin...

Страница 12: ...he tappet adjuster screw until the clearance is within specifications Tighten each jam nut securely after completing the adjustment CC007D 4 Install the spark plug then install the timing inspection plug 5 Place the two tappet covers with O rings into posi tion Tighten the cap screws securely Valve Tappet Clearance Valve Adjuster Procedure To check and adjust valve tappet clearance use the followi...

Страница 13: ...ompression To test engine compression use the following proce dure NOTE The engine must be warm and the battery must be fully charged for this test NOTE The seats and center console must be removed for this procedure 1 Remove the high tension lead from the spark plug 2 Using compressed air blow any debris from around the spark plug 3 Remove the spark plug then attach the high ten sion lead to the ...

Страница 14: ...emove the spark arrester Account for a gasket PR498 PR499 2 Using a suitable brush clean the carbon deposits from the screen taking care not to damage the screen NOTE If the screen or gasket is damaged in any way it must be replaced 3 Install the spark arrester assembly and gasket and secure with the cap screws Tighten the cap screws to 48 in lb Engine Transmission Oil Filter OIL FILTER Change the...

Страница 15: ...e NOTE The oil level stick should be threaded into the case for checking the oil level 11 Remove the oil level stick the engine oil level should be above the illustrated L mark but not higher than the illustrated F mark ATV 0100AA 12 Inspect the area around the drain plug and oil filter for leaks Front Differential Rear Drive Differential Lubricant To check lubricant use the following procedure 1 ...

Страница 16: ...ile HANDLE WITH CARE When replacing the headlight bulb do not touch the glass portion of the bulb If the glass is touched it must be cleaned with a dry cloth before installing Skin oil residue on the bulb will shorten the life of the bulb To replace the headlight bulb use the following proce dure 1 Remove the wiring harness connector from the back of the headlight 2 Grasp the bulb socket turn it c...

Страница 17: ... the most intense beam is centered on the ver tical mark 5 cm 2 in below the horizontal mark on the aiming surface 0740 647 7 Using the adjuster knob adjust each headlight until correct aim is obtained CD714A Shift Lever Prowler XTX CHECKING SHIFT LEVER CABLE Set the parking brake and turn the ignition switch on then with the shift lever in the neutral position look for the N indication on the LCD...

Страница 18: ...ts and center console 2 Make sure the shift lever is in neutral then loosen the jam nut on the linkage 3 Remove the E clip on the transmission shift arm then remove the linkage from the shift arm Account for a washer and a bushing PR461A 4 Turn the linkage rod clockwise or counterclock wise until the lower linkage hole aligns with the shift arm pin 5 Install the bushing and linkage and secure with...

Страница 19: ...m D At this point perform steps B and C on the other FRONT bleeder screw then move to the REAR bleeder screw and follow the same pro cedure E Repeat steps B and C until the brake pedal is firm 4 Carefully check the entire hydraulic brake system that all hose connections are tight the bleed screws are tight the protective caps are installed and no leakage is present INSPECTING HOSES Carefully inspe...

Страница 20: ...nal 1 With the engine off transmission in neutral and the parking brake set attempt to move the vehicle 2 If the rear wheels are locked it is adjusted prop erly 3 If the rear wheels are not locked it must be adjusted set up ADJUSTING To adjust set up the parking brake use the following procedure NOTE Remove the four rear body screws secur ing the belly panel to the frame and allow it to drop down ...

Страница 21: ...ove the outer brake pad Remove the inner pad PR466A Inspecting and Measuring 1 Inspect the pads for gouges chips or wear 2 Inspect the disc for gouges grooves cracks and warpage 3 Using a calipers measure the thickness of each brake pad 4 If the thickness of either brake pad is less than 1 0 mm 0 039 in the brake pads must be replaced NOTE The brake pads should be replaced as a set Installing 1 Pl...

Страница 22: ...brakelight illuminates when the brake pedal is depressed Checking Replacing V Belt REMOVING 1 Remove the seats and center console then remove the left side seat base PR104 2 Remove the cap screws securing the V belt cover noting the location of the different lengthed cap screws for installing purposes then using a rubber mallet gently tap on the cover tabs to loosen the cover Remove the cover 3 Re...

Страница 23: ...until the V belt is flush with the top of the driven pulley 4 Place the V belt cover gasket into position then install the cover and secure with the cap screws making sure the different lengthed cap screws are in their proper location Tighten the cap screws to 8 ft lb 5 Secure the seat base with the four cap screws Tighten securely 6 Install the seats and center console making sure the seats lock ...

Страница 24: ...leed hydraulic system 5 Replace seal s Problem Brake pedal travel excessive Condition Remedy 1 Hydraulic system entrapped air 2 Brake fluid low 3 Brake fluid incorrect 4 Piston seal cup worn 1 Bleed hydraulic system 2 Add fluid to proper level 3 Replace with correct fluid 4 Replace seal cup Problem Brake fluid leaking Condition Remedy 1 Connection joints loose 2 Hose cracked 3 Piston seal worn 1 T...

Страница 25: ...3 1 3 SECTION 3 ENGINE TRANSMISSION TABLE OF CONTENTS Engine Transmission 3 2 Specifications 3 2 Prowler XT XTX Table of Contents 3 3 Troubleshooting 3 49 Back to TOC ...

Страница 26: ...0 013 mm Valve Guide Valve Stem Deflection max wobble method 0 35 mm Valve Guide Inside Diameter 5 000 5 012 mm Valve Stem Outside Diameter intake exhaust 4 972 4 987 mm Valve Stem Runout max 0 1 mm Valve Head Thickness min 2 3 mm Valve Face Seat Width intake exhaust 2 25 mm 2 60 mm Valve Seat Angle intake exhaust 45 Valve Face Radial Runout max 0 2 mm Valve Spring Free Length min 38 7 mm Valve Sp...

Страница 27: ...suitable lift or jack stands allowing room to perform work from the underside NOTE Locate the jack stands to allow removing of the center belly panel 1 Remove the seats and center console then remove the left side and right side seat bases 2 Remove the center belly panel then drain the oil and coolant NOTE Use a small funnel between the frame and coolant drain plug to prevent coolant from drain in...

Страница 28: ... ness ground and the battery ground wires to the starter PR145A PR128A PR474B 6 Remove the E clip from the transmission shift arm then on the XT disconnect the shifter linkage and account for a washer and a bushing On the Prowler XTX disconnect the cable PR461B PR567A 7 Remove four machine screws securing the shifter mount to the frame then remove the shifter assem bly Back to TOC Back to Section ...

Страница 29: ...ir filter and mounting bracket as an assembly PR140A 10 Remove the throttle arm cover from the carbure tor throttle body then disconnect and remove the throttle cable and the carburetor throttle body PR154A 11 Remove the coolant hoses from the water pump and thermostat housings then position the upper coolant line to the left side of the engine compart ment PR150A 12 Remove the exhaust duct from t...

Страница 30: ...ionary and cap screw removing will be more difficult PR152A PR120A 15 Separate the drive coupler flanges then remove the driveshafts from the splined slip joints being careful not to damage the rubber boots The front boot should be removed with the driveshaft PR148A 16 Remove two flange nuts from the underside of the rear engine mounts PR153A 17 Remove two flange nuts securing the engine mounting ...

Страница 31: ...ove the spark plug and timing inspec tion plug then using an appropriate wrench rotate the crankshaft to top dead center of the compres sion stroke 1 Remove the two tappet covers CC001D NOTE Keep the mounting hardware with the cov ers for assembly purposes or thread them back into the head to keep them separated 2 Remove the 12 cap screws securing the valve cover to the head account for the four r...

Страница 32: ...then remove the C ring NOTE Care should be taken not to drop the C ring down into the crankcase CC012D 5 Bend the washer tabs down and remove the two cap screws securing the sprocket to the camshaft then drop the sprocket off the camshaft CC013D 6 Remove the cap screw securing the chain ten sioner account for a washer then remove the ten sioner CC014D 7 While holding the chain slide the sprocket a...

Страница 33: ...wo alignment pins then remove the cam chain guide CC020D CC022D C Cylinder D Piston NOTE Steps 1 9 in the preceding sub section must precede this procedure 10 Loosen the clamp securing the coolant hose to the union then detach the hose 11 Remove the two nuts securing the cylinder to the crankcase AT THIS POINT To service valves and cylinder head see Servicing Top Side Components sub section AT THI...

Страница 34: ...ng the rod or install a suit able connecting rod holder NOTE If the existing rings will not be replaced with new rings note the location of each ring for proper installation When replacing with new rings replace as a complete set only If the piston rings must be removed remove them in this sequence AT THIS POINT To service cylinder see Servicing Top Side Compo nents sub section CAUTION When removi...

Страница 35: ...nish Correct any high spots before assembly by continuing to move the valve cover in a figure eight motion until a uniform bright metallic finish is attained CC130D Removing Valves NOTE Keep all valves and valve components as a set Note the original location of each valve set for use during installation Return each valve set to its original location during installation 1 Using a valve spring compr...

Страница 36: ...n a set of V blocks 2 Position the dial indicator contact point on the out side edge of the valve face then zero the indicator ATV1082A 3 Rotate the valve in the V blocks 4 Maximum runout must not exceed specifications Measuring Valve Guide Valve Stem Deflection Wobble Method 1 Mount a dial indicator and base on the surface plate then place the cylinder head on the surface plate 2 Install the valv...

Страница 37: ...ound coils toward the head ATV 1011A 4 Place a spring retainer over the valve springs then using the valve spring compressor compress the valve springs and install the valve cotters CC132D PISTON ASSEMBLY NOTE Whenever a piston rings or pin are out of tolerance they must be replaced Cleaning Inspecting Piston 1 Using a non metallic carbon removal tool remove any carbon buildup from the dome of the...

Страница 38: ...ortion of the cylinder Use the piston to position each ring squarely in the cylinder 2 Using a feeler gauge measure each piston ring end gap Acceptable ring end gap must be within specifications CC280D Measuring Piston Pin Outside Diameter and Piston Pin Bore 1 Measure the piston pin outside diameter at each end and in the center If measurement is not within specifications the piston pin must be r...

Страница 39: ...e trued they must be replaced Cleaning Inspecting Cylinder Head 1 Using a non metallic carbon removal tool remove any carbon buildup from the combustion chamber being careful not to nick scrape or damage the combustion chamber or the sealing surface 2 Inspect the spark plug hole for any damaged threads Repair damaged threads using a heli coil insert 3 Place the cylinder head on the surface plate c...

Страница 40: ... before assembly by continuing to move the cylin der in a figure eight motion until a uniform bright metallic finish is attained CC129D Inspecting Cam Chain Guide 1 Inspect cam chain guide for cuts tears breaks or chips 2 If the chain guide is damaged it must be replaced Honing Cylinder 1 Using a slide gauge and a dial indicator or a snap gauge measure the cylinder bore diameter in three locations...

Страница 41: ...mshaft and note runout maximum tolerance must not exceed specifications Measuring Camshaft Lobe Height 1 Using a calipers measure each cam lobe height ATV1013A 2 The lobe heights must not exceed minimum speci fications Inspecting Camshaft Bearing Journal 1 Inspect the bearing journal for scoring seizure marks or pitting 2 If excessive scoring seizure marks or pitting is found the cylinder head ass...

Страница 42: ...ace the cylinder head Inspecting Camshaft Spring Drive Pin 1 Inspect the spring and drive pin for damage CF061A CF060A 2 If damaged the camshaft must be replaced Installing Top Side Components A Piston B Cylinder 0732 301 1 Install the piston on the connecting rod making sure there is a circlip on each side and the open end of the circlip faces upwards NOTE The piston should be installed so the ar...

Страница 43: ...e the cyl inder to the crankcase NOTE The two cylinder to crankcase nuts will be tightened in step 10 CC023D 5 Install the coolant hose onto the crankcase union and tighten the clamp C Cylinder Head D Valve Cover NOTE Steps 1 5 in the preceding sub section must precede this procedure 6 Place the chain guide into the cylinder CC022D 7 Place the head gasket into position on the cylinder Place the al...

Страница 44: ...shaft lobes onto the camshaft At this point do not seat the sprocket onto the shaft 732 307B NOTE At this point oil the camshaft journals cam lobes and the three seating surfaces on the cylinder 13 While holding the cam chain sprocket to the side install the rear cam chain tensioner guide into the cylinder head Install the pivot cap screw and washer CD461 14 With the cam lobes directed down toward...

Страница 45: ...ith red Loctite 271 securing the sprocket and tab washer to the camshaft Tighten only until snug CD464 18 Rotate the crankshaft until the second cap screw securing the sprocket to the camshaft can be installed then install the cap screw threads coated with red Loctite 271 and tighten to 11 ft lb Bend the tab to secure the cap screw CD465 19 Rotate the crankshaft until the first cap screw from step...

Страница 46: ...se The adjuster shaft tension will be released in step 24 23 Place the chain tensioner adjuster assembly and gasket into position on the cylinder and secure with the two cap screws CD469 24 Using a flat blade screwdriver rotate the adjuster screw inside the tensioner counterclockwise until all tension is released then install the cap screw into the end of the chain tensioner CD470 CD471 25 Loosen ...

Страница 47: ... 32 If removed install the spark plug Tighten securely Right Side Components NOTE For efficiency it is preferable to remove and disassemble only those components which need to be addressed and to service only those components The technician should use discretion and sound judgment NOTE The engine transmission does not have to be removed from the frame for this procedure Removing Right Side Compone...

Страница 48: ...scharge hole the water pump must be replaced see Section 4 7 Remove the cap screws securing the right side cover to the crankcase noting the location of the different sized cap screws for installing purposes 8 Using Side Case Puller remove the side cover Account for a gasket and two alignment pins NOTE Inspect the inside of the right side cover for any shaft washers that may have come off with the...

Страница 49: ...ap ring securing the water pump driven gear then remove the gear noting the direc tion of the sides of the gear for installing purposes Account for the driven gear alignment pin CD952A NOTE There is an oil passage beneath the driven gear drive gear assembly This passage should be plugged prior to removing the driven gear and drive gear Failure to do so could result in the loss of an alignment pin ...

Страница 50: ...ss of an alignment pin 1 Install the water pump driven gear alignment pin and the driven gear with the beveled side of the gear facing outward as noted in removing then secure with the snap ring CD950A CD952A CD949 NOTE The sharp side of the snap ring should be facing outward 2 Install the water pump drive gear drive pin and the drive gear with the flat side of the gear facing out ward as noted in...

Страница 51: ...veled side of the intermediate gear facing inward as noted in removing CD139 PR447A 4 In order on the crankshaft install a washer ring gear key and the magneto rotor Secure with the nut threads coated with red Loctite 271 Tighten to 105 ft lb CD948A CD940B 5 Install the shift cam plate onto the shift cam shaft then coat the cap screw threads with red Loctite 271 and tighten securely CD935A CD934 B...

Страница 52: ... washer is in place PR431A 9 Install the magneto cover and secure with the cap screws Tighten only until snug 10 Place the spacer into position on the crankshaft making sure a new lubricated O ring is inside the spacer Tighten the flange nut to 28 ft lb PR465 11 Tighten the cap screws from step 9 to 8 ft lb 12 Place the speed sensor housing and gasket into position and secure with the two cap scre...

Страница 53: ...over B Driven Pulley C Clutch Cover 1 Remove the cap screws securing the V belt cover noting the location of the different lengthed cap screws for installing purposes then using a rubber mallet gently tap on the cover tabs to loosen the cover CD079 2 Remove the nut securing the movable drive face then remove the face Account for a flat washer and spacer CD963 CD966A 3 Remove the nut securing the f...

Страница 54: ... D from the clutch housing Note the location of the green dot or the word OUTSIDE for installing purposes 8 Using a hydraulic press remove the clutch hous ing assembly from the clutch cover Account for the left fixed drive spacer and an O ring inside the fixed drive spacer CF085 CC596 NOTE Account for and inspect the clutch hous ing seal CAUTION Care must be taken when removing the cover so the co...

Страница 55: ...t hand threads securing the clutch shoe assembly C FI279A 11 Remove the cap screw securing the oil pump drive gear B Account for a cap screw washer pin and spacer CC606 CD987 CD993 12 Using an impact driver remove the Allen head screws securing the final drive carrier bearing housing E then remove the housing and account for two alignment pins CD999 Back to TOC Back to Section TOC Next Back ...
Страница 56: ... or damage If any shoe is worn to the bottom of the groove replace the complete set ATV1014 INSPECTING CLUTCH HOUSING 1 Inspect the clutch housing for burns grooving cracks or uneven wear 2 If the housing is damaged in any way the housing must be replaced INSPECTING PRIMARY ONE WAY DRIVE 1 Insert the drive into the clutch housing 2 Rotate the inner race by hand and verify the inner race rotates on...

Страница 57: ...94 2 Install the secondary shaft bearing housing making sure the two alignment pins are properly posi tioned Tighten the Allen head screws securely CD999 3 Install the oil pump onto the engine then tighten the cap screws securely CD988 4 Install the oil pump drive gear spacer onto the crank balancer shaft Grease the pin and insert it into the shaft then install the drive gear making sure the raise...

Страница 58: ... flange nut threads coated with red Loctite 271 Tighten to 221 ft lb PR410A 7 Lightly grease the clutch housing seal then insert the left fixed drive spacer CF088A CF086 8 Install the clutch cover alignment pins into the crankcase apply oil to the cover gasket and install the gasket onto the crankcase 9 Apply grease to the outer edges of the clutch hous ing then from inside the clutch cover instal...

Страница 59: ...ven pulley and over the front shaft PR389 NOTE The arrows on the V belt should point for ward 17 Pinch the V belt together near its center and slide the spacer and movable drive face onto the drive shaft Secure the drive face with a washer and nut coated with red Loctite 271 Using Spanner Wrench tighten the nut to 165 ft lb CF261 NOTE At this point the cap screw can be removed from the driven pull...

Страница 60: ...engthed cap screws 3 Using the Crankcase Separator Crankshaft Remover and tapping lightly with a rubber mallet separate the crankcase halves Account for four alignment pins NOTE To keep the shaft gear assemblies intact for identification tap the shafts toward the right side crankcase half when separating the halves CC665 Disassembling Crankcase Half NOTE For steps 1 7 refer to illustration CC821B ...

Страница 61: ...y If necessary see Ser vicing Center Crankcase Components sub sec tion 6 Using a rubber mallet tap on the crankcase to remove the driveshaft E CC675 7 Note the timing marks on the crank balancer gear B and crankshaft gear C for assembling pur poses then slide the crank balancer gear off the crank balancer Account for the key in the keyway CD826 8 Remove the crank balancer NOTE There is a flat spot...

Страница 62: ...the dial indicator so the tip is contacting a tooth on the secondary drive bevel gear 4 While rocking the drive bevel gear back and forth note the maximum backlash reading on the gauge 5 Acceptable backlash range is 0 05 0 33 mm 0 002 0 013 in Correcting Backlash NOTE If backlash measurement is within the acceptable range no correction is necessary 1 If backlash measurement is less than specified ...

Страница 63: ...led the initial set up must be performed to establish correct gear tooth con tact If only the secondary output drive shaft or secondary output driven gear are replaced pro ceed to Correcting Backlash in this sub section 1 Install a new bearing A onto the secondary driven shaft B making sure the bearing locating groove is directed away from the driven gear splines MT011A 2 Using a suitable press in...

Страница 64: ...djust tooth contact use the following chart to correctly shim the driven shaft 7 After correct tooth contact is established proceed to Checking Backlash in this sub section Checking Backlash 1 If removed install the secondary drive bevel gear shaft into the crankcase then tighten the nut to 59 ft lb 2 Install the secondary drive bearing support then install the secondary driven output shaft into t...

Страница 65: ...connecting rod small end journal 2 Zero the indicator and push the small end of the connecting rod away from the dial indicator 3 Maximum deflection must not exceed specifications Measuring Connecting Rod Big End Side to Side 1 Push the lower end of the connecting rod to one side of the crankshaft journal 2 Using a feeler gauge measure the gap between the connecting rod and crankshaft journal CC28...

Страница 66: ...og 14 driven gear washer 13 and bushing 9 2 Install bearing 8 and high driven gear 15 then install the left drive gear washer 16 From the right side 1 Install driven gear washer 13 bushing 9 bear ing 8 and low driven gear 12 2 Install lock washer 11 lock washer 10 washer 6 and bushing 9 3 Install bearing 8 reverse driven gear 7 washer 6 and the circlip 4 4 Install reverse driven gear spacer 5 circ...

Страница 67: ...l 3 Install the crank balancer CD832B NOTE It will be necessary to rotate the crank bal ancer until the counterweight is facing away from the crankshaft then rotate the crankshaft clock wise into the journal area to allow the crank bal ancer to be fully seated 4 Place the key into the crank balancer keyway then install the crank balancer gear making sure the alignment dots on the crank balancer ge...

Страница 68: ...68A 11 Place the oil strainer into position then secure with the two screws 12 Place the oil strainer cap into position making sure the O ring is in position then secure the cap with cap screws Tighten securely Joining Crankcase Halves 1 Apply High Temp Sealant to the right side mating surface 2 Lightly oil all bearings and grease all shafts in the left side crankcase 3 Using a propane torch heat ...

Страница 69: ...e mounts should be in the frame 2 Align the rear engine mount studs with the holes in the frame and slowly lower into place The front engine mounting bracket will then slip over the engine mount studs PR146 3 Install the flange nuts on the rear engine mount studs then secure the front engine mounting bracket to the front engine mount studs with two flange nuts Tighten the four flange nuts to 25 ft...

Страница 70: ...connecting the outlet hous ing to the V belt housing Tighten all clamps securely PR153B PR144B 8 Connect the lower coolant hose to the water pump housing then connect the upper coolant hose to the thermostat housing Tighten the hose clamps securely 9 Install the starter wire on the starter and tighten the nut securely then connect the CDI connector 650 cc alternator connector gear shift position s...

Страница 71: ...155B PR130A NOTE Make sure the main harness ground and battery ground wires are installed and secured in the proper location with the unpainted cap screw PR474B 11 Install the carburetor throttle body and tighten the intake boot clamp securely then connect the gasline hose vacuum line and throttle cable PR117 PR140B PR154 Back to TOC Back to Section TOC Next Back ...
Страница 72: ...ng the cable Prowler XTX then secure with the E clip NOTE Before operating vehicle check and adjust shifter linkage cable as required see Section 2 15 Fill the engine transmission with the appropriate lubricant 16 Fill the cooling system with the appropriate coolant 17 Connect the positive battery cable to the battery then connect the negative cable 18 Install the left side and right side seat bas...

Страница 73: ...ve 1 Clean vent hose 2 Replace valve 3 Clean replace hose 4 Clean replace inlet screen valve screen 5 Replace fuel pump Problem Engine stalls easily Condition Remedy 1 Spark plug fouled 2 Magneto defective 3 CDI unit ECU defective 4 Carburetor jets fuel injector obstructed 5 Valve clearance out of adjustment 1 Clean replace plug 2 Replace magneto 3 Replace CDI unit ECU 4 Clean jets replace fuel in...

Страница 74: ...e shaft s 7 Replace thrust washer s Problem Engine idles poorly Condition Remedy 1 Valve clearance out of adjustment 2 Valve seating poor 3 Valve guides defective 4 Rocker arms arm shaft worn 5 Magneto defective 6 CDI unit ECU defective 7 Spark plug fouled gap too wide 8 Ignition coil defective 9 Float out of adjustment 650 cc 10 Jets fuel injector obstructed 11 Pilot screw setting improper 650 cc...

Страница 75: ...st clearance 2 Replace springs 3 Time camshaft 4 Replace service rings cylinder 5 Repair seats 6 Clean replace plug 7 Replace arms shafts 8 Adjust gap replace plug 9 Clean jets replace fuel injector 10 Adjust float height 11 Clean element 12 Drain excess oil change oil 13 Tighten replace manifold 14 Replace cam chain sprockets Problem Engine overheats Condition Remedy 1 Carbon deposit piston crown...

Страница 76: ...on 550 700 cc 4 7 Engine RPM Idle 650 cc 4 8 Gas Tank 4 9 Gas Vent Hoses 4 11 Oil Filter Oil Pump 4 12 Oil Cooler 700 cc 4 12 Liquid Cooling System 4 13 Radiator 4 13 Thermostat 4 15 Fan 4 15 Water Pump 4 16 Electric Fuel Pump Fuel Level Sensor 550 700 cc 4 17 Vacuum Pulse Fuel Pump 650 cc 4 18 Fuel Level Sensor 650 cc 4 19 Troubleshooting 650 cc 4 21 Troubleshooting 550 700 cc 4 21 Back to TOC ...

Страница 77: ...o the carburetor 2 Carefully remove the choke assembly from the carburetor taking care not to force the plunger from the carburetor body INSPECTING TESTING 1 Inspect the plunger A for scoring or scratches the needle B for damage to the tip the spring C for breakage and the O ring D for breaks KC328A 2 With the choke at room temperature approxi mately 70 F measure plunger extension Mea surement A s...

Страница 78: ...nnect the throttle cable from the carburetor PR154A PR162A 6 Disconnect the electric choke connector then remove the carburetor from the engine DISASSEMBLING 1 Remove the four Phillips head screws securing the top cover then remove the cover WARNING Whenever any maintenance or inspection is per formed on the fuel system during which there may be fuel leakage there should be no welding smok ing ope...

Страница 79: ...gm assembly spring and U ring in the housing CC748 4 Remove the Phillips head screws securing the float chamber then remove the chamber Account for the O ring CC749 CC750 5 Remove the float pin CC752 6 Lift the float assembly from the carburetor Account for the float valve CC753 NOTE Note the locations of the jets pilot screw and holder for disassembling procedures Back to TOC Back to Section TOC ...

Страница 80: ...rs in the rubber 7 Inspect float for damage 8 Inspect gasket and O rings for distortion tears or noticeable damage 9 Inspect tips of the jet needle pilot screw and the needle jet for wear damage or distortion 10 Inspect the slow jet and main jet for obstructions or damage NOTE If the slow jet is obstructed the mixture will be extremely lean at idle and part throttle oper ation 11 Inspect the float...

Страница 81: ...g sure the O ring is properly positioned then secure with the Phillips head screws CC750 CC749 7 Place the U ring into the pump housing Position the spring and diaphragm assembly lip toward the carburetor onto the carburetor then secure the assembly with the pump housing and three screws Tighten securely CC748 8 Place the jet needle spring seat and spring into the vacuum piston then place the asse...

Страница 82: ...sufficient clean gas in the gas tank 4 Verify that the battery is sufficiently charged to crank the engine over at normal speed 5 Check the air filter housing and air filter for con tamination Clean or replace as necessary see Sec tion 2 REMOVING THROTTLE BODY 1 Turn the ignition switch to the OFF position then remove the ignition switch key 2 Remove the left and right seats then remove the center...

Страница 83: ... 2 then con nect the gasline hose 4 Connect the electrical connectors to the throttle body components 5 Install the air filter assembly and secure with the existing hardware then connect the IAT sensor and crankcase breather hose 6 Install the center console and seats making sure the seats lock securely in place Engine RPM Idle 650 cc NOTE Idle RPM is not adjustable on the 550 700 cc To adjust idl...

Страница 84: ...164 4 From the opposite side of the vehicle repeat step 3 then lift the rear of the floorboard up and lift the floorboard out of the vehicle PR165 5 Disconnect the vent hose gas hose and fuel level sensor connector then cap the vent fitting and gas hose fitting PR166B 6 Remove the outer cap screw securing the front tank hold down then swing the hold down to the left WARNING Adjust the idle to the ...

Страница 85: ...tank components with parts cleaning solvent 2 Inspect all hoses for cracks or leaks 3 Inspect gas tank cap and tank for leaks holes and damaged threads 4 Inspect the fuel level sensor for proper operation see appropriate Fuel Level Sensor in this section INSTALLING 1 Place the gas tank into position in the vehicle then install the inside rear hold down strap PR173 PR172A 2 Swing the front hold dow...

Страница 86: ...the gas hose and gas tank vent hose to the proper fittings then connect the fuel level sensor connector to the main harness PR166B 7 Position the floorboard into the vehicle and secure with the appropriate hardware then install the cen ter console seat bases and seats making sure the seats lock securely Gas Vent Hoses Replace the gas hose every two years Damage from aging may not always be visible...

Страница 87: ...ion 1 clogged oil passage clogged oil filter or improper installation of the oil filter REMOVING DISASSEMBLING 1 Remove the oil pump from the engine see Right Side Components in Section 3 2 Remove the Phillips head screw on the back side of the pump and separate the pump housing and cover Note the position of the inner and outer rotors and alignment pin for assembly 3 Remove oil pump components CL...

Страница 88: ...ooling System When filling the cooling system use premixed Arctic Cat Antifreeze While the cooling system is being filled air pockets may develop therefore run the engine for five minutes after the initial fill shut the engine off and then fill the cooling system to the bot tom of the stand pipe in the radiator neck Radiator REMOVING 1 Remove the cap screws securing the dash assem bly to the frame...

Страница 89: ...ING AND INSPECTING NOTE Whenever a part is worn excessively cracked or damaged in any way replacement is necessary 1 Flush the radiator with water to remove any con taminants 2 Inspect the radiator for leaks and damage 3 Inspect all hoses for cracks and deterioration 4 Inspect all fasteners and grommets for damage or wear INSTALLING 1 Place the radiator into position making sure the grommets are c...

Страница 90: ...ar or spring damage 2 Using the following procedure inspect the ther mostat for proper operation A Suspend the thermostat in a container filled with water B Heat the water and monitor the temperature with a thermometer C The thermostat should start to open at 63 5 66 5 C 146 152 F D If the thermostat does not open it must be replaced 3 Inspect all coolant hoses connections and clamps for deteriora...

Страница 91: ...e right side seat base 4 Loosen the coolant hose clamps and slide the clamps away from the hose ends PR132 5 Remove the two cap screws securing the water pump to the engine then remove the water pump CC786A INSTALLING 1 Secure the water pump to the engine with the two cap screws tightened securely CC786A 2 Connect the two coolant hoses to the water pump and secure with the clamps then install the ...

Страница 92: ...e the key from the ignition switch 2 Remove the seats center console and right side seat base then disconnect the negative battery cable 3 Disconnect the electrical plug from the main har ness then disconnect the gasline hose from the fuel pump 4 Mark the fuel pump mounting and gas tank for installing purposes then remove the screws secur ing the fuel pump to the gas tank and remove the fuel pump ...

Страница 93: ...NOTE It is important to install the fuel pump with the correct orientation to ensure adequate float lever clearance 2 Connect the gasline hose to the fuel pump pipe and secure with the hose clamp then connect the elec trical plug to the main harness 3 Connect the negative battery cable then turn the ignition switch to the ON position and verify that no gas leaks are present the pump runs for 2 3 s...

Страница 94: ...or then remove four torx head machine screws and the fuel level sensor mounting plate PR166C 3 Remove the fuel level sensor from the gas tank Account for a seal INSPECTING 1 Inspect the fuel screen and clean with low pressure compressed air 2 Move the float lever and check for free movement The float assembly should drop to the empty position when the fuel level sensor is held verti cally If there...

Страница 95: ...ate Tighten the four torx head machine screws securely 2 Connect the fuel level sensor connector to the main harness then install the gasline hose and secure with the clamp 3 Install the right side seat base then install the cen ter console and seats making sure the seats lock securely into place Back to TOC Back to Section TOC Next Back ...
Страница 96: ...operly 5 Filter obstructed 6 Float height incorrect 1 Shift into higher gear decrease RPM speed 2 Clean main jet 3 Clean needle jet 4 Check piston operation 5 Clean filter 6 Adjust float height Problem Overflow and fuel level fluctuations Condition Remedy 1 Float valve worn damaged 2 Float valve spring broken 3 Float not working properly 4 Float valve dirty 5 Float height too high too low 1 Replac...

Страница 97: ...0 700 cc 5 8 Speed Sensor 5 8 Ignition Switch 5 9 Headlight Switch 5 9 2WD 4WD Differential Lock Switch Prowler XTX 5 10 2WD 4WD Selector Switch XT 5 10 Differential Lock Switch XT 5 11 Reverse Override Switch 5 11 Front Drive Actuator 5 12 Stator Coils 650 cc 5 12 Stator Coil Crankshaft Position CKP Sensor 550 700 cc 5 13 Starter Motor 5 14 Starter Relay 5 15 CDI Unit 650 cc 5 15 Electronic Contr...

Страница 98: ...s Description p n Fluke Model 73 Multimeter 0644 191 MaxiClips 0744 041 Peak Voltage Reading Adapter 0644 307 Test Plug Error Code List 0444 216 650 cc Spark Plug Type Champion RG6YC Spark Plug Gap 0 7 0 8 mm 0 028 0 032 in Spark Plug Cap 5000 ohms Ignition Coil primary Resistance secondary Less than 1 ohm terminal to ground 5200 7800 ohms high tension plug cap removed to ground Ignition Coil Peak...

Страница 99: ...nstall the battery hold down RPM Limiter NOTE The UTV is equipped with a CDI unit ECU that retards ignition timing when maximum RPM is approached When the RPM limiter is activated it could be misinterpreted as a high speed misfire Testing Electrical Components All of the electrical tests should be made using the Fluke Model 73 Multimeter and when testing peak voltage the Peak Voltage Reading Adapt...

Страница 100: ...ter lead to ground 3 The meter must show battery voltage NOTE If the meter shows no battery voltage troubleshoot the battery fuse receptacle connec tor or the main wiring harness Brakelight Switch The switch connector is the two prong black connector below the master cylinder NOTE The ignition switch must be in the ON position VOLTAGE Wiring Harness Connector 1 Set the meter selector to the DC Vol...

Страница 101: ...he oil to cool and when the temperature is within a temperature range of 67 82 C 150 184 F the meter should show an open circuit 7 If the readings are not as indicated the switch must be replaced 8 Install the switch and tighten securely 9 Connect the switch leads Engine Coolant Temperature ECT Sensor 550 700 cc 1 Connect the meter leads selector in OHMS posi tion to the sensor terminals 2 Suspend...

Страница 102: ...stribution module under the operator s seat If there is any type of electrical system failure always check the fuses first 1 Remove all fuses from the power distribution module 2 Set the meter selector to the DC Voltage position 3 Connect the black tester lead to ground 4 Using the red tester lead contact each end of the fuse holder connector terminals individually 5 The meter must show battery vo...

Страница 103: ...ry Coil 650 cc or Pri mary Coil 550 700 cc in this sub section RESISTANCE NOTE For these tests the meter selector should be set to the OHMS position Primary Winding 1 Connect the red tester lead to the terminal with the wire removed then connect the black tester lead to ground PR278A 2 The meter reading must be within specification Secondary Winding 1 Connect the red tester lead to the high tensio...

Страница 104: ... to the ON position The meter must show battery voltage EFI Sensors Components 550 700 cc CRANKSHAFT POSITION CKP SENSOR To test the CKP sensor see Stator Coil Crankshaft Position CKP Sensor 550 700 cc in this section MANIFOLD ABSOLUTE PRESSURE MAP SENSOR 1 Disconnect the MAP connector from the pressure sensor located on the throttle body 2 Select DC Voltage on the tester and turn the igni tion sw...

Страница 105: ...access the ignition switch dash switches front accessory connectors and front switched accessory connector the dash must be unfastened and slid to the rear VOLTAGE 1 Set the meter selector to the DC Voltage position 2 Connect the red meter lead to the red wire then connect the black meter lead to ground 3 Meter must show battery voltage NOTE If the meter shows no battery voltage troubleshoot the m...

Страница 106: ...r using a break out harness or MaxiClips 1 Connect the black tester lead to the black wire then turn the ignition switch to the ON position 2 Select the DC Volts position on the tester and observe the meter readings for each of the three switch positions NOTE If the meter does not show voltages according to the chart make sure the front drive actuator is plugged in then troubleshoot the switch ign...

Страница 107: ... Override Switch VOLTAGE NOTE To perform the following tests the ignition switch must be in the ON position and the trans mission shifted into reverse gear 1 Connect the red meter lead to the black blue wire and the black meter lead to a suitable ground then select 2WD on the 2WD 4WD selector switch The meter must show approximately 1 5 DC volts 2 Depress the reverse override switch The meter show...

Страница 108: ... show battery voltage 5 Select 4WD on the 2WD 4WD selector switch The meter must show 0 DC volts 6 Connect the red meter lead to the white orange wire The meter must show battery voltage 7 Engage the differential lock The meter must show 0 DC volts NOTE If the meter does not show 0 DC volts rock the vehicle to help engage the differential lock then troubleshoot the differential lock switch see Dif...

Страница 109: ...using the electric starter 4 The meter reading must be within specification Signal Coil 1 Set the meter selector to the DC Voltage position 2 Connect the red tester lead to the yellow wire then connect the black tester lead to the white wire 3 Crank the engine over using the electric starter 4 The meter reading must be within specification Stator Coil Crankshaft Position CKP Sensor 550 700 cc VOLT...

Страница 110: ... Disconnect the battery 2 Remove the nut securing the positive cable to the starter then remove the cable from the starter 3 Remove the two cap screws securing the starter with ground wires to the crankcase then remove the starter Account for the wiring forms and an O ring INSTALLING 1 Apply a small amount of grease to the O ring seal on the starter then install the starter into the crankcase Secu...

Страница 111: ... the green wire and the black tester lead to the black wire PR297A 5 Depress the starter button and observe the multim eter NOTE If battery voltage is indicated replace the starter relay If no voltage is indicated proceed to Neutral Start Relay check CDI Unit 650 cc The CDI is located beneath the operator s seat near the battery NOTE The CDI unit is not a serviceable compo nent If the unit is defe...

Страница 112: ...white wire low beam using a MaxiClip The meter must show battery voltage NOTE If battery voltage is not shown in any test inspect the LIGHTS fuse on the power distribution module headlight switch ignition switch switch connectors or wiring harness Taillight Brakelight VOLTAGE Taillight NOTE Perform this test at the socket end of the taillight brakelight harness pigtail The ignition switch must be ...

Страница 113: ...re clearing Stored Codes 00 No Fault Detected active code only 12 CKP Crankshaft Position Sensor 13 MAP Manifold Absolute Pressure Sensor 14 TPS Throttle Position Sensor 15 ECT Engine Coolant Temperature Sensor 16 Speed Sensor 21 IAT Inlet Air Temperature Sensor 23 Tilt Sensor 24 Ignition Coil 1 32 Fuel Injector 1 40 ISC Idle Speed Control Valve 41 Fuel Pump Relay 60 Cooling Fan Relay 95 Sensor Po...

Страница 114: ...red on the multimeter leads as the following tests are made with the sensor connected 1 Connect the three wire plug to the sensor then remove the right side mounting screw securing the sensor to the rear frame CD707 2 Install the needle adapters to the multimeter leads then select DC Voltage on the multimeter 3 Connect the red tester lead to the blue brown wire B and the black tester lead to the b...

Страница 115: ... tester lead from terminal A and connect it to terminal C The meter should read 5 0 DC volts NOTE If the meter does not read as specified check for poor connections at the ECU or open broken wires in the wiring harness 5 Turn the ignition switch to the OFF position then disconnect the battery negative cable first 6 Select the OHMS position on the meter then per form the following resistance tests ...

Страница 116: ...and adjust to specifi cations see INSTALLING ADJUSTING in this sub section 10 Clear all ECU error codes after servicing is com plete see ECU Error Codes 550 700 cc in this sec tion REMOVING 1 Remove the seats and center console then discon nect the three wire TPS connector plug PR533A 2 Remove the screw securing the TPS to the throttle body and remove the TPS INSTALLING ADJUSTING 1 Place the TPS i...

Страница 117: ...unting screws securely then verify the TPS icon appears in the center position 6 Remove the test plug then install the center con sole and seats making sure the seats lock securely in place Back to TOC Back to Section TOC Next Back ...
Страница 118: ...ttery does not charge Condition Remedy 1 Lead wires connections shorted loose open 2 Magneto coils shorted grounded open 3 Regulator rectifier shorted punctured 1 Repair replace tighten lead wires 2 Replace magneto coils 3 Replace regulator rectifier Problem Battery charges but charging rate is below the specification Condition Remedy 1 Lead wires shorted open loose at terminals 2 Stator coils mag...

Страница 119: ...y run down damaged 5 Electrolyte contaminated 1 Replace battery 2 Keep electrolyte to prescribed level 3 Charge battery add distilled water 4 Replace battery 5 Replace battery Problem Battery discharges too rapidly Condition Remedy 1 Electrolyte contaminated 2 Specific gravity too high 3 Charging system charging operation not set prop erly 4 Cell plates overcharged damaged 5 Battery short circuite...

Страница 120: ...F CONTENTS Drive System 6 2 Front Drive Actuator 6 2 Front Differential 6 3 Drive Axles 6 15 Rear Gear Case Prowler XT Rear Differential XTX 6 20 Hub 6 21 Hydraulic Brake Caliper 6 23 Universal Joints 6 24 Troubleshooting 6 27 Back to TOC ...

Страница 121: ... switch is in the ON position The front drive actuator is located on the right side of the front drive input housing With the engine stopped and the ignition switch in the ON position a momen tary whirring sound can be heard each time the front drive selector switch is shifted If no sound is heard see Section 5 If the actuator runs constantly or makes squealing or grinding sounds the actuator must...

Страница 122: ...ighten this cap screw while the others are loose to ensure proper seating of the actuator 5 Tighten the remaining cap screws then connect the electrical plug to the main harness 6 Turn the ignition switch to the ON position and check the operation by shifting the selector switch several times 7 Secure the wiring harness to the frame with a nylon cable tie then install the inner fender panel Front ...

Страница 123: ... front drive actuator power connec tor from the main harness then disconnect the dif ferential lock indicator connector from the differential lock switch located on the right side of the differential PR191 9 Remove two cap screws securing the differential lock cable support then disconnect the differential lock cable at the differential PR194A PR195A 10 Remove the lower and upper ball joint cap sc...

Страница 124: ...e the front axles PR199 16 Remove the lower differential mounting cap screw Account for a lock nut and four washers Note the position of the washers for assembling PR205A 17 Remove the upper differential mounting cap screw Account for a lock nut and two washers CD016 18 Free the differential assembly from the frame mountings then lower the differential through the frame Disassembling Input Shaft 1...

Страница 125: ...or assembling purposes CD103 CD106 3 Remove the input shaft from the pinion housing CD107 4 Using a seal removal tool remove the input shaft seal Account for a spacer AF982 5 Remove the snap ring securing the input shaft bearing then place the pinion housing in a press and remove the bearing AF983 AF984 KX219 Back to TOC Back to Section TOC Next Back ...
Страница 126: ...nce 2 Molybdenum Disulphide Grease NOTE Any time drive splines are separated clean all splines with parts cleaning solvent and dry with compressed air then lubricate with rec ommended grease KX221 KX222 4 Install the input shaft into the pinion housing then secure in the bearing with a circlip KX210A 5 Place the pinion housing with new gasket onto the differential housing then secure with existing...

Страница 127: ...e note of the ID tag location for assembling purposes KX173 3 Using a plastic mallet tap lightly to remove the differential cover Account for an O ring KX174 NOTE If the cover is difficult to remove pry on the cover in more than one recessed location 4 Remove the splined coupler shifter fork pin and spring of the differential lock assembly and set aside Note position of parts for assembling pur po...

Страница 128: ...n gear in a bearing puller then remove the pinion bearing using a press Account for a collar and a bearing CC879 NOTE If gears are being replaced use the exist ing shims The numbers are scribed onto the gears the ring gear has the number on the oppo site side of the gears and the pinion gear has the number on the end of the pinion gear shaft by the splines If no number is present it should be con ...

Страница 129: ... mm 0 004 0 008 in If not within specification range reselect shim until backlash specification range can be verified 4 Prior to final assembling apply molybdenum dis ulfide grease to all oil seal lips 5 Prior to final assembling prelubricate journal on pinion assembly with SAE 80W 90 hypoid gear lubricant prior to pressing assembly into differen tial housing Assembling Pinion Gear 1 Install the b...

Страница 130: ...ly onto the housing then secure with the existing cap screws Tighten to 23 ft lb NOTE If a new housing is being installed tighten the cap screws to 28 ft lb CD103 CD110 8 Install the proper shim onto the ring gear spider assembly making sure the chamfer side of the shim is facing toward the ring gear Install the ring gear in the housing then install the outside shim with the chamfer side of the sh...

Страница 131: ... ft lb Removing Needle Bearing NOTE Removing the needle bearing is rarely necessary Avoid removing the needle bearing unless the bearing is clearly damaged NOTE This procedure can be performed on a rear gear case Prowler XT rear differential XTX 1 Place a 1 4 in drill bit on the inside surface of the needle bearing against the bottom side then drill through the pinion shaft needle bearing housing ...

Страница 132: ...n the edge of the lock collar in the oil gallery area then using a hammer stake the lock collar to ensure that the collar will remain securely tightened CC891 5 Install the pinion housing Removing Installing Axle Seal NOTE This procedure can be performed on a rear gear case Prowler XT rear differential XTX 1 Remove the seal using a seal removal tool CC899 2 Using a press remove the bearing CC900 3...

Страница 133: ...ation for the spacer washers PR205A 3 Tighten the nuts to 38 ft lb 4 Pour 275 ml 9 3 fl oz of SAE 80W 90 hypoid lubricant into the differential and install the fill plug Tighten to 16 ft lb 5 Align the scribed match marks on the front input drive flange and the front drive yoke flange then secure with the cap screws tightened to 20 ft lb PR198A 6 Install the front axles see Drive Axles in this sec...

Страница 134: ...e the wires to the frame with nylon ties 12 Apply a light coat of multi purpose grease to the hub splines then install the hubs and nuts Tighten to 200 ft lb then install new cotter pins AF894D 13 Install the wheels and tighten to 45 ft lb 14 Remove the vehicle from the support stand 15 Install the belly panel Drive Axles REMOVING REAR DRIVE AXLE 1 Secure the vehicle on a support stand to elevate ...

Страница 135: ...er remove the drive axle AF935 REMOVING FRONT DRIVE AXLE NOTE For removing a front drive axle see Front Differential in this section CLEANING AND INSPECTING AXLES NOTE Always clean and inspect the drive axle components to determine if any service or replace ment is necessary 1 Using a clean towel wipe away any oil or grease from the axle components CD019 2 Inspect boots for any tears cracks or det...

Страница 136: ...st face toward the housing CD022 5 Inspect the splines of the shaft the bearing ring and the housing for damage NOTE If any damage is apparent to the splines the bearing ring and or the housing the drive axle must be replaced as an assembly 6 Using a side cutters or suitable substitute remove the small clamp from the shaft CD752 NOTE At this point if the outside boot is dam aged continue with step...

Страница 137: ... the boot seats down into the recessed groove CD754 10 Using CV Boot Clamp Tool secure both outside boot clamps CD024 ASSEMBLING AXLES 1 Install the inner boot with the small clamp making sure the ends of the clamp are positioned correctly NOTE The boot is positioned correctly when the small end of the boot seats down into the recessed groove CD754 2 Using the boot clamp tool secure the small clam...

Страница 138: ...proper seating of the axle give it a light pull the axle should remain clipped in place 2 Swing the knuckle up and onto the drive axle then place the knuckle into place in the upper A arm Secure the knuckle to the A arm with a cap screw and a new lock nut Tighten to 33 ft lb 3 Place the hub into position on the axle followed by a hex nut Tighten the hex nut finger tight at this time 4 Tighten the ...

Страница 139: ... back then remove the cargo box lift support by removing the cap screw and nut securing the lower lift support to the frame The cargo box will tilt fully rearward 1 Drain the lubricant from the rear gear case differ ential then remove both rear drive axles see Drive Axles in this section 2 Remove the driveline brake caliper then cut the rear most propeller shaft boot clamp and slide the boot forwa...

Страница 140: ...brake and turn the ignition switch to OFF 2 Remove the cotter pin from the axle NOTE During assembly new cotter pins should be installed PR257 3 Remove the flange nut securing the hub 4 Remove the brake caliper front only PR243A 5 Remove the hub assembly 6 Remove the four cap screws securing the brake disc front hub only PR254A CLEANING AND INSPECTING NOTE Whenever a part is worn excessively crack...

Страница 141: ...he axle then set the parking brake PR221 4 Secure the hub assembly with the nut Tighten to 200 ft lb then secure with a new cotter pin NOTE If the cotter pin can not be inserted due to misalignment of the hole in the axle and the slots in the nut tighten the nut until properly aligned PR258 5 For front hubs secure the brake calipers to the knuckle with two cap screws tightened to 20 ft lb PR377B 6...

Страница 142: ...nd account for the brake caliper O ring Do not remove the piston from the caliper PR239B 6 Plug the fluid port with a suitable plug to prevent contamination during cleaning PR240A CLEANING AND INSPECTING 1 Clean all caliper components except the brake pads with parts cleaning solvent 2 Inspect the brake pads for damage and excessive wear NOTE For measuring brake pads see Section 2 ASSEMBLING INSTA...

Страница 143: ...he wheel Tighten to 45 ft lb 7 Remove the vehicle from the support stand and verify brake operation Universal Joints REMOVING NOTE The four universal joints can be accessed by removing the belly panel To remove the belly panel see Belly Panel in Section 8 1 Support the vehicle on suitable jack stands ele vated high enough to allow working from the underside of the vehicle 2 To aid in installing ma...

Страница 144: ...ide of the yoke to push the second bearing cup from the yoke then remove the tool and separate the uni versal joint 7 Secure the separator tool in a vise and repeat steps 4 6 to remove the bearing cups from the movable yoke PR375 INSPECTING 1 Inspect the yoke bores for damage or signs of bearing cup looseness If bearing cups are loose the yoke must be replaced PR367B 2 Check that yoke legs are par...

Страница 145: ...posite side bearing cup 4 Remove the separator tool from the vise and install the universal joint bearing cups and movable yoke into the fixed yoke using the same procedure as steps 2 3 except the vise cannot be used PR355 5 Check that the universal joint can be flexed freely without binding then apply multi purpose grease to the splines and install the propeller shaft noting the match marks made ...

Страница 146: ...ven gear teeth broken 2 Propeller shaft serration worn broken 3 Coupling damaged 4 Coupling joint serration worn damaged 5 Front drive driven bevel gears broken damaged 6 Front differential gears pinions broken damaged 7 Front drive actuator not operating 1 Replace gear s 2 Replace shaft 3 Replace coupling 4 Replace joint 5 Replace gear s 6 Replace gears pinions 7 Replace fuse 2WD 4WD switch front...

Страница 147: ...7 1 7 SECTION 7 SUSPENSION TABLE OF CONTENTS Suspension 7 2 Shock Absorbers 7 2 Front A Arms 7 3 Rear A Arms 7 5 Wheels and Tires 7 7 Troubleshooting 7 8 Back to TOC ...

Страница 148: ...nd sleeves from each AF605D 3 Remove the two cap screws and nut securing each rear shock absorber to the frame and lower A arm Account for bushings and sleeves from each AF626D 4 Using a suitable spring compression stand com press the shock absorber spring remove the retainer and remove the spring AF730D CLEANING AND INSPECTING NOTE Whenever a part is worn excessively cracked or damaged in any way...

Страница 149: ...cotter pin PR257 3 Remove the nut securing the hub 4 Remove the brake caliper Account for two cap screws CD007 5 Remove the hub assembly 6 Remove the cotter pin and slotted nut securing the tie rod end to the knuckle then remove the tie rod end from the knuckle 7 Remove the cap screws securing the ball joints to the knuckle PR193 8 Tap the ball joints out of the knuckle then remove the knuckle 9 R...

Страница 150: ...ly green Loctite 609 to the entire outside diameter of the ball joint then install the ball joint into the A arm and secure with the snap ring AF616D 2 Install the A arm assemblies into the frame mounts and secure with the cap screws Only fin ger tighten at this time AF610D 3 Route the brake hose through the upper A arm shock absorber mount AF627D 4 Secure the lower eyelet of the shock absorber to...

Страница 151: ... 20 ft lb PR377B 11 Secure the hub nut from step 9 to the shaft axle Tighten to 200 ft lb 12 Install a new cotter pin and spread the pin to secure the nut PR260 13 Install the wheel and tighten to 45 ft lb 14 Remove the vehicle from the support stand Rear A Arms REMOVING 1 Secure the vehicle on a support stand to elevate the wheels 2 Set the parking brake 3 Remove the wheel 4 Remove the cotter pin...

Страница 152: ...me mounts and secure with the cap screws and new lock nuts Finger tighten only at this time 2 Slide the knuckle onto the drive axle and into posi tion on the A arms then secure the knuckle to the A arms with cap screws and new lock nuts Tighten to 33 ft lb 3 Tighten the hardware securing the A arms to the frame mounts from step 1 to 33 ft lb 4 Apply grease on the drive axle splines then install th...

Страница 153: ...for damage wear or punctures NOTE If repair is needed follow the instructions found on the tire repair kit or remove the wheel and have it repaired professionally NOTE Be sure all tires are the specified size and have identical tread pattern 3 Check the front wheel alignment toe in and toe out and adjust as necessary see Section 8 4 Test drive the vehicle on a dry level surface and note any pullin...

Страница 154: ...e spring s 2 Replace shock absorber Problem Suspension too stiff Condition Remedy 1 A arm related bushings worn 1 Replace bushing Problem Suspension noisy Condition Remedy 1 Cap screws suspension system loose 2 A arm related bushings worn 1 Tighten cap screws 2 Replace bushings Back to TOC Back to Section TOC Back ...

Страница 155: ... Steering Shaft 8 5 Lower Steering Shaft Assembly 8 7 Steering Knuckles 8 8 Checking Adjusting Front Wheel Alignment 8 10 Front Bumper Assembly XT XTX 8 11 Hood 8 11 Fenders 8 12 Floor 8 12 Belly Panel 8 13 Exhaust System 8 13 Cargo Box XT XTX 8 13 Taillight Assembly 8 14 Seats 8 15 Troubleshooting 8 15 Back to TOC ...

Страница 156: ...e the vehicle on a support stand to elevate the front wheels then remove the front wheels 2 Remove the cotter pins and nuts securing the tie rod ends to the knuckles then remove the tie rod ends from the knuckles PR301 3 Make matching alignment marks on the pinion shaft and lower steering shaft joint PR333A NOTE Any time steering components are disas sembled all connecting components should be mar...

Страница 157: ...ing assembly rack and pinion is not repairable and must be replaced as an assembly however the tie rods and boots are replaceable REPLACING TIE RODS BOOTS 1 Secure the rack and pinion assembly in a vise or other suitable holding fixture then remove the tie rod end jam nut and rack boot 2 Slide the steering stopper A away from the inner tie rod end B then hold the rack C with a pipe wrench and remo...

Страница 158: ...steering shaft joint onto the pinion shaft aligning the match marks PR309 3 Apply green Loctite 270 to the cap screw then secure the lower steering shaft joint to the pinion shaft making sure the shaft does not protrude into the joint beyond the clamping surface PR309A 4 Tighten the cap screw to 36 ft lb then check that the steering wheel turns freely 5 Install the tie rod ends into the steering k...

Страница 159: ... thrust washer and then the two wave washers onto the steering shaft 2 Install the steering wheel aligning the two match marks then apply a drop of red Loctite 271 to the threads of the nut and secure the steering wheel Tighten to 25 ft lb NOTE If a new steering wheel is being installed mark the wheel as close as possible to the old wheel mark then check for proper positioning with the front wheel...

Страница 160: ... steering wheel shaft into the steering housing then with the lower thrust washer in posi tion align the match marks and slide the upper steering shaft joint onto the steering wheel shaft PR313A 2 Apply green Loctite 270 to the cap screw then install the cap screw in the upper steering shaft joint Install the nut and finger tighten 3 Align the match marks on the steering wheel shaft and the steeri...

Страница 161: ...ssembly must be replaced 1 Inspect the joints for excessive wear or looseness 2 Inspect welds and slip joints for cracks 3 Check for excessive wobble in the slip joint INSTALLING 1 Place the steering shaft assembly into position through the opening in the splash panel PR314A 2 Align the match marks on the pinion shaft and the lower steering shaft joint then slide the steering shaft joint onto the ...

Страница 162: ...PR193 8 Tap the ball joint end out of the knuckle then remove the knuckle 9 Remove the snap ring securing the bearing in the knuckle then press the bearing out of the knuckle PR289 CLEANING AND INSPECTING NOTE Whenever a part is worn excessively cracked or damaged in any way replacement is necessary 1 Clean all knuckle components 2 Inspect the bearing for pits scoring rusting or premature wear 3 I...

Страница 163: ...71 Tighten to 30 ft lb then install a new cotter pin and spread the pin NOTE During assembling new cotter pins should be installed 4 Apply a small amount of grease to the hub splines PR290A 5 Install the hub assembly onto the splines of the shaft CD009 6 Secure the hub assembly with the nut Tighten to 200 ft lb PR256 7 Install a new cotter pin and secure by spreading as shown Back to TOC Back to S...

Страница 164: ... and rear of the tire then using a tape measure measure and record the distance between the marks at the front and rear The front measurement should be 6 12 mm 1 4 1 2 in greater than the rear measurement toe out PR087A To adjust the wheel alignment use the following pro cedure 1 Center the steering wheel then using an open end wrench to hold the tie rod ends loosen the right side and left side ja...

Страница 165: ...EMOVING 1 Open the hood then disconnect the four headlight connectors and remove two nylon ties PR328A 2 Loosen but do not remove the four cap screws and flange nuts securing the hood hinge to the frame then lower the hood PR332A 3 Finish removing the cap screws and flange nuts from step 2 then remove the hood assembly CLEANING AND INSPECTING NOTE Whenever a part is worn excessively cracked or dam...

Страница 166: ...ppropriate fender into position and secure with existing hardware Floor REMOVING 1 Remove the seats and center console 2 Remove twelve cap screws and two self tapping screws securing the floor to the frame 3 While pulling forward on the upper rear of the floor lift the rear part of the floor above the seat lock stud NOTE To aid in removing insert a small wood block to hold in position PR163 PR164 ...

Страница 167: ...securely Exhaust System REMOVING MUFFLER 1 Remove the two exhaust springs at the muf fler exhaust pipe juncture PR131 2 Slide the muffler assembly clear of the holder pins INSPECTING MUFFLER NOTE Whenever a part is worn excessively cracked or damaged in any way replacement is necessary 1 Inspect muffler externally for cracks holes and dents 2 Inspect the muffler internally by shaking the muf fler ...

Страница 168: ...he cargo box then install the lower pivot housings and secure with the four shoulder cap screws Tighten to 20 ft lb 3 Raise the cargo box then connect the lift support to the frame install the cap screw and nut and tighten the nut securely 4 Lower the cargo box and lock into position Taillight Assembly REMOVING 1 Remove two torx head screws securing the tail light assembly to the rear canopy tube ...

Страница 169: ...worn damaged 5 Tie rod ends worn loose 6 Tires defective incorrect 7 A arm bushings damaged 8 Bolts nuts frame loose 1 Adjust pressure 2 Replace wheel s 3 Tighten replace cap screws 4 Replace bearing 5 Replace tighten tie rod ends 6 Replace tires 7 Replace bushings 8 Tighten bolts nuts Problem Steering pulling to one side Condition Remedy 1 Tires inflated unequally 2 Front wheel alignment incorrec...

Страница 170: ... Remedy 1 Rear wheel hub bearings worn loose 2 Tires defective incorrect 3 Wheel rim distorted 4 Wheel hub cap screws loose 5 Parking brake adjusted incorrectly 6 Rear suspension arm related bushing worn 7 Rear shock absorber damaged 8 Rear suspension arm nut loose 1 Replace bearings 2 Replace tires 3 Replace rim 4 Tighten cap screws 5 Adjust parking brake 6 Replace bushing 7 Replace shock absorbe...

Страница 171: ... SECTION 9 CONTROLS INDICATORS TABLE OF CONTENTS Master Cylinder Assembly 9 2 Accelerator Pedal 9 2 Front Differential Lock XT 9 3 Shift Lever 9 3 Speedometer Tachometer LCD Indicator Lights 9 4 Back to TOC ...

Страница 172: ...is holes 2 Inspect the push rod boot for tears or deterioration 3 Inspect the reservoir for cracks and leakage 4 Inspect the brake hose for cracks and deterioration and the condition of the banjo fittings INSTALLING 1 Place the master cylinder into position then using three new crush washers secure the two banjo fit tings to the master cylinder Tighten to 20 ft lb 2 Secure the master cylinder asse...

Страница 173: ...ition on the tog gle The front drive actuator should operate engag ing four wheel drive NOTE It may be necessary to turn the steering wheel or to rock the vehicle forward and backward to align the differential lock splines and allow engagement 3 Return the toggle to the pushed in position and lis ten for the front drive actuator to operate 4 Turn the ignition switch to the OFF position Tighten the...

Страница 174: ...omponents PR181A 3 Remove the nuts securing the gauge assembly to the dash then unplug the multi pin connector and remove the gauge from the vehicle PR284A 4 Place the new gauge into the dash panel opening then place the gauge holder over the mounting screws and secure with the nuts 5 Plug the multi pin connector into the gauge then turn the ignition switch to the ON position and check gauge funct...

Отзывы: