User Guide
APconnections, Inc. // 303.997.1300 // www.netequalizer.com
Page 23 of 120
rev. 20170131
© 2014-2017 APconnections, Inc. All Rights Reserved
version 8.4
Configure Hard Limits by IP
(
back
)
Use Hard Limits to set a fixed amount of individual bandwidth to a single IP
address or an entire set of IP addresses specified by a subnet mask.
Subnetted Hard Limits are not shared bandwidth. EACH IP address in the hard-limited
subnet range will receive the specified hard limit. For example, if you set up a 3Mbps
up/5Mbps down for a subnet, each IP address will get 3Mbps/5Mbps to use. Subnetted Hard
Limits can be set up for a Class B subnet, Class C subnet, or any legal subnet value 1-32.
NetEqualizer allows up to 60 thousand (60,000) unique active Hard Limits.
From the NetEqualizer Dashboard or Navigation Menu
Click on ->[Setup] -> Manage Traffic
Limits -> Configure Hard Limits
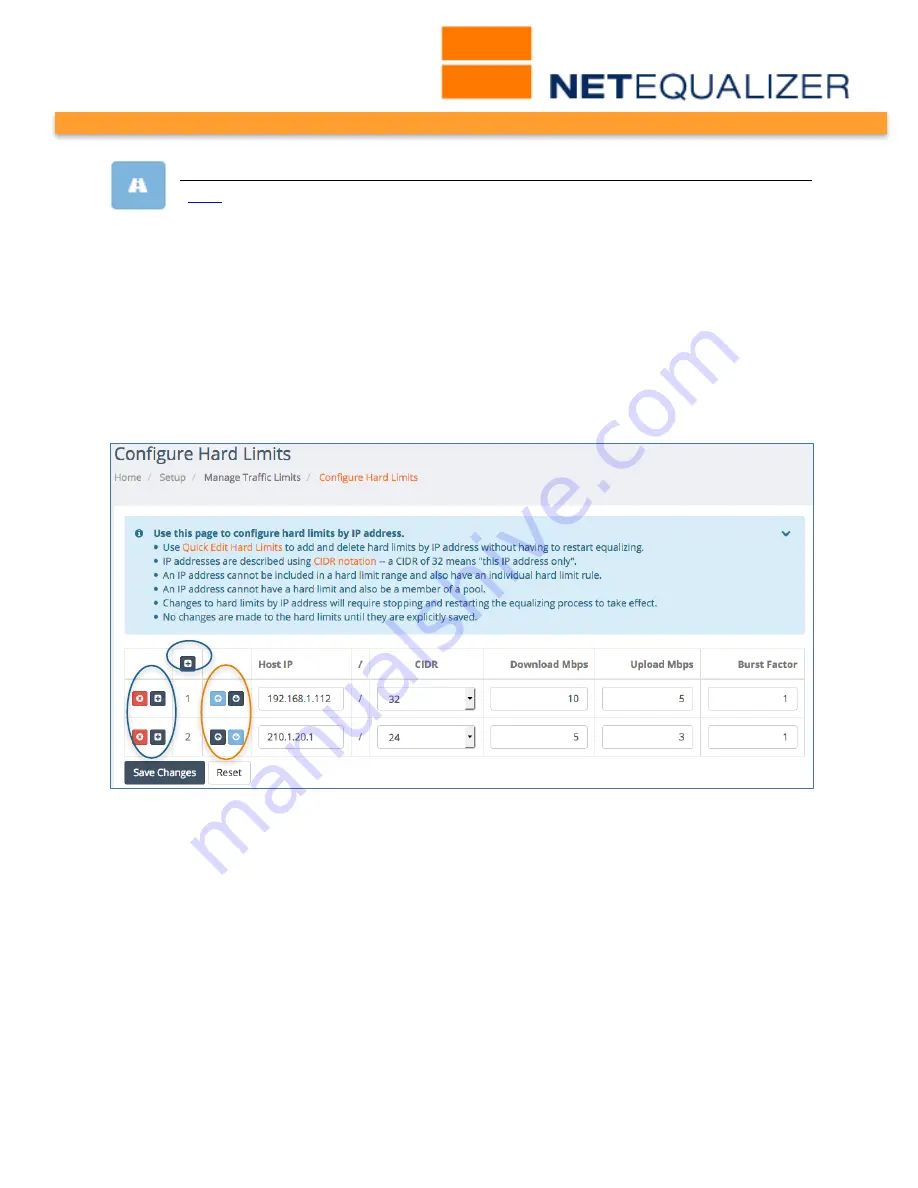
. The Configure Hard Limits screen opens, shown here.
Configure Hard Limits is a Batch Entry Screen, where you can add or edit many rules at
once and then save your changes, saving you time in the setup process. Click on the
dark blue “+” buttons to add entries, red “x” to delete entries (circled in blue above),
and the blue “up/down arrows” (circled in orange) to reorder Hard Limits. Once you
have entered, modified, or deleted Hard Limits,
Click on -> [Save Changes]
to save
changes or
Click on -> [Reset]
to discard changes.
In the light blue box above the entry fields, you will find notes to help you in creating
Hard Limits. Links are in orange, which you can click on to either get more information,
or to move to another screen.
Once you save changes, you will be prompted to Restart Equalizing. Your Hard Limits
will NOT take effect until you restart equalizing, even if you see them in your
NetEqualizer Configuration.
We have also maintained your ability to add or delete a rule without restarting
Equalizing. In Software Update 8.4, this maintained in our Quick Edit screens. From the


