


User Guide
APconnections, Inc. // 303.997.1300 // www.netequalizer.com
Page 11 of 120
rev. 20170131
© 2014-2017 APconnections, Inc. All Rights Reserved
version 8.4
Navigation – How to Move Around the System
Each of the Key Function screens work in the same way. Here we will review one screen, so
that you know how to navigate the NetEqualizer system.
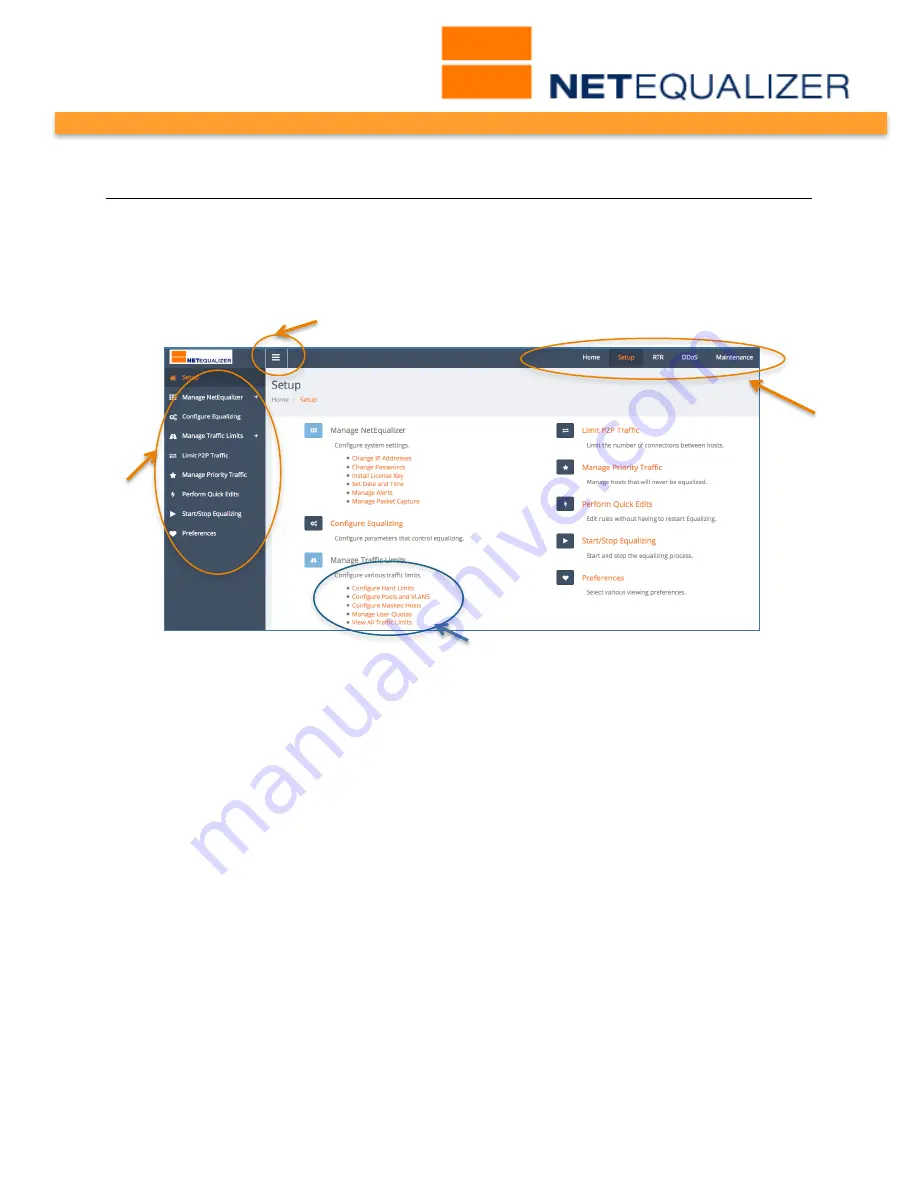
We will use the Setup Function as our example. From the NetEqualizer Dashboard,
Click on
-> [Setup].
The following screen opens.
The Setup
Side Menu
(circled above), can be used to navigate to each Setup Function. If a
Setup Function is followed by a “+”, it is an expandable menu. On the Setup Side Menu,
both Manage NetEq and Manage Traffic are expandable. Clicking on either
one opens up a sub-menu that contains the same functions as listed in orange on the Setup
window. For example, if you click on “Manage Traffic ”, you will see Configure Hard
Limits, Configure Pools and VLANS, etc.
On the Setup screen, all Setup
Functions
are available by clicking on the links (orange
text). For example, the Manage Traffic Limits functions are circled in blue above.
Note that clicking on a Side Menu Item or a Function (orange text) will bring up a new
configuration window. This paradigm is repeated throughout the GUI.
The
Navigation Menu
, circled in orange above, contains shortcuts available from all
windows. These help you quickly and easily get back to the NetEqualizer Dashboard
(Home) or Key Functions (Setup, RTR, DDoS, and Maintenance) from anywhere in the
system.
The
Minimize Button
can be used to shrink the Side Menu, so that the main screen is
maximized. You can also use it to expand the Side Menu.
This paradigm is used throughout the screens in the NetEqualizer 8.4 GUI.
Side
Menu
Navigation
Menu
Minimize Button
Functions


