


Installation and Setup
52
Enova Digital Media Switchers - Hardware Reference Manual
Wiring Audio Inputs and Outputs
Enova DGX Switchers can include the following audio expansion boards: Dante Audio Switching Boards (ASB-DAN), Audio
Switching Boards (ASB) or Audio Insert/Extract (AIE) Boards. Audio expansion boards work in conjunction with HDMI, 4K
HDMI, DVI, DXLink Twisted Pair 4K, DXLink Twisted Pair, and DXLink Fiber Boards. The inputs and outputs are configured on a
per connector basis to route audio into, out of, or through the system.
CAUTION:
Audio Switching Boards, Dante Audio Switching Boards, and Audio Insert/Extract Boards are not compatible.
Do not install mixed types of expansion boards in the same enclosure. If two types of boards are present, the audio
subsystem is disabled.
IMPORTANT:
Audio Insert/Extract Boards Only - Setting the DIP switches is the only mechanism for configuring insert/extract
functionality on the Audio Insert/Extract Board. Therefore, setting the switches (which requires removal of the board from
the enclosure) needs to be done at the time of installation setup.
For information on board connectors and wiring and specifications for specific types of connectors:
Dante Audio Switching Boards (ASB-DAN) – page 164
Audio Switching Boards (ASB) – page 164
Audio Insert/Extract Boards (AIE) – page 175
Refer to the following figures for the locations of the Expansion Board Slots on each DGX 100 Series Enclosure:
DGX-1600: FIG. 5 on page 37
DGX-3200: FIG. 8 on page 39
DGX-6400: FIG. 11 on page 42
System Setup for Using the Integrated NetLinx NX Master
The Enova DGX 100 Series Switcher has an integrated NetLinx NX Central Control Processor (Master) that establishes its
public LAN (Local Area Network) connection through the LAN 100/1000 port on the CPU. The Master provides a System
Configuration interface that allows you to make various configuration settings via a web browser on any PC connected
to the public LAN. The NX Master’s on-board System Configuration interface delivers HTML pages for setting up the system
plus dedicated Switching, Configuration, and Status pages which allow for remote control and monitoring of an Enova
DGX Switcher using PC-based Internet browsing software.
IMPORTANT:
The Enova DGX Switcher uses DHCP to retrieve its IP address by default. The integrated Master’s IP address is
available via the control panel at Setup Options/Master Info/IP Address.
The enclosure must be connected to a LAN in order to get an IP address from a DHCP server. After the network assigns a
DHCP IP address, a static IP address can be assigned in its place.
IMPORTANT:
Although it is also possible to provide access from outside a LAN via the Internet, security issues for your LAN
environment must be taken into account (contact your Network Administrator).
System Setup Overview
IMPORTANT:
The Enova DGX Switcher uses DHCP by default.
The LAN 100/1000 (Ethernet) port provides functionality for the following protocols: FTP, SSH, Telnet, HTTP, HTTPS/SSL, and
ICSP (for protocol descriptions and standard port numbers used, see the table on page 54). This port is connected to a
public LAN. By default, the integrated Master will receive an IP address from the LAN it connects with (via DHCP). Once
the System Configuration interface has been launched and a test switch has been completed, it will be possible to
reconfigure the integrated Master’s LAN 100/1000 port IP setting from DHCP to Static IP (see page 201).
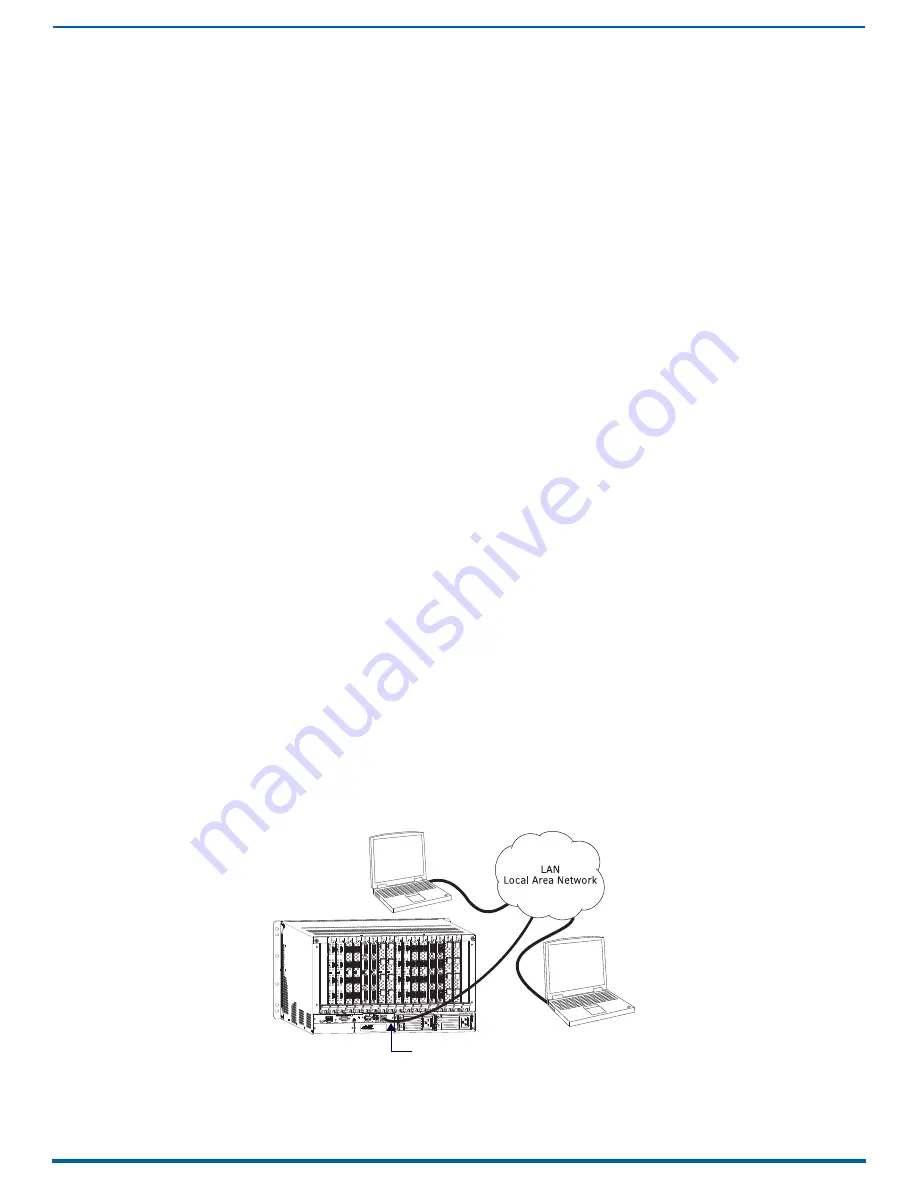
FIG. 20 shows a DGX 3200 connected to a LAN via the LAN 100/1000 port. Both computers in the figure have access to the
enclosure via the LAN.
CAUTION:
Be careful not to create a network (Ethernet) loop. To avoid doing so, see page 130 (DXLink Twisted Pair 4K
modules), page 119 (DXLink Twisted Pair modules), and/or see page 134 (DXLink Fiber modules).
FIG. 20
Enova DGX 3200 connected via a LAN to two PCs
DGX 3200 Enclosure
LAN 100/1000 Port (DGX enclosure connected to PCs via LAN)


