118
801683
Section 5 Service Procedures
© Copyright, Alliance Laundry Systems LLC – DO NOT COPY or TRANSMIT
To reduce the risk of electric shock, fire, explosion, serious injury or death:
• Disconnect electric power to the washer before servicing.
• Never start the washer with any guards/panels removed.
• Whenever ground wires are removed during servicing, these ground wires must be
reconnected to ensure that the washer is properly grounded.
• Motor not grounded! Disconnect electric power before servicing motor.
W485
WARNING
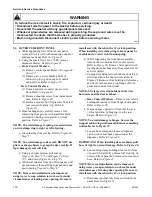
h. Run belt off pulley while slowly turning pulley.
.
i. Remove belt from motor shaft.
j. Remove cap screw (left hand thread)
lockwasher and flat washer holding pulley to
inner basket shaft. Refer to
NOTE: Cap screw can be accessed through hole in
rear panel by removing hole plug. Refer to
Figure 55.
k. Remove pulley from shaft.
IMPORTANT: When installing pulley, always use a
new cap screw to prevent screw from loosening
during operation. Use a thread tap to clean old
Loctite out of pulley screw receiving hole before
installing new screw. This ensures that inner basket
and pulley properly seat.
NOTE: When installing new cap screw, apply a
thread locking compound to screw threads and
torque new cap screw to 240 minimum to 260
maximum inch pounds (27.5 to 29.7 Nm).
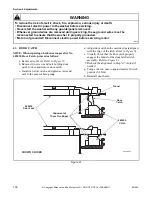
l. After installing belt, adjust belt tension as
follows:
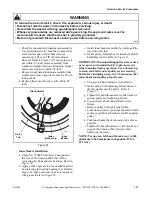
(1) Working through the access door opening,
place a locking pliers on the metal rod and
loosen the two adjusting bolts. Refer to
. Repeat procedure to loosen the
.
(2) Pull down on motor to increase belt tension.
Use a Burroughs belt gauge to obtain
proper tension. Proper belt tension is
obtained when belt can be deflected
approximately 1/4 inch (6.35 mm) from
normal position when moderate pressure 50
to 60 pounds (22.68 to 27.22 Kg) is applied
to a point midway between pulleys. Refer
to
.
(3) After proper belt tension has been obtained,
tighten belt adjusting bolts firmly, then
tighten pivot bolts. Refer to
.
58. INNER BASKET ASSEMBLY
Inner Basket Removal –
a. While supporting lower front access panel,
remove two screws from bottom edge of panel
and remove panel. Refer to
.
b. Using the special tool, No. 318P4, remove
dispenser drawer. Refer to
.
c.
Front Control Washers –
(1) Remove control panel. Refer to
.
(2) Remove two screws holding front of
cabinet top to top front edge of control
cabinet front. Refer to
Rear Control Washers –
(1) Unlock and remove meter case service
door. Refer to
.
(2) Remove shoulder screw from inside meter
case. Refer to
(3) Remove security bolt (if present) from left
rear corner of cabinet top. Refer to
.
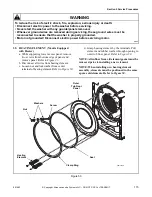
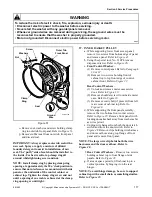
d. Open loading door. Carefully remove wire
clamp ring from groove with small flat blade
screwdriver. Spring is in 6 o’clock position.
Refer to
.
NOTE: To avoid damage to spring, use screwdriver
on wire clamp ring to right or left of spring.
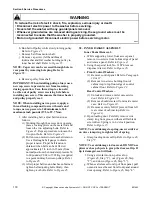
e. Grasp loading door seal lip. Refer to
Step “1”.
NOTE: To avoid damage to door seal, DO NOT use
pliers or sharp objects to grasp the door seal lip. If
lip is damaged, seal will leak.
f. Using a circular motion, pull seal up
(
, Step “1”), out (
, Step
“2”), and down (
, Step “3”).
g. When seal releases from lip of front panel, pull
out and remove the seal from front panel around
door opening. Refer to
, Step “4”.
Содержание HWFB61QN1102
Страница 2: ......
Страница 14: ...12 801683 Section 2 Introduction Copyright Alliance Laundry Systems LLC DO NOT COPY or TRANSMIT Notes ...
Страница 70: ...68 801683 Section 4 Grounding Copyright Alliance Laundry Systems LLC DO NOT COPY or TRANSMIT Notes ...
Страница 138: ...136 801683 Section 6 Adjustments Copyright Alliance Laundry Systems LLC DO NOT COPY or TRANSMIT Notes ...


