801683
75
Section 5 Service Procedures
© Copyright, Alliance Laundry Systems LLC – DO NOT COPY or TRANSMIT
To reduce the risk of electric shock, fire, explosion, serious injury or death:
• Disconnect electric power to the washer before servicing.
• Never start the washer with any guards/panels removed.
• Whenever ground wires are removed during servicing, these ground wires must be
reconnected to ensure that the washer is properly grounded.
• Motor not grounded! Disconnect electric power before servicing motor.
W485
WARNING
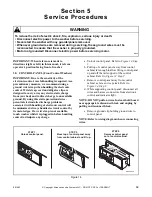
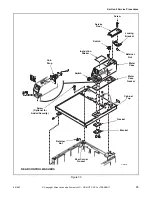
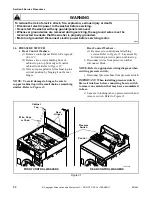
c. Remove four screws holding electronic control
assembly to backside of control panel. Refer to
d. Place the old control in the anti-static wrapping
that the new control was supplied in.
e. While holding new control by its metal edges,
place control in opening of control panel and
fasten control down with four screws removed
in step “c”. Refer to
.
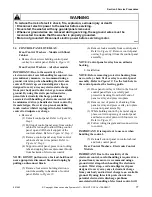
NOTE: For proper control alignment, tighten the
top two screws first then tighten the bottom screws.
Refer to Figure 18 or 19.
f. Follow wiring diagram and reconnect wires to
new control.
IMPORTANT: It is important to take care when
handling the original control. It must be carefully
placed in the anti-static wrapping and anti-static
foam which was removed from new control. If
control is not wrapped properly, warranty credit
will not be issued.
Rear Control Washers
IMPORTANT: Due to the sensitivity of the
electronic control, careful handling is required. As a
precautionary measure, we recommend using a
ground wrist strap when handling the electronic
control. Wrist strap, cord and alligator clip are
designed to carry away any electrostatic charge
from your body and to direct charge to an available
ground. By using this static protection device,
potential electrostatic discharge problems
associated with handling of electronic control will
be minimized. Always handle electronic control by
its metal edges. If a wrist strap is not available,
touch washer while it is plugged in before handling
control to dissipate any charge.
NOTE: New control is supplied in a special anti-
static wrapping, and protected by anti-static foam.
While holding control by its metal edges, remove
control from foam and wrapping.
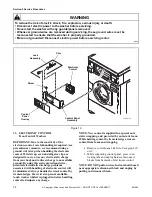
a. Remove two control panel attaching screws.
. Lay control panel assembly
face down on protective padding.
b. Press in on locking tabs and unplug harness
disconnect blocks from backside of electronic
control assembly.
NOTE: DO NOT pull on wires. Instead, hold board
near appropriate disconnect block and unplug by
pulling on disconnect block.
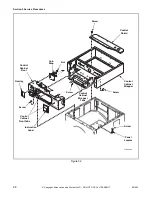
c. Remove four screws holding electronic control
assembly to backside of control panel. Refer to
d. Place the old control in the anti-static wrapping
that the new control was supplied in.
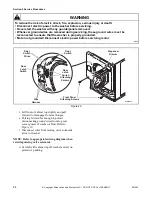
e. While holding new control by its metal edges,
place control in opening of control panel and
fasten control down with four screws. Refer to
NOTE: For proper control alignment, tighten the
top two screws first then tighten the bottom screws.
Figure 20 or 21.
f. Follow wiring diagram and reconnect wires to
new control.
IMPORTANT: It is important to take care when
handling the original control. It must be carefully
placed in the anti-static wrapping and anti-static
foam which was removed from new control. If
control is not wrapped properly, warranty credit
will not be issued.
Содержание HWFB61QN1102
Страница 2: ......
Страница 14: ...12 801683 Section 2 Introduction Copyright Alliance Laundry Systems LLC DO NOT COPY or TRANSMIT Notes ...
Страница 70: ...68 801683 Section 4 Grounding Copyright Alliance Laundry Systems LLC DO NOT COPY or TRANSMIT Notes ...
Страница 138: ...136 801683 Section 6 Adjustments Copyright Alliance Laundry Systems LLC DO NOT COPY or TRANSMIT Notes ...

