


MAP 600 – User’s Manual
Page 34
1
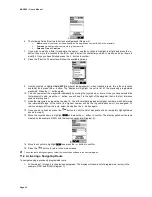
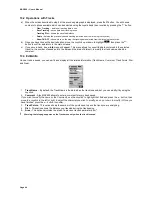
2. Move the Joystick up or down to select the desired route for navigation, and press the button. The display will
show the available options (Diagram 2).
3. Use the Joystick to select
Set Navi
and press the
button. An asterisk will appear at the right of the activated
route.
4. Press the
button to exit. At this point, the
Map
and
Compass
pages will refer to the first waypoint.
2
For further details regarding use of the Map and Compass pages, please refer to par. 9.2 and 9.4.
2
Obviously, only one navigation route can be activated at a time. Selecting another route overrides the previous selected route.
2
If you wish to turn off the navigation of all routes, follow again the above procedure selecting
Cancel Navi
at step 3.
11.3 Adding a waypoint to a route
To add waypoints to a route:
1. Follow steps 1 through 4 in paragraph 11.1.
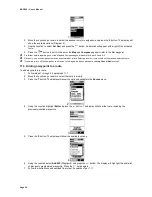
2. Move the Joystick up or down to select the route to modify.
3. Press the button. The display will show the options available in the
Routes
menu:
2
4. Using the Joystick, highlight
Edit
and press the
button. The display will show the route, including the
previously inserted waypoints.
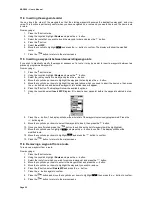
3
5. Press the button. The display will show the available options.
4
6. Using the Joystick, select
Add WP
(Diagram 4) and press the
button. The display will highlight the entire list
of previously programmed waypoints. Press the
button again.
7. Follow the instructions as described from step 10 onwards of par. 11.1.
Содержание MAP600
Страница 1: ......


